

How to Deploy Container in ServerStadium using Docker
This article will explain how to deploy containers in ServerStadium using Docker. Before knowing how to deploy containers using docker, let’s understand the basic of it.
What is Docker?
Docker is a tool that allows developers, sys-admins, etc. to easily deploy their applications in a sandbox (called containers) to run on the host operating system, e.g. Linux.
Accordingly, the key benefit of Docker is that it allows users to package an application with all of its dependencies into a standardized unit for software development. Unlike virtual machines, containers do not have high overhead, enabling more efficient usage of the underlying system and resources.
What are containers?
To begin with, the industry standard today is to use Virtual Machines (VMs) to run software applications. VMs run applications inside a guest Operating System, which runs on virtual hardware powered by the server’s host OS.
In addition, VMs are great at providing full process isolation for applications. There are very few ways a problem in the host operating system can affect the software running in the guest operating system and vice-versa. But this isolation comes at a great cost — the computational overhead spent virtualizing hardware for a guest OS to use is substantial.
Furthermore, containers take a different approach. By leveraging the low-level mechanics of the host operating system, containers provide most of the isolation of virtual machines at a fraction of the computing power.
Prerequisites
Before we begin the tutorial, the following are the stack versions that we are going to install:
- OS: Ubuntu 18.04 (LTS)
- Latest Docker Engine stable version for Ubuntu 18.04
- Latest Docker Repository
In short, there are three tasks that we need to do:
- Open the necessary port on ServerStadium Security Profile
- Install docker (Community Edition)
- Deploy or Create a Web Server container with Nginx
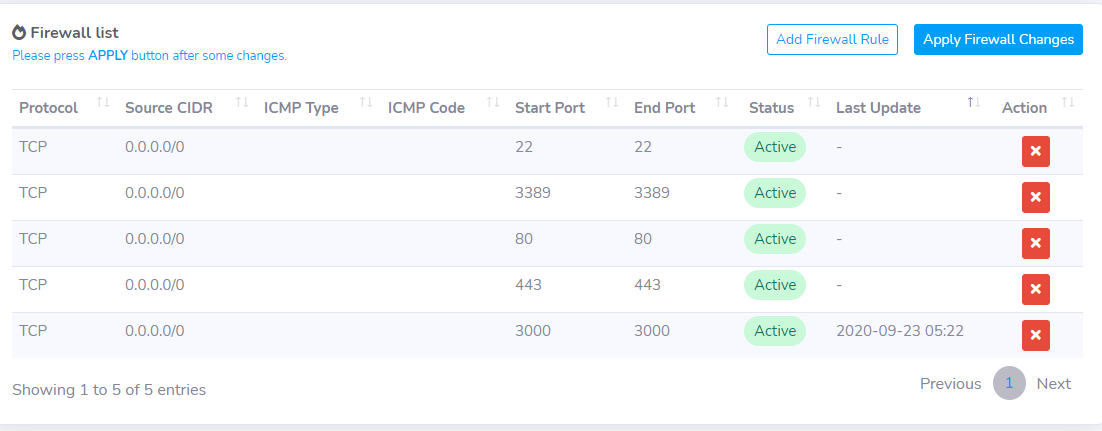
Open Necessary Port on ServerStadium frontend
Before we start further, open the necessary ports to your instances, go to https://cp.serverstadium.com/ >> Home >> networking >> Security Profile
There are at least three ports that need to be opened 80, 443 (for HTTP and HTTPS), and 22 (for SSH)
Install Docker
Please run the following command to ensure there is no old docker installed:
$ sudo apt-get remove docker docker-engine docker.io containerd runc
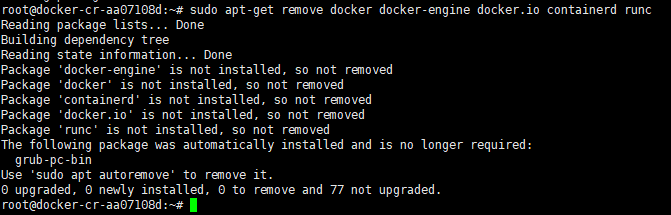
Additionally, it’s OK if apt-get reports that none of these packages are installed.
Install using the repository
Before installing Docker Engine for the first time on a new host machine, you must set up the Docker repository. Afterward, you can install and update Docker from the repository.
Setup The Repository
$ sudo apt-get update
$ sudo apt-get install apt-transport-https ca-certificates curl gnupg-agent software-properties-common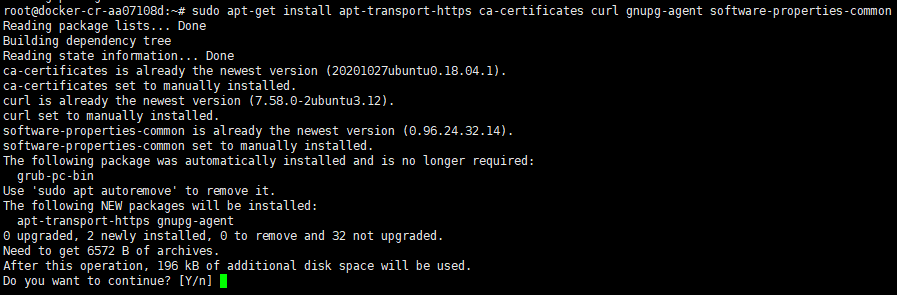
There will appear a confirmation prompt; please type “Y” to continue
Add Docker’s official GPG key:
$ curl -fsSL https://download.docker.com/linux/ubuntu/gpg | sudo apt-key add -
To set up the stable repository:
$ sudo add-apt-repository "deb [arch=amd64] https://download.docker.com/linux/ubuntu $(lsb_release -cs) stable"
Install Docker Engine
To install the Docker Engine command, run:
$ sudo apt-get install docker-ce docker-ce-cli containerd.io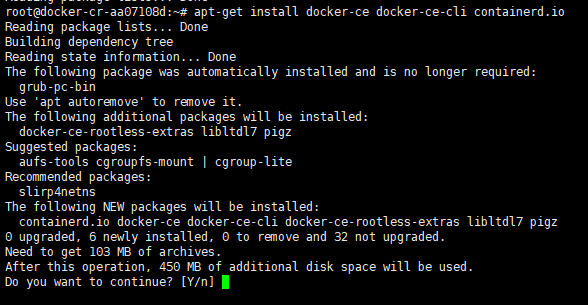
Verify that Docker Engine is installed correctly by running the hello-world image.
$ sudo docker run hello-world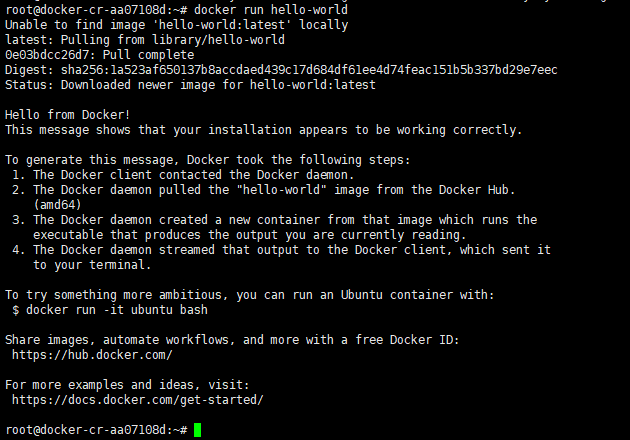
There will be information that states as follows after verification is running properly:
Hello from Docker!
This message shows that your installation appears to be working correctly.
Deploy or Create a Web Server container with Nginx
Now, we have to create a simple hosting static content command.
Create a folder
mkdir -p /var/www/html

Download, deploy the latest nginx image, and configure the web-root. We named it “test-nginx”
docker run --name test-nginx -v /var/www/html:/usr/share/nginx/html:ro -d nginx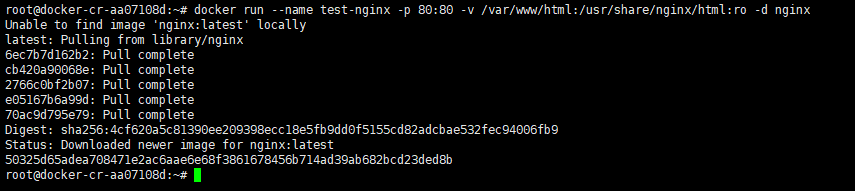
After that, verify if the container is running:
docker container ls

Verify whether port 80 it’s listening not by running the following command:
netstat -tulpn | grep 80

Then, create a test script:
nano /var/www/html/index.html

Append the following test script:
TEST WEBSERVER as CONTANIER

When it’s done. Save the modification by pressing “ctrl + x“, Choose “Y” then press “Enter“
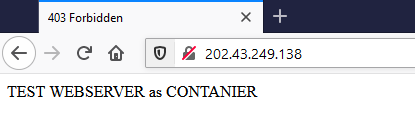
Please open a browser app such as Chrome, or Firefox and insert your Public IP instance: http://202.43.249.138/ and it will show the following display:
TEST WEBSERVER as CONTANIER
Docker CheatSheet:
list all Docker containers
docker container ls -aStop a specific container
docker container stop [container_id]Remove a stopped container
docker container rm [container_id]Remove all stopped containers:
docker container rm $(docker container ls –aq)List Docker image
docker image lsRemove an image, or multiple images:
docker image rm [image_id1]docker image rm [image_id1] [image_id2]Conclusion
To sum up, this article explains running NGINX official image, adding our custom HTML files, and creating a container based on the official image
Last but not least, we hope this helps you. Thank you.