

Using the SSH key Feature in ServerStadium Dashboard
In ServerStadium, we have several ways to access our VM. If we want to securely access the VM, we can use the SSH key feature.
It is really simple to generate the SSH key because ServerStadium will help us to generate and insert it into the VM. Below are the steps that we can follow:
Create SSH Key
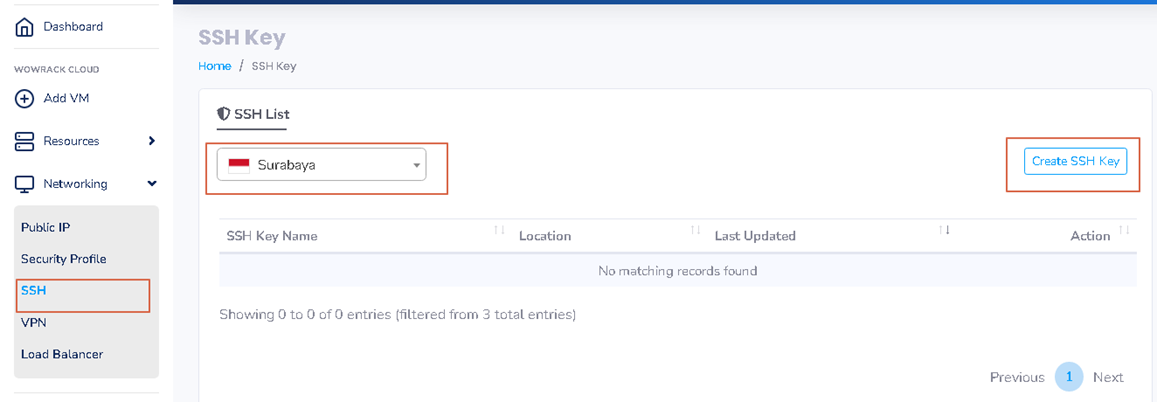
After login into the ServerStadium dashboard, we can click Networking then Choose SSH.
Change the Location to “Surabaya“.
In the right pane, we can click the “Create SSH” key button to generate the SSH key.
Then, it will display a new screen and fill it as follow :

After we click Create New SSH key button, our SSH key will be listed on the SSH list.

Click the “Download” button and save the private key to your computer or server that we will use to connect to the VM in ServerStadium.
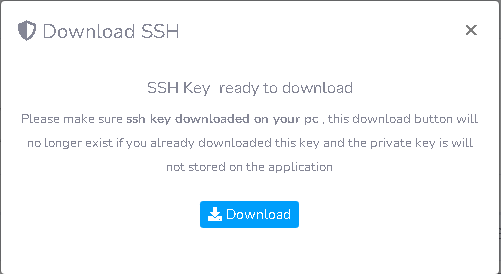
After downloading the SSH, the ServerStadium dashboard will display the SSH key name.

Create VM using SSH Key
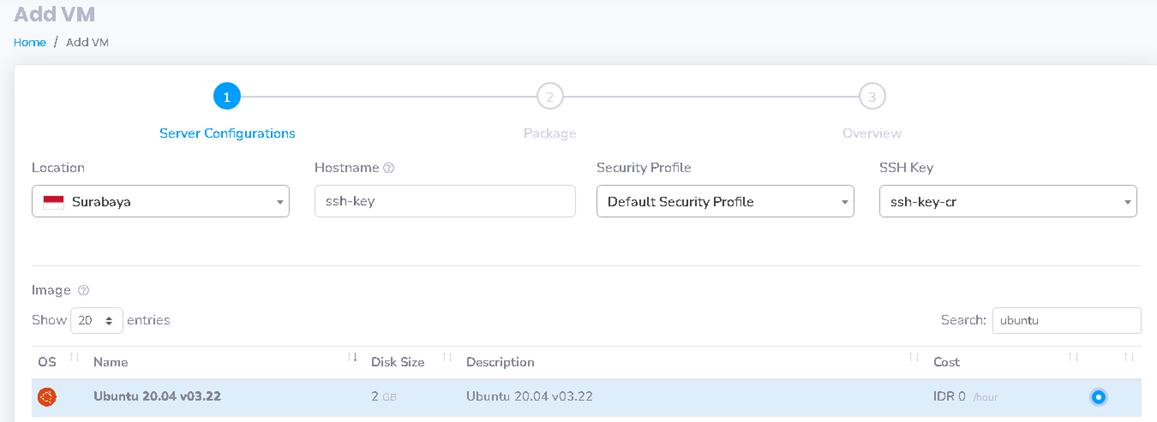
Next, we can continue creating the VM using the SSH key.
Click Add VM and in the right pane, choose the SSH Key with ssh-key-cr.
Choose the OS image; in this tutorial, we will use Ubuntu 20.04.
Click next until the VM is created.
After the VM has been created, we can see SSH key Name on the bottom right specification of the VM.
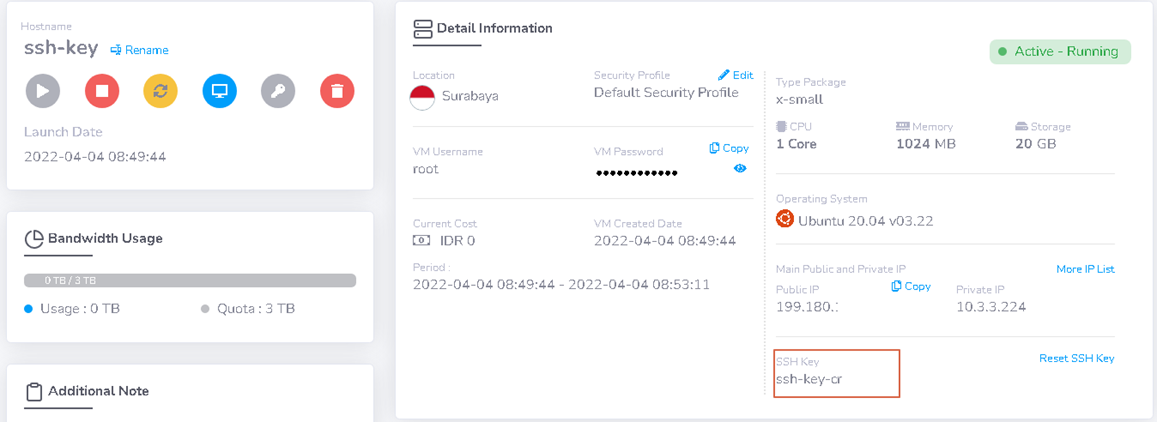
It means we are ready to access the VM using the SSH key.
Access the server using the SSH key
Now, we will verify the Private key that we have downloaded previously.
Login to your PC or server, then copy the downloaded private key. Change the permission of the private key as follow
# chmod 400 ssh-key-cr
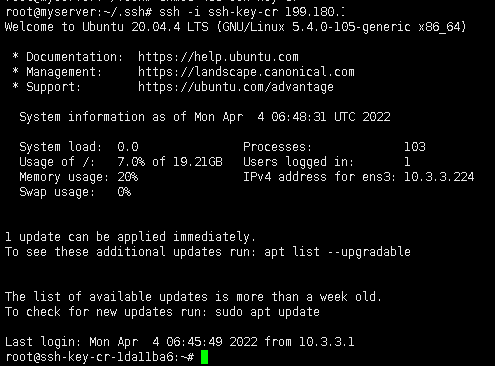
Connect your VM in ServerStadium using a command.
ssh -i ssh-key-cr 199.180.xx.xx
or
ssh -i ssh-key-cr IP_Address_ServerStadium
Add SSH key before the SSH key feature displayed in the previous VM
SSH key feature will be working on the new VM. We can still use the SSH key feature for the previous VM that was deployed. We can follow the steps below:
Login to the VM where we will enable the SSH key, then edit /etc/cloud/cloud.cfg as follow:

Save the file, then stop or shut down the VM. In Detail Information of the VM, click Reset SSH Key.
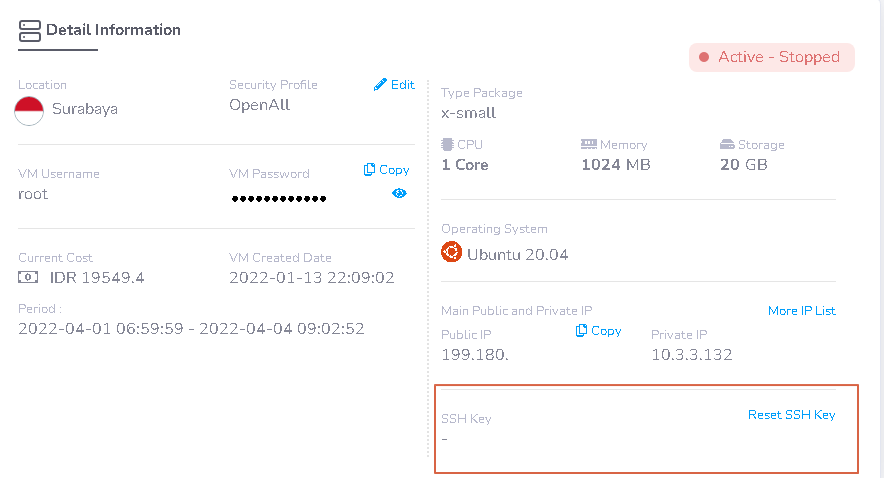
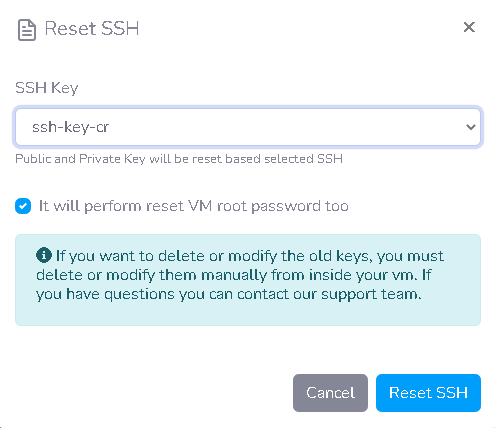
Choose the SSH key that we want to use “ssh-key-cr” and tick “It will perform reset VM root password too”. After that, click “Reset SSH”
After all the setting has been configured, start the VM again to use the new configuration.
We can ensure the VM using a new configuration by file /root/.ssh/authorized_keys has the public key.

Now your VM in ServerStadium Cloud is using the SSH key. Please don’t hesitate to contact our support if you have difficulties using the SSH key.
Find more tutorial articles in ServerStadium’s Knowledge Base,