

ServerStadium Load Balancer, Solution to Distribute Load Equally
Introduction
Load Balancer is a single point entry to distribute the load between servers and can act as a proxy for the backend server behind it. ServerStadium load balancer implements a TCP-level with three policies: round-robin, Least connection, and Source IP.
- Round-robin load balancing: Client requests are forwarded to each server in turn
- Least connection load balancing: Client requests are distributed to the backend server with the least number of active connections at the time the client request is received.
- Source IP load balancing: This type of load balancing uses an algorithm that takes the source and destination IP addresses of the client and server to generate a unique hash key. This key is used to allocate the client to a particular server. As the key can be regenerated if the session is broken, this load-balancing method can ensure that the client is directed to the same server previously used.
Creating a Load Balancer
- Login to your ServerStadium management portal
- Navigate to Networking > Load Balancer
- Click Add New Load Balancer
- Input the required value displayed by the dialog box
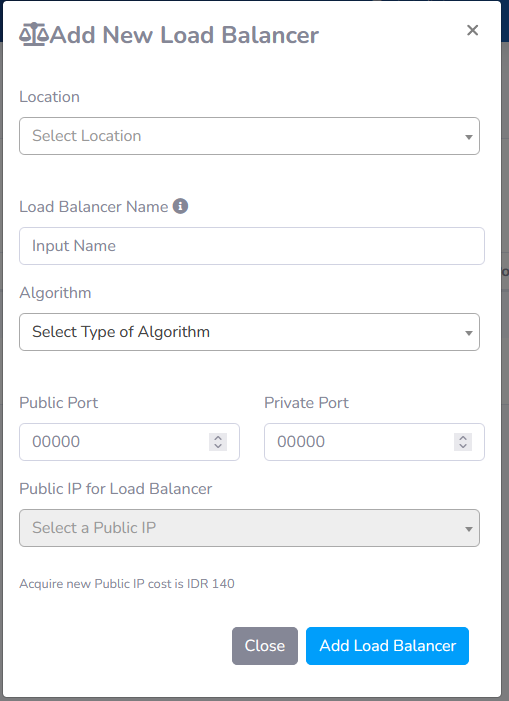
-
- Location: Jakarta
- Load Balancer Name: the name of your load balancer rule
- Algorithm: Choose your desired load balancer algorithm (round-robin, least connection, and Source IP Hash)
- Public Port: Input your public-facing port
- Private Port: Input your private port (the listened port at your instances)
- Public IP for LoadBalancer: Choose Acquire Automatically if you don’t have any Public IP or want to acquire new Public IP, otherwise please choose the available Public IP in your load balancer
- Click Add Load Balancer and wait until the provisioning is completed
Assigning Backend Server
- Click Configure on the newly created Load Balancer
- Click Assign new VM, and choose the specific VMs as the backend servers for the load balancer
- The final result should be like the below pictures
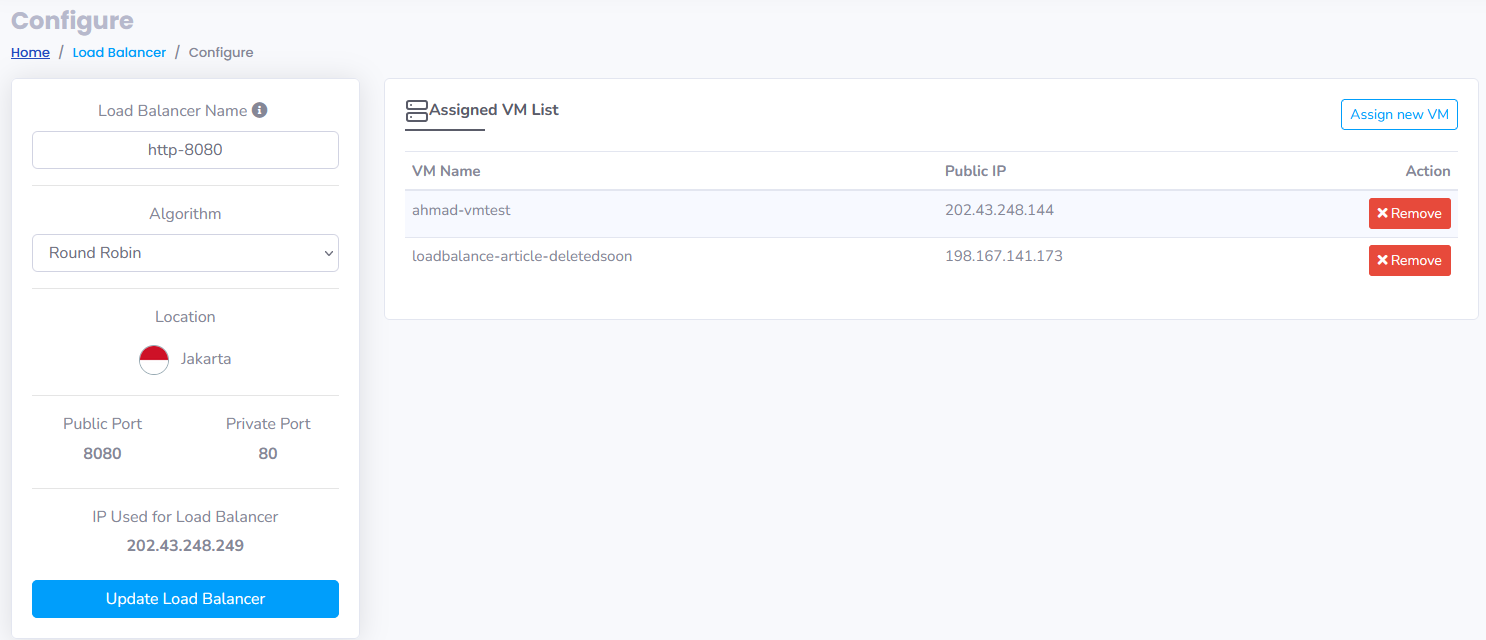
- No need to assign IP Public to the VM, because you only need the loadbalancer IP Public in front of your servers.
Testing the Load Balancer
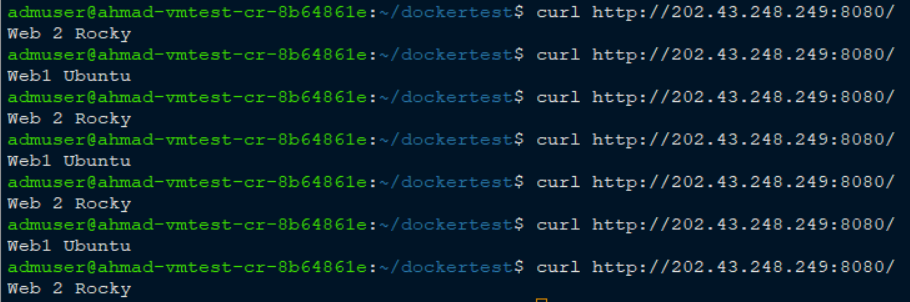
Let’s test the load balancer to see if this works. We are gonna use the round-robin as load balancer algorithm. The expected result is, the traffic will forwarded to one web server and another, everytime request been made.
Here, we test using a curl command from command line. The syntax will be like curl http://<load balancer IP>:8080/
curl http://202.43.248.249:8080/
Conclusion
If you plan deploy multiple VMs as Web workers or another app that required multiple computing machines, best to deploy the loadbalancer to distribute the load balancely.
To get more tips and tutorial article you can check on ServerStadiums’s Knowledge base. Or even better, you can sign up now for free in ServerStadium to try our dashboard and feature.