

Installing NextCloud in ServerStadium Detail Steps from the Beginning to the Very End
Have you ever saved your data without the ability to configure it in a more customizable way and free? It must be hard, isn’t it?
One of the solutions for managing our data in a more advanced and safer way is by using NextCloud.
What is NextCloud?
In short, NextCloud is an open-source platform for cloud storage solutions that allow users to self-host. Functionally it is similar to the cloud storage solutions that we often here, and of course, most of us have used them (Dropbox, Google Drive, One Drive, etc.).
Unlike other cloud providers, NextCloud is more concerned about our data privacy. Besides that, NextCloud can be installed on our on-premise server or in a private virtual server (ServerStadium’s VM, for example). By that, we have more control over our data.
We can also upload files to our NextCloud and then synchronize the files to our computer, laptop, or smartphone.
NextCloud also provides many extension apps, making it more useful than cloud storage.
The Impact and Benefit of Using NextCloud
There are many impacts and benefits that we can get by using NextCloud; they are:
- Full control of our infrastructure
- Accessible from all devices, anywhere
- Groupware, sharing files within users or groups will be so much easier and well-controlled
- Reliable and safe
- All-in-one-platform (file, address, calendar, chat, edit, email)
- Open-source and free
- End-to-end encryption, meaning the file can be encrypted in the client’s device before being uploaded to the server. So, even when someone tried to breach our server, they could not read our file.
When Do We Need NextCloud Solution?
From the benefits mentioned, these are the right moments for us to use NextCloud:
- When cyber security becomes your main concern
- If you want to have alternative media for your main public cloud storage
- When you need more control of your data
- When you want to handle the limitation of scalability
ServerStadium x NextCloud
Deploying NextCloud in ServerStadium’s VM will give many benefits and advantages to you; they are:
- It helps you to manage cloud storage in a much easier way
- Enjoy the best time to use NextCloud and ServerStadium’s user-friendly panel
- Increase your storage capacity easier needs anytime
- Advance security with ServerStadium’s Security Profile
- Responsive support from ServerStadium’s support team, who is always ready to help
System & Specification Requirements
Several requirements are recommended by NextCloud to be followed so the performance, stability, and functionality can run well:
- OS: Ubuntu 20.04 lts (recommended)
- Database: MySQL 8.0+ or MariaDB 10.2/10.3/10.4/10.5 (recommended)
- Webserver: Apache 2.4 with mod php or php-fpm (recommended)
- PHP Runtime: 7.4, 8.0, 8.1 (recommended)
The system’s Requirement specification in running NextCloud’s server varies depending on the total users, applications, files, and server activity volume.
Though NextCloud needs a minimum of 128MB RAM, NextCloud recommends having a minimum of 512MB RAM in our system.
The number of CPU can be started with 1 CPU, but also can use more CPUs if the number of users and workloads increases.
Install NextCloud in ServerStadium
We should take several steps before installing NextCloud in ServerStadium’s VM.
1. Prepare VM
First, prepare VM in ServerStadium. For this article, I will use VM with this specification:
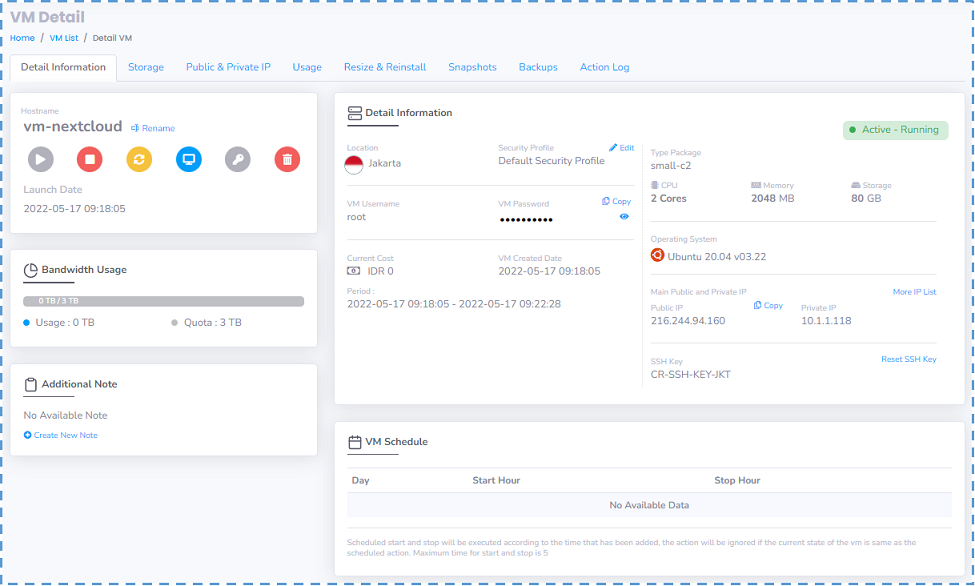
- Linux Ubuntu 20.04
- 2 Core CPU
- 2GB RAM
2. Ubuntu Software Packages Updates
Access the VM; then we have to update the repository and software package first
#sudo apt update #sudo apt upgrade 3. Install LAMP Stack (Apache MariaDB PHP)
Because NextCloud is written in PHP, we must first install LAMP Stack in our Ubuntu VM.
Install Apache Web Server
Insert this command:
#sudo apt install -y apache2 apache2-utils↳ Apache20-utils command will install some utilities that can be useful, like Apache HTTP Server Benchmarking Tool and etc.
After the installation, Apache must be automatically turned on; we can check the status with systemcl.
#systemctl status apache2 Use this command to let the Apache always on automatically:
#sudo systemctl enable apache2 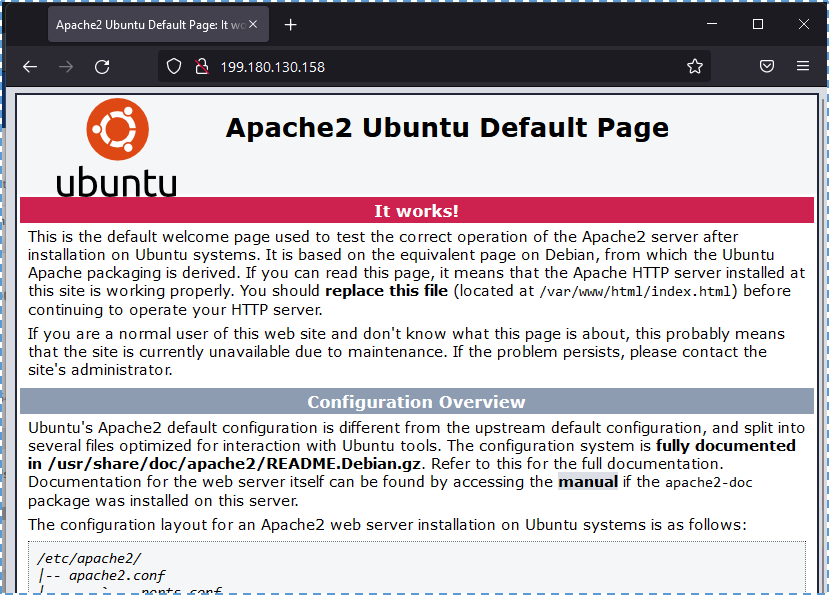
↳ Now we access the public IP from our VM in a browser; a default page from Apache2 Ubuntu should appear.
Now we need to set www-data (Apache user) as owner of a web root, because in default, web root is owned by the root user. Use this command:
#sudo chown www-data:www-data /var/www/html/ -R Install MariaDB Database Server
In this article, we will use MariaDB as server database. Insert this command to install it:
#sudo apt install mariadb-server mariadb-client After installing, MariaDB will automatically be active, we can check the status with systemctl
#systemctl status mariadb Use this command to make MariaDB always automatically active on every system booting:
#sudo systemctl enable mariadb Now we run the post-installation security script
#sudo mysql_secure_installation 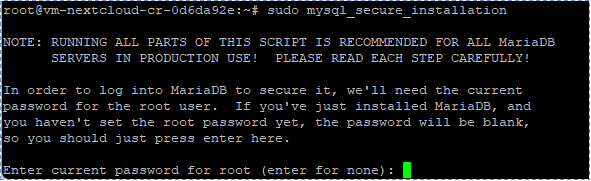
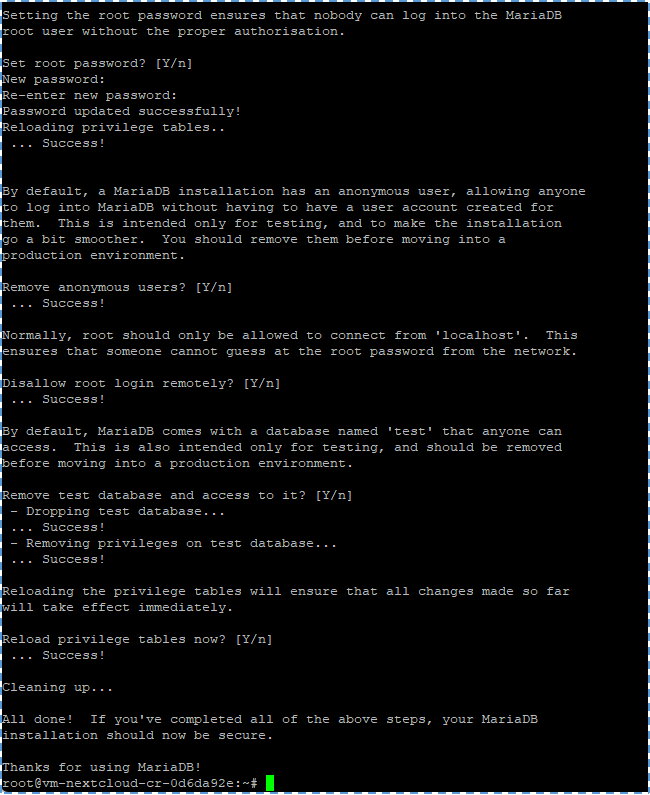
↳ When we asked to insert root password from MariaDB, we only need to click Enter because we just installed MariaDB. Then, push the Y button to start setting a root password.
For further steps, you can look into this image below:
By default, MariaDB’s package in Ubuntu uses unix_socket to authenticate user login. In other words, we can use user pass from OS for login to MariaDB’s console. So, we can run the command to login without inserting the password root from MariaDB.
#sudo mariadb -u root 
Installing PHP
In this article, I will be using version 7.4, which is a stable version of PHP and runs smoothly with NextCloud. Enter the following command to install PHP and some common PHP modules.
#sudo apt install php7.4 libapache2-mod-php7.4 php7.4-mysql php-common php7.4-cli php7.4-common php7.4-json php7.4-opcache php7.4-readline Activate the PHP module and then restart Apache Web Server.
#sudo a2enmod php7.4 #sudo systemctl restart apache2 We also can check the information on PHP by giving the below command.
#php -–version 
4. Installing NextCloud
Okay, after LAMP stack is installed in our VM, we can now move to the NextCloud installation and configure some of the essential things so that NextCloud can run well.
Download NextCloud on Ubuntu
In the terminal, insert this command to download the newest version from NextCloud.
#wget https://download.nextcloud.com/server/releases/latest.zip Once the download is finished, extract this archive by using package unzip. Then we can process the package installation.
#sudo apt install unzip #sudo unzip latest.zip -d /var/www/ ↳ –d option in the command functioned to decide the target directory. Meaning, the NextCloud files will be extracted to /var/www/nextcloud/.
After that, we need to change the owner from this directory to www-data so that the web server (Apache) can access and write to this directory.
#sudo chown www-data:www-data /var/www/nextcloud/ -R Making Database and user for NextCloud in MariaDB
Log in to MariaDB
# sudo mariadb -u root Then we make a database for NextCloud. For this article, I will add the database that is nextcloud_db. You can customize it to your needs.
create database nextcloud_db; 
Now let’s make a user for this database; you can set username and password based on your needs.
create user admin@localhost identified by 'password-anda'; 
The last step, give this user all the privileges in the NextCloud database.
grant all privileges on nextcloud_db.* to admin@localhost identified by 'password-anda'; flush privileges; 
Then, insert exit as the command.
exit; Create Apache Virtual Host for NextCloud
We need to create and edit the file nextcloud.conf from /etc/apache2/sites-available/ directory.
#sudo nano /etc/apache2/sites-available/nextcloud.conf Then, copy-paste this text below into a file. After that, save the file.
| <VirtualHost *:80> DocumentRoot “/var/www/nextcloud” ServerName files.tiyanwants.website ErrorLog ${APACHE_LOG_DIR}/nextcloud.error CustomLog ${APACHE_LOG_DIR}/nextcloud.access combined <Directory /var/www/nextcloud/> Require all granted Options FollowSymlinks MultiViews AllowOverride All <IfModule mod_dav.c> Dav off </IfModule> SetEnv HOME /var/www/nextcloud SetEnv HTTP_HOME /var/www/nextcloud Satisfy Any </Directory> </VirtualHost> |
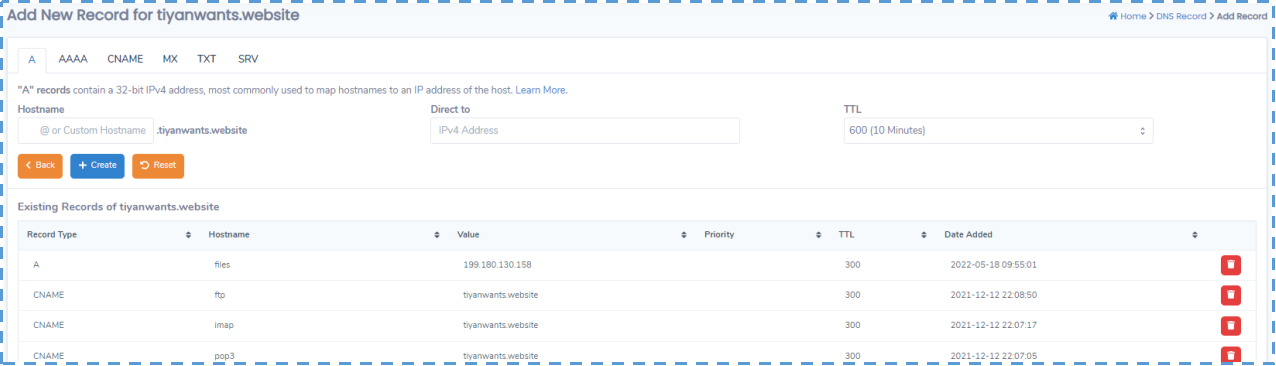
I will use files.tiyanwants.website as the domain in this article. You can always suit your needs. And, of course, don’t forget to add DNS A record for this domain inside your DNS Zone editor.
After that, activate this virtual host.
#sudo a2ensite nextcloud.conf Run this command to activate the Apache module you need
#sudo a2enmod rewrite headers env dir mime setenvif ssl Lastly, restart Apache to deploy the changes.
#sudo systemctl restart apache2 Install and Activate PHP Modul
Run this command for the required PHP module installation and recommend by NextCloud.
#sudo apt install imagemagick php-imagick libapache2-mod-php7.4 php7.4-common php7.4-mysql php7.4-fpm php7.4-gd php7.4-json php7.4-curl php7.4-zip php7.4-xml php7.4-mbstring php7.4-bz2 php7.4-intl php7.4-bcmath php7.4-gmp Reload Apache to activate this module with the below command
#sudo systemctl reload apache2 Activate HTTPS
At this point, we should be able to access NextCloud web install wizard in our browser.
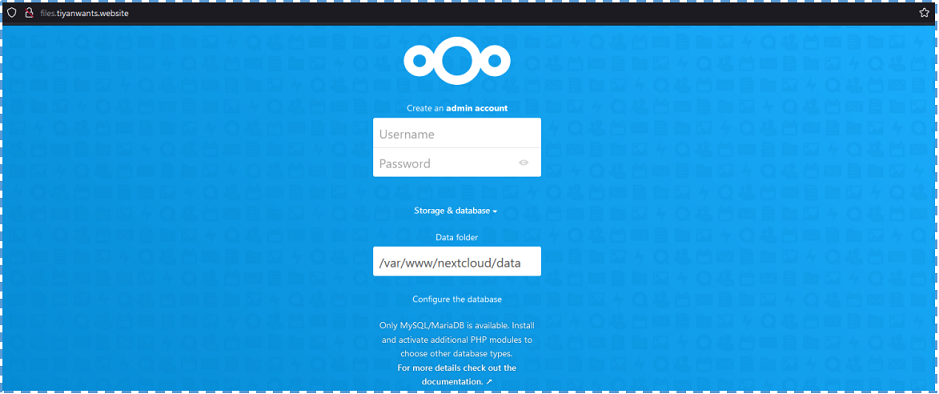
But it will be better to activate HTTPS inside our NextCloud domain before entering sensitive information.
#sudo apt install certbot python3-certbot-apache ↳ Python3-certbot-apache is an Apache plugin.
Run the below command to get a free TLS certificate using Apache Plugin.
#sudo certbot --apache --agree-tos --redirect --staple-ocsp --email wisesa.tiyan@gmail.com -d files.tiyanwants.website Where:
- –apache2: use Apache’s authenticator and installation
- –agree-tos: Agree to Let’s Encrypt service requirement
- –redirect: Implement HTTPS by adding 301 redirect
- –staple-ocsp: Activate Stapel OCSP
- –email: Email used for registration and recovery contact
- -d is followed by a list of domain names, separated by commas. You can add up to 100 domain names
There will be some options that we need to fill. Once it finishes, TLS certification will automatically obtain and configured for us; it shows by the message below.
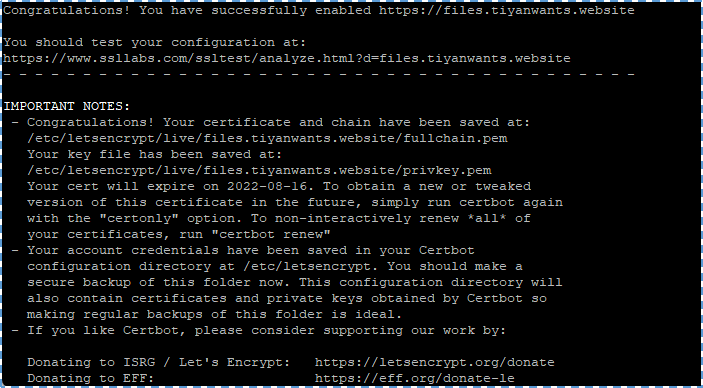
The next configuration is to enable HSTS (HTTP Strict Transport Security). Because sometimes, Certbot can’t automatically add HSTS header in Apache configuration file for NextCloud. Let’s edit this file first.
#sudo nano /etc/apache2/sites-enabled/nextcloud-le-ssl.conf Then, add this line to SSL server block to activate HSTS header.
Header always set Strict-Transport-Security "max-age=31536000" 
Lastly, restart Apache so the changes will be successfully implemented.
#sudo systemctl reload apache2 Cloud Finalization
When we want to access our NextCloud dashboard, we are now automatically using HTTPS.
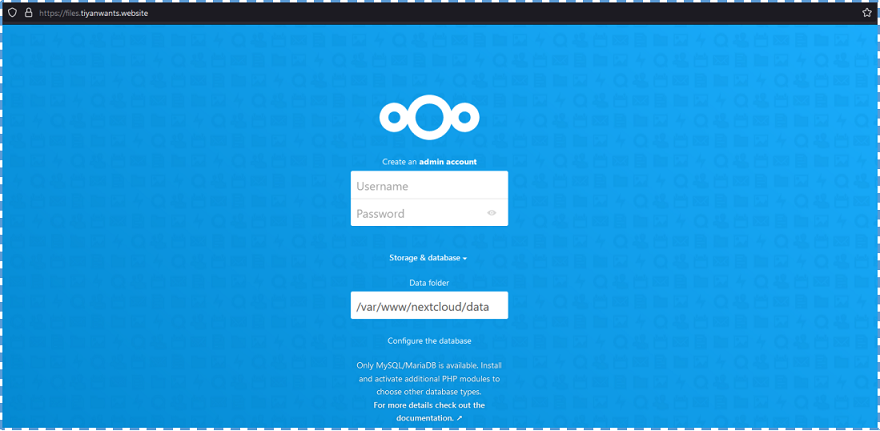
To finish the installation on this wizard page, we need to do several things:
- Create admin account
- Decide NextCloud’s data folder location
- entering database detail that have been made in step 2, and
- Decide the host address
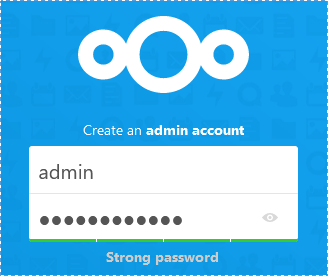
↳ Input username and password for admin user.
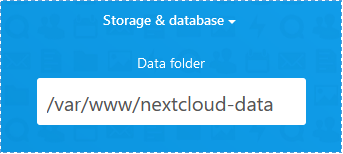
↳ A data folder is a place where the user’s files are saved. It would be better to place a data directory outside of the webroot directory from NextCloud. Instead of saving the users file in /var/www/nextcloud/data/, we can change it to /var/www/nextcloud-data.
We can do it with this command.
#sudo mkdir /var/www/nextcloud-data Then, make sure Apache’s user (www-data) has permission to write into the data directory.
#sudo chown www-data:www-data /var/www/nextcloud-data -R 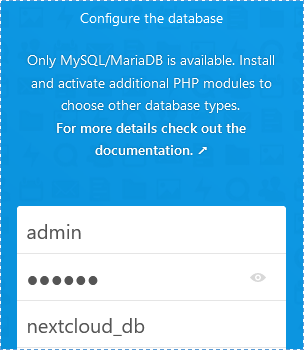
↳ Re-input the database detail that we have made in previous steps.
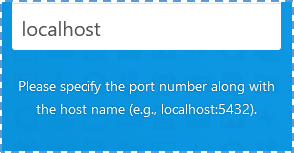
↳ We can use default localhost as host address, or we can input localhost:3306, because MariaDB uses port 3306.
After that, click “install”. Then we will be redirected to the main page of NextCloud’s dashboard.
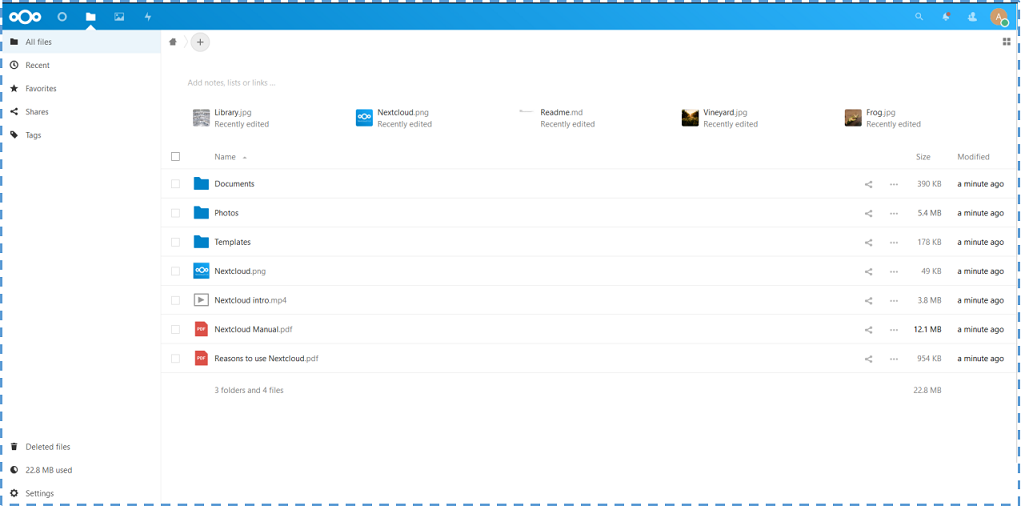
Okay, now we can use NextCloud as our Private Cloud Storage.
5. Essential Additional Configuration
Increase PHP Memory Limit
The default limitation of PHP memory is 128MB, but NextCloud recommends 512MB for better performance. To change the PHP memory limit, edit this PHP file,
#sudo nano /etc/php/7.4/apache2/php.ini Direct to this line
memory_limit = 128M Change the value into
memory_limit = 512M 
Save & close, then restart Apache so the company will implement the changes.
#sudo systemctl reload apache2 Configure Redis Cache for NextCloud
We will activate the cache memory for NextCloud by using Redis. Run this command to install Redis from the Ubuntu repository.
#sudo apt install redis-server To configure Redis as cache for NextCloud, we need to install a PHP extension so it can interact with Redis.
#sudo apt install php-redis Next, edit NextCloud’s file configuration.
#sudo nano /var/www/nextcloud/config/config.php Add the following line before the end. );
| ‘memcache.distributed’ => ‘\OC\Memcache\Redis’, ‘memcache.local’ => ‘\OC\Memcache\Redis’, ‘memcache.locking’ => ‘\OC\Memcache\Redis’, ‘redis’ => array( ‘host’ => ‘localhost’, ‘port’ => 6379, ), |
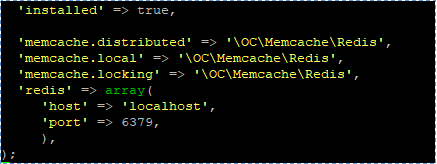
Save and close the file. Then, restart Apache and PHP-FPM.
#sudo systemctl restart apache2 Case Study
Okay, after we have successfully installed NextCloud in the VM, let’s try to make a case study in using NextCloud. With the following case studies:
- Have 2 groups of divisions
a. Sales
b. Billing
- Will choose one division leader to manage the group.
- Making “file-sharing” based on the groups. However, the Customer’s Invoice file from Billing division, is shared with the Sales Division as well.
Let’s see these steps to achieve the goal.
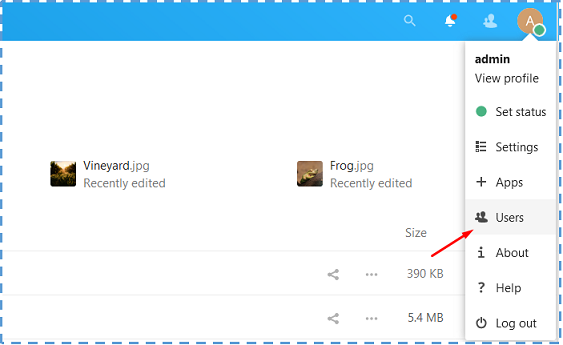
↳ First, access Users menu

↳ Then, click Add Group, and input the group’s name.
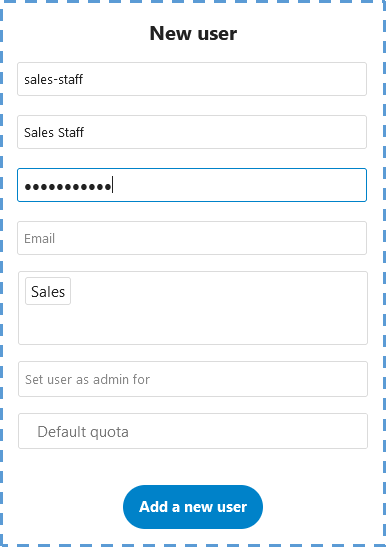
↳ Now we are adding new users and then deciding which group the new user belongs to.
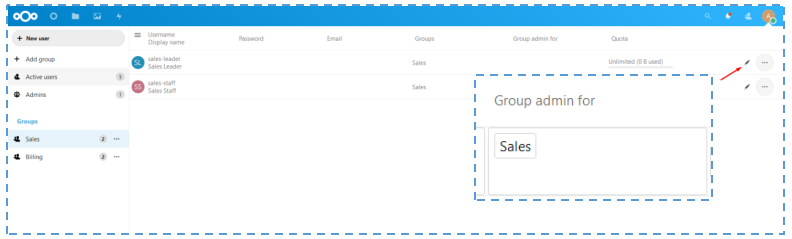
↳ In the Active Users menu, edit the user who will become the group’s division administrator.
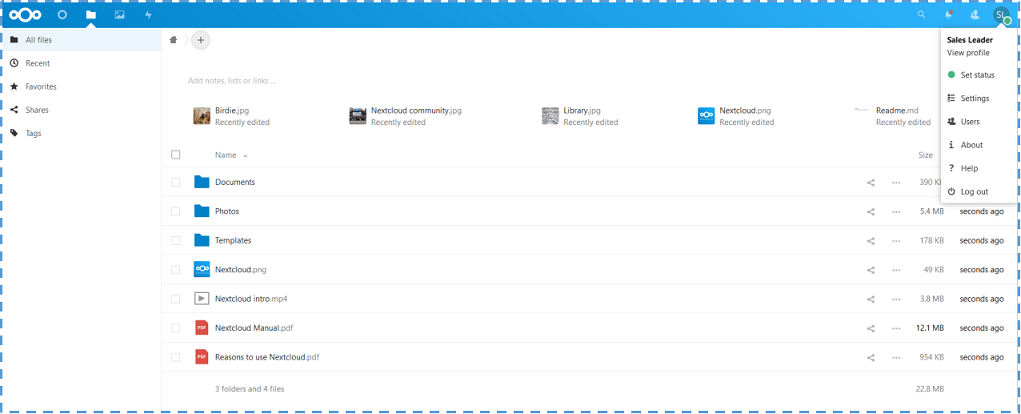
↳ After that, now let’s switch accounts to one of the users that we have made, then access the menu File.

↳ Decide which file we will share and choose the group. In the Sharing tab, decide which group will be shared the file with.
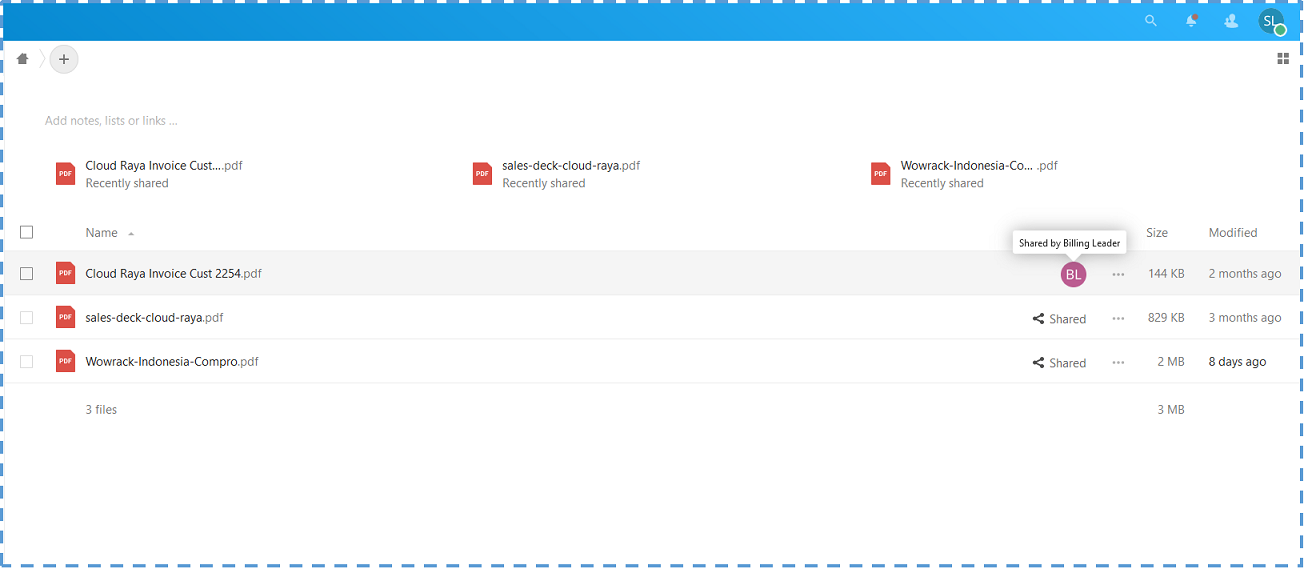
↳ We can see the file shared by the Billing group to the Sales group also appear inside the file list.
Conclusion
From this article, we learned together how to install NextCloud. Starting from how to install it on ServerStadium’s VM and its configuration to the case study examples in it.
If you want to see the video tutorial version, you can access it on ServerStadium’s Youtube channel or through this link.
For questions or discussions about this tutorial, you can directly submit them in the comments column.