

High Availability Kubernetes Using RKE in ServerStadium Part 2
After we complete installing Kubernetes on Part 1, we can continue to install the Rancher.
Rancher has a nice Web UI in which we can manage our Kubernetes cluster. There are several ways to install Rancher on the server:
- Install Rancher in standalone docker
- Install Rancher as a container under Kubernetes cluster itself
In this tutorial, we will install Rancher as a container deployed on the Kubernetes cluster on every node. If one of the servers is down, we can still access Rancher from our end.
Before we install the rancher, we need to install helm on the server.
Helm is package management for Kubernetes like apt. Please install Helm from the latest source, or we can install it using snap package on Ubuntu.
# snap install helm --classic
Add Stable Rancher Chart
After we install Helm, we can add the Helm chart repository. In this tutorial, we will use the stable repository.
# helm repo add rancher-stable https://releases.rancher.com/server-charts/stable
Create a Namespace for Rancher: cattle-system
The next step creates Kubernetes namespace with the name cattle-system where the Chart will be installed.
Namespace helps us organize clusters into virtual sub-clusters and is helpful when working with another team or sharing the project on the Kubernetes cluster.
#kubectl create namespace cattle-system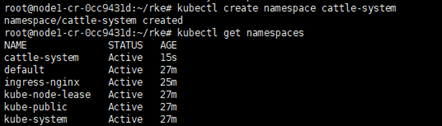
Install Cert-Manager
Rancher management is designed to use SSL/ TLS for a secure connection. There are three recommended options for TLS termination for Rancher.
- Rancher-generated TLS certificate. This option needs to install cert-manager into the cluster. Cert-manager will issue and maintain the certificate for Rancher, including generating CA certificate and signing the cert.
- Let’s encrypt. This option also needs cert-manager and combine with Issuer Let’s Encrypt to issue cert for rancher.
- Using own certificate. This option allows you to use private or public CA-signed certificate.
In this tutorial, we will use the option Rancher-generated TLS cert.
# kubectl apply --validate=false -f https://github.com/jetstack/cert-manager/releases/download/v1.0.4/cert-manager.crds.yaml
Create a namespace for cert-manager.
# kubectl create namespace cert-manager
Add the Jetstack Helm repository.
# helm repo add jetstack https://charts.jetstack.io
Update the local helm chart repository.
# helm repo update
Now we can install the cert-manager
#helm install cert-manager jetstack/cert-manager --namespace cert-manager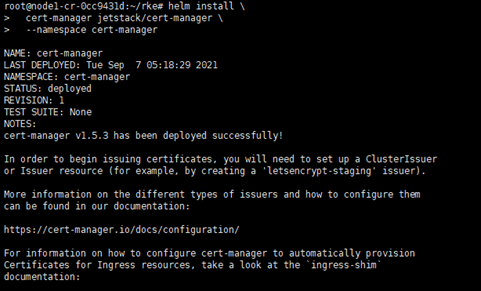
List pods status on cert-manager. Make sure all pods are running
# kubectl get pods --namespace cert-manager
Install Rancher Using Rancher-Generated Certificate
We are ready to install rancher using self-sign certificate. We will use domain rancher.serverstadium.com for self-generated certificate just for this tutorial. Please use the following command to install Rancher.
# helm install rancher rancher-stable/rancher --namespace cattle-system --set hostname=rancher.serverstadium.com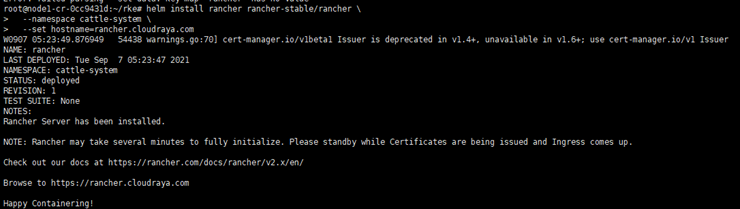
Monitor the deployment status using the following command.
#kubectl -n cattle-system rollout status deploy/rancher
After Rancher has been rolled out successfully. We can continue to the next step.

# kubectl -n cattle-system get deploy rancher
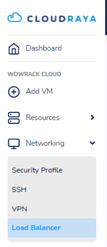
Add Port of Rancher to Load Balancer
Now Rancher has already deployed on the server, the next step is to configure the Rancher Web UI using Load Balancer in ServerStadium Cloud.
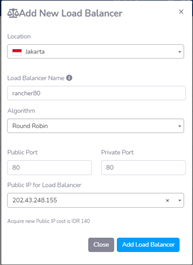
Please Click Networking – Load Balancer, then Click Add New Load Balancer with the name rancher80. Fill in the field for the new load balancer as follow:
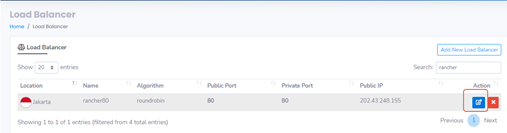
After Load Balancer has been created with the name rancher80, edit the Load Balancer to assign it to All nodes.
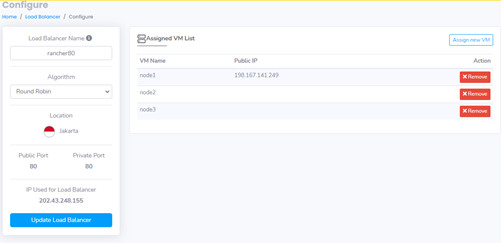
Click the Assign New VM button the choose node1, node2 and ndoe3
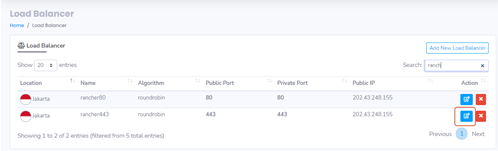
Add new Load Balancer for port 443 with name rancher443
Edit rancher443, then assign all nodes to the load balancer as we did on rancher80.
Access from Browser
Don’t forget to create A record of your rancher domain to the Public IP of the Load Balancer.
After that, you can browse the domain name from your browser. In this tutorial, we use rancher.serverstadium.com
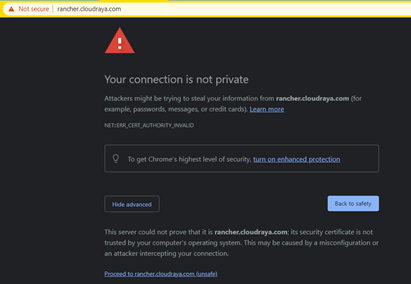
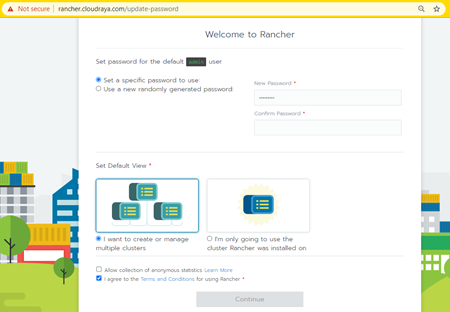
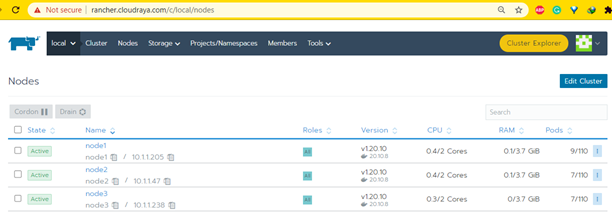
Please click Proceed if you get the warning message. Insert your password, then choose default View with Multiple Cluster.
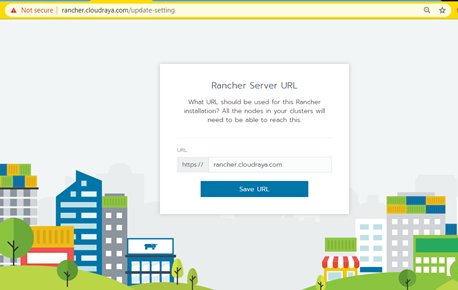
Insert the Rancher Server URL
In the next article, we can deploy a simple application and learn how to add helm repository through Rancher.
You can re-read Part 1 to make sure you did not miss anything.
Next, we will continue to deploy simple applicationa in Kubernetes part 3