

Easy Steps to Enable VPC in ServerStadium Cloud
Do you know that Virtual Private Cloud (VPC) is now ready on ServerStadium Cloud panel? But, before that, you must ensure you are familiar with what VPC is.
VPC is a networking feature that replaces the Default Network with Security Profile feature that previously existed in ServerStadium Cloud.
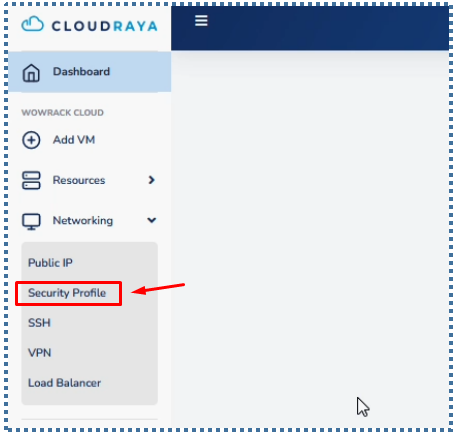
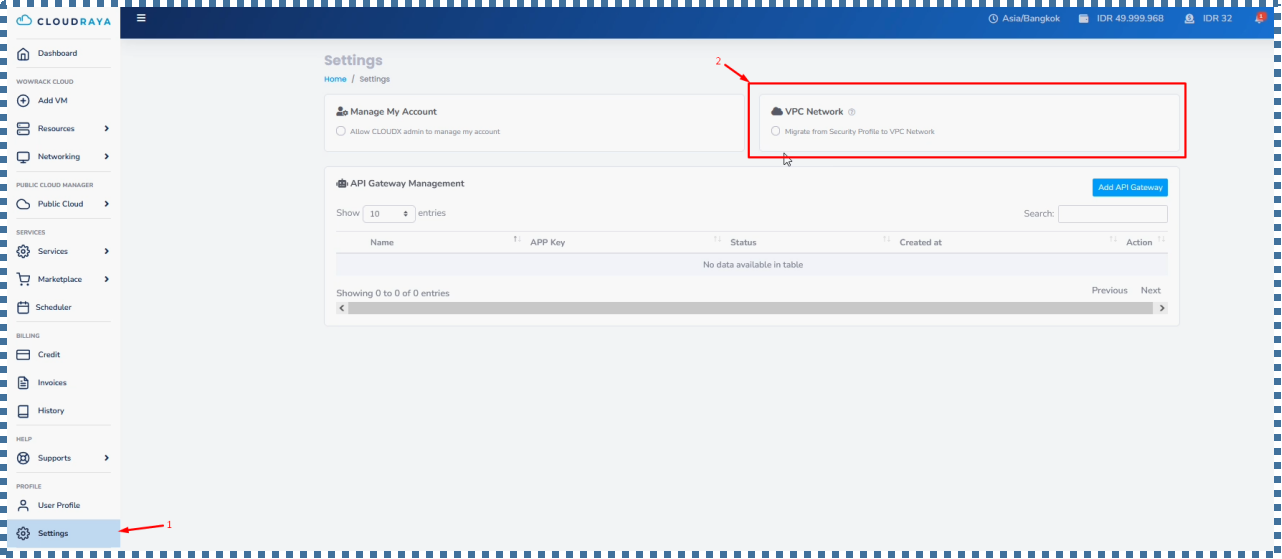
For ServerStadium Cloud accounts from existing customers, this VPC feature will not automatically appear in the Networking menu, but still displays the Security Profile menu.
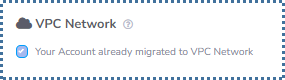
However, for customers who have just created a ServerStadium account after the official VPC release, it will automatically be activated and the Security Profile will disappear.
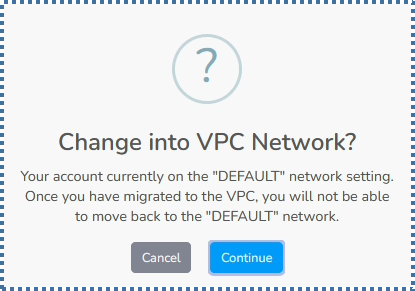
If you are still comfortable with the Default Network with Security Profile, where you only need to enter the port, and the IP, without any advanced configuration, then you can still use the Security Profile.
But if you want a feature with the benefit that we can isolate some of our resources (VMs) with certain IPs, more advanced ACL control, and we don’t need to re-apply every time we make changes to the ACL Rules, then VPC is the answer.
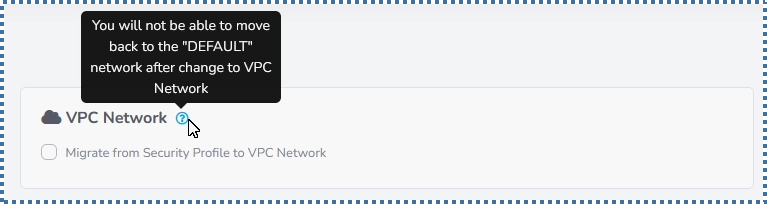
Although in order to continue using ServerStadium and add new VM resources, we are required to switch to VPC.
Then the question now is how to configure the VPC in ServerStadium. Is it much more confusing and difficult than the Security Profile?
Of course not! Although the features offered are much more advanced, ServerStadium, with its User-Friendly Panel, will still make it easy for you to manage VPCs.
Let’s see how!
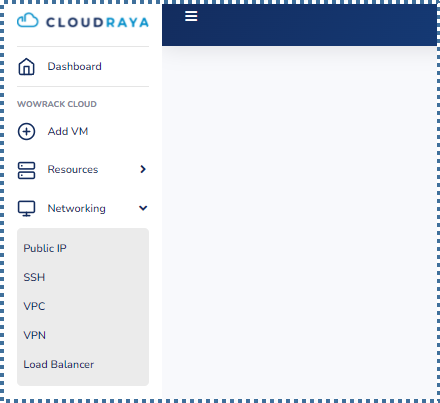
Configuring the VPC in ServerStadium
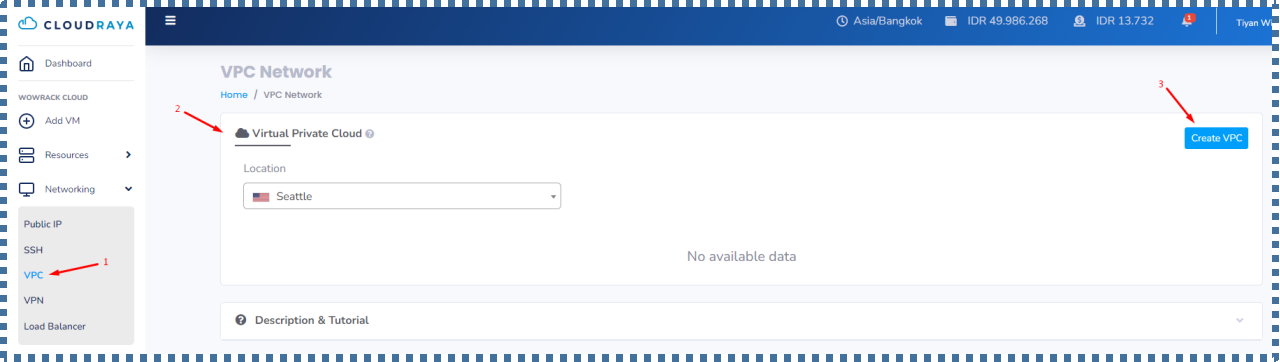
On the Virtual Private Cloud tab, a list of the VPC networks that we already have in a particular region/location will appear.
To start creating a VPC network, we can click on the “Create VPC” button.
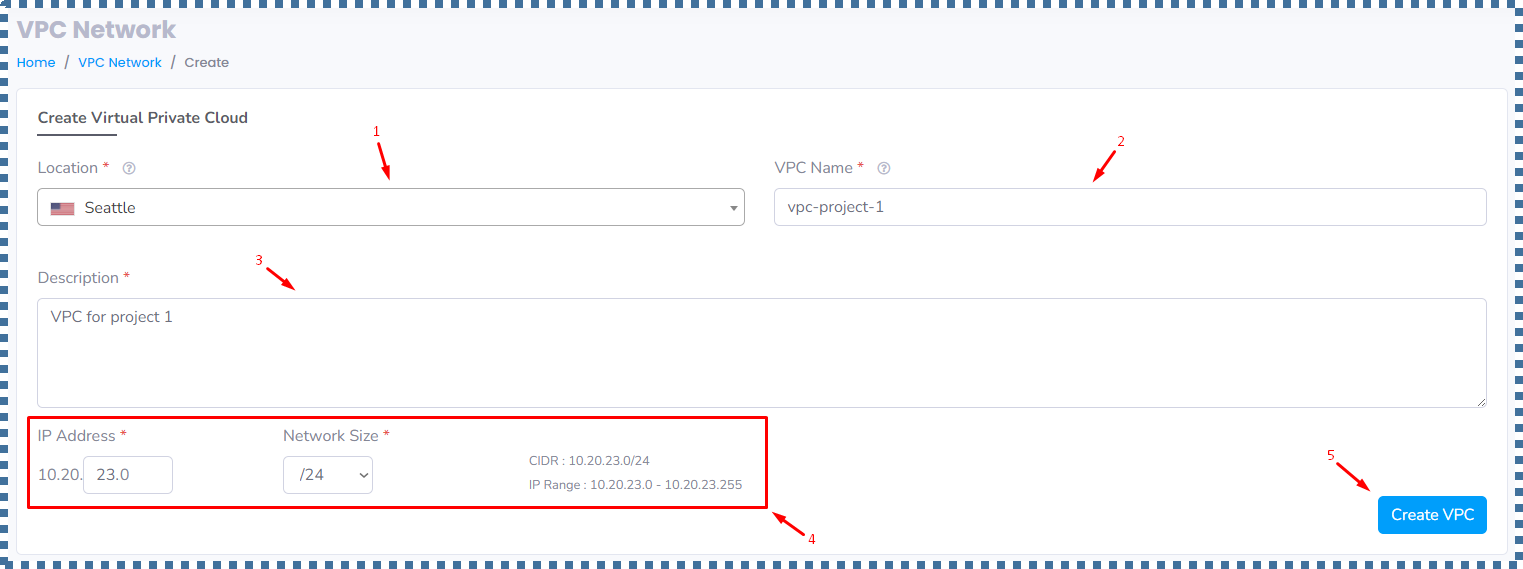
| 1. | Location | : | We select the region where we want to create this VPC Network. You can fill it according to the location of the VM you want to launch. In this tutorial I will choose Seattle. |
| 2. | VPC Name | : | We fill in the name of the VPC network that we want to create. |
| 3. | Description | : | We fill in the description of the VPC network. |
| 4. | IP Address & Network Size | : | In the IP Address, we can specify the IP of the Super Network that we want. In this case, I will make the Super Network IP 10.20.23.0, with Network Size is /24. How many IP ranges can we have on this /24 network size? Don’t worry, the information will automatically appear. Later, in this Super Network, we can create smaller subnets for the needs of each group of resources that we want to isolate from other groups of resources. |
If so, we can click on “Create VPC”.
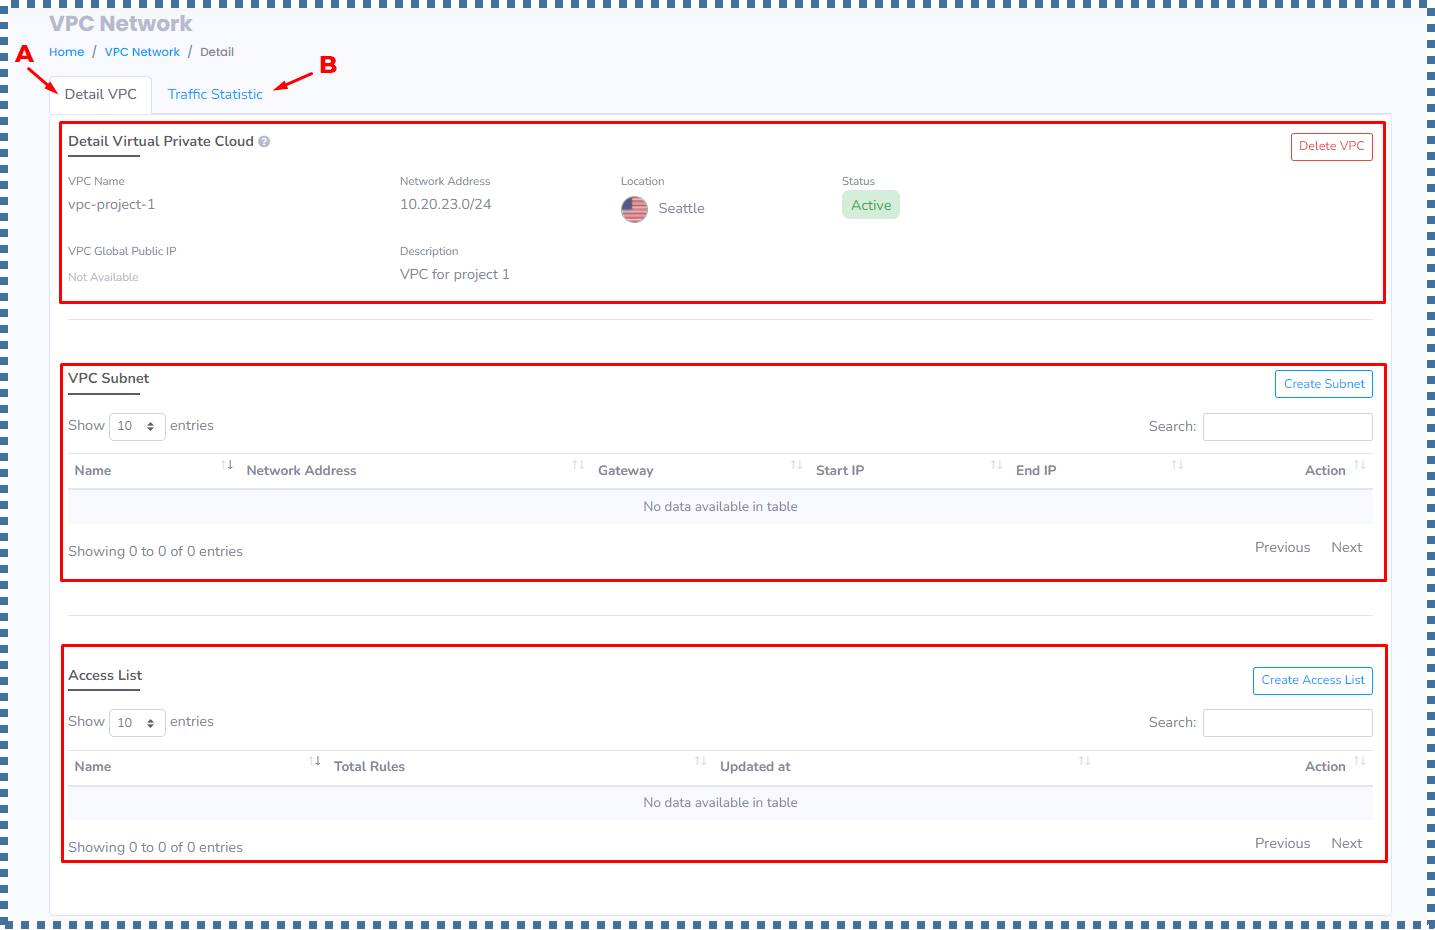
A. Detail VPC
In this tab, there are three sections, namely:
- Detail Virtual Private Cloud
- VPC Subnet
- Access List
1. Detail Virtual Private Cloud

2. VPC Subnet
This section consist of a list of the subnets that we have will be displayed. To create a new one, click “Create Subnet”.
▶️ Create Subnet
| 1. | Subnet Name | : | We fill in the name of the Subnet that we want to create. |
| 2. | Description | : | We fill in the description of the subnet. |
| 3. | IP Address & Network Size | : | In this field, we can specify the range of Subnets we want for the resources we create. The range of the subnet must still be within the range of the Super Network that we created earlier (/24).In this tutorial I will create a subnet IP of 10.20.23.1, with a network size of /28 |
| 4. | ACL Rules | : | Is a collection of firewall rules that we can customize. Conceptually, ACL Rules are the same as Security Profile, where we can specify which ports we want to open. In this step we select the Default ACL Rules first, for later we will adjust it again in the next step. |
If so, click “Create Subnet”.
▶️ Managing Subnet Lists
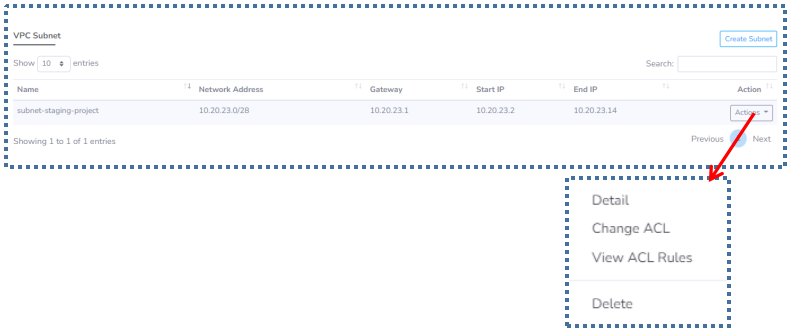
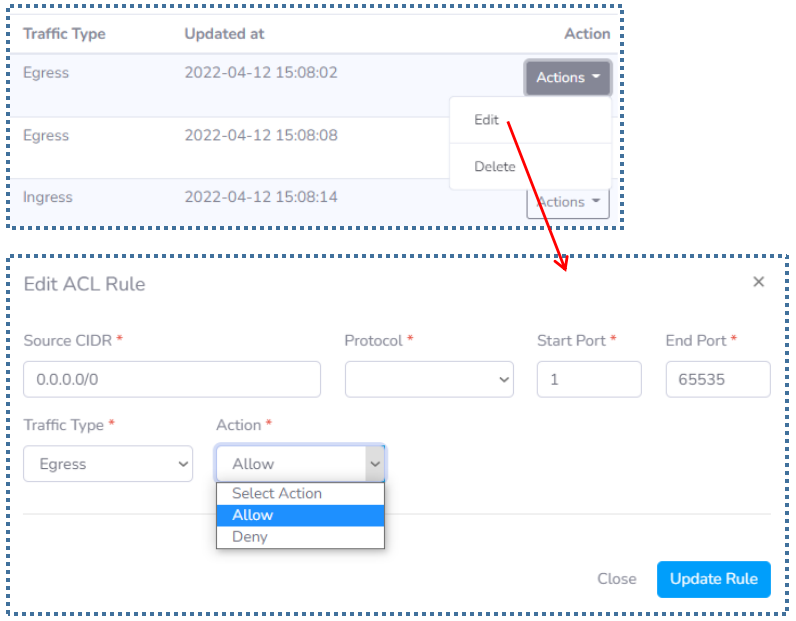
Detail
Change ACL
View ACL Rules
Delete
In this option, we can delete the Subnet that we have. But please make sure that there are no VMs attached to this Subnet. Because if not, an error message will appear as follows.
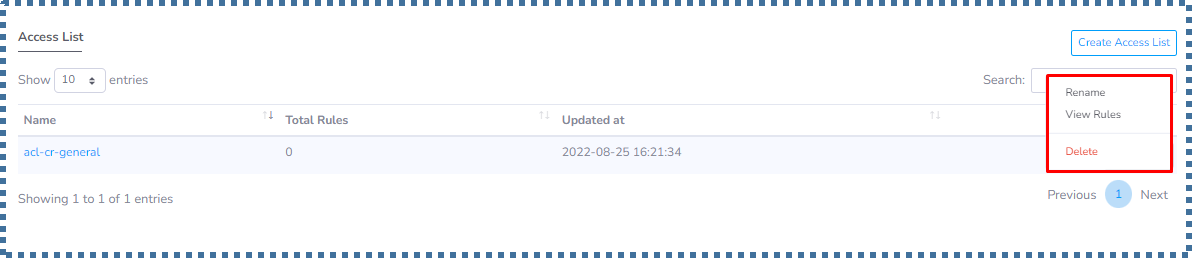
2. Access List
In line with the previous ACL Rules explanation on the Create Subnet page, the ACL Profile will be displayed in this section when we finish creating the subnet.
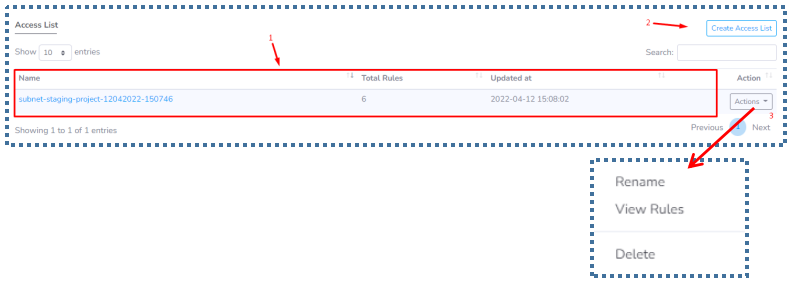
- The total rules in the ACL will also be displayed.
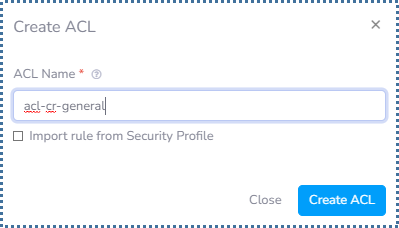
- If we want to add a new Access List, we can click on “Create Access List”.
- In the ACL profile that we already have, we can manage several things such as changing its name, viewing the collection of rules, to deleting this profile.
▶️ Managing ACL Profile
According to point number 3 above, we can do several things on each of our ACL Profiles.
Rename
View Rules
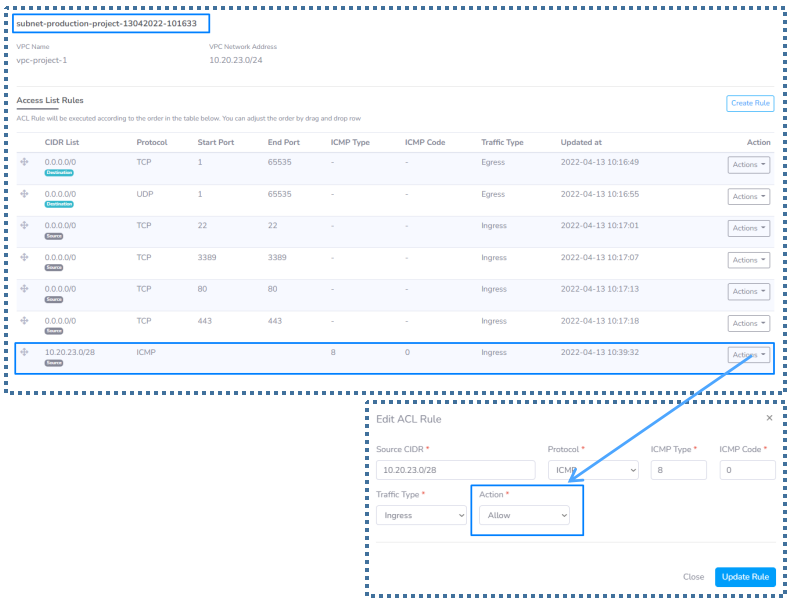
Now let’s talk about the rules that are in this default ACL.
- Egress: The type of traffic whose destination is outbound from our VM.
- Ingress: The type of traffic whose destination is incoming / inbound into our VM.
With each Action in the default ACL listed on the list is “Allow”.
If we try to translate the set of rules above, it will be as follows:
Allow all ports with TCP and UDP protocols from 1 – 65535 from our VM, to be able to go to the internet. And allow ports 22, 3389, 80, 443 with the TCP protocol to be able to enter our VM.
We can also add new rules that we want by clicking on the “Create Rule” button.
Delete
We can also remove the ACL Profile by clicking on the Delete option. However, please make sure that there are no subnets tied to this ACL Profile. Because if not, an error message like this will appear.
▶️ Create Access List
If we have specific preferences regarding which Port and Protocol details we want to open and deny, or we want to we can do that by clicking on “Create Access List”.
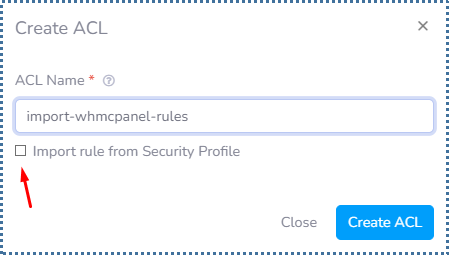
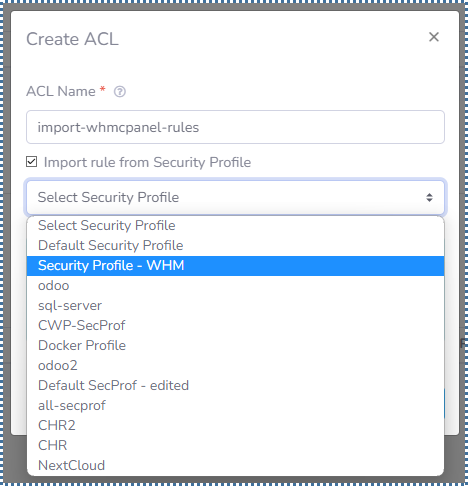
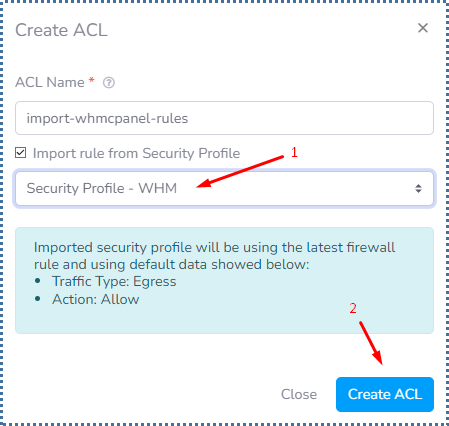
▶️ Import Access Control List rule from the previous Security Profile
When we have created a lot of rules on the Security Profile, of course we don’t want to create those rules again in the Access List in the VPC system.
Relax, you can do this easily in VPC.


B. Traffic Statistic

VPC Implementation
After activating and configuring the VPC, now we implement the VPC into the VM that we created.
Where, in this step we can determine the VPC network configuration that we want for the VM.
Later, the IP ranges available for our VM will also be displayed. Keep in mind, the VPC profile that appears will adjust from the region where you want to launch the VM.
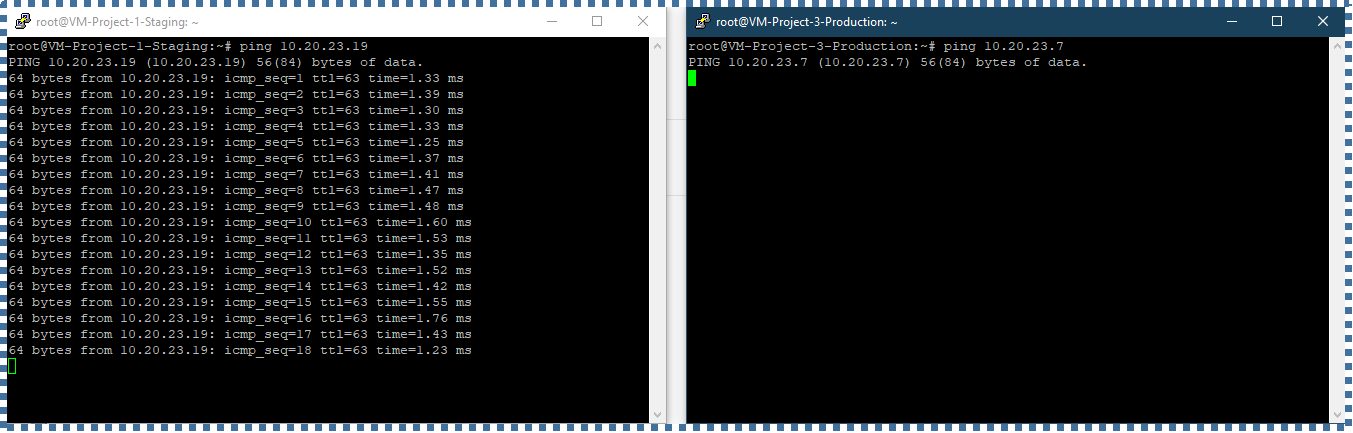
Case Study
In this case study, I will create two groups of resources.
Where in the Staging resource, there are 2 VMs with the subnet range ‘A’, and in the Production resource, there are 2 VMs with the subnet range ‘B’.
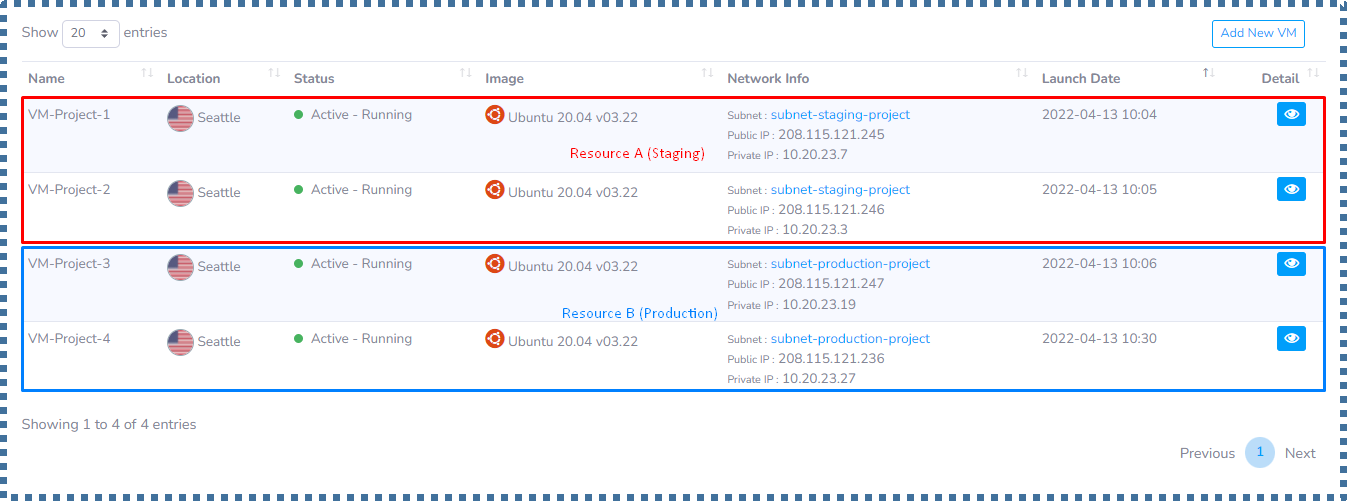
The goals that we will make are:
- The VM from Staging resource can ping the VM from Production resource,
- Whereas VM from Production resource cannot ping the VM from Staging resource.
To achieve this we will create ACL rules for these two types of resources.
Some things you have to take note of about VPC
- Ping can only from the Workstation/PC to the server (but not the other way around).
- In order for ping to work within the VPN network of the VPC, ICMP type 8 code 0 needs to be allowed for Ingress traffic (inbound) and needs to be at the top of the list,
- Make sure on your VPN configuration, “Allow these Protocols” -> “Microsoft CHAP Version 2” is checked.
▶️ Control Panel -> Network and Internet -> Network Connections -> Properties on your VPN device
▶️ Go to “Security” tab -> checkmark on “Allow these Protocols” -> “Microsoft CHAP Version 2”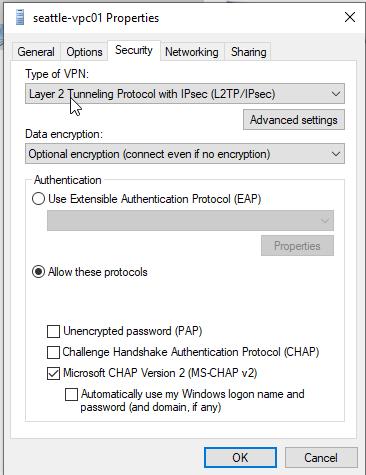
- And make sure to uncheck the “Use default gateway on remote network”
▶️ Control Panel -> Network and Internet -> Network Connections -> Properties on your VPN device
▶️ Go to Networking Tab -> double click on Internet Protocol Version 4
▶️ Click Advanced -> IP Settings , uncheck “Use default gateway on remote network”
▶️ Its function is so that the Internet is still running and can also access the VPN/VPC network.
- All VMs within the same VPC Supernetwork can talk to one another. Just need to make sure to allow ICMP pings.
- VMs that belong to different VPC Supernetwork, need to use the public IP to communicate with one another.
Conclusion
Okay, that’s a wrap.
In this article, we both know what a VPC is, its benefits and features, how to activate it, its configuration, and implementation in a case study.
If you want to see the video tutorial version, you can access it at the following YouTube link.
For further questions about VPC, please leave your questions in the comment below, or by ServerStadium’s live chat.
Find more insights and knowledge with tech topics in ServerStadium’s Knowledge Base. Even better, you can try to start creating new VM and add ServerStadiums’s VPC on it.