

Deploying a Virtual Machine in ServerStadium
Introduction
Deploying a virtual machine in ServerStadium Cloud is very simple. Please follow the steps below.
Via Control Panel
Once you are logged into the control panel https://cp.serverstadium.com, on the left of the dashboard, there is a menu, and you can click on the “Add VM” button

You will be presented with an installation wizard:
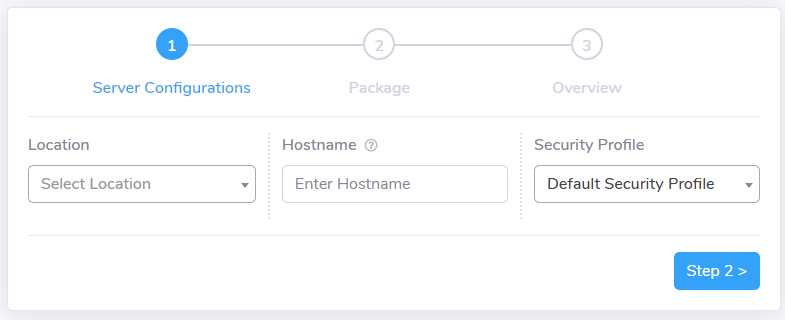
Step 1: Select the Location
Step 2: Enter the Hostname of your choice; only support alphanumeric and dash (“-“).
Step 3: Assign a Security Profile, by default, there is a “Default” Security profile that allows management ports such as 22 (ssh), 3389 (rdp), and some service ports such as 80 (http) and 443 (https).
Step 4: Please select the “Image” or the operating system of your choice. Then click the blue “Step 2” button on the Add VM page.

Step 5: Select your desired package or a custom package. Then you may click on the blue button “Step 3” to review the summary.
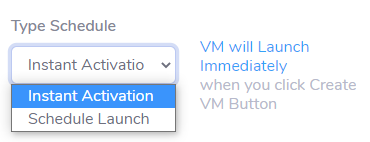
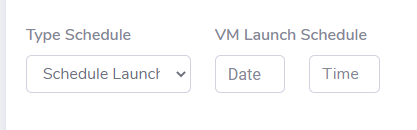
Step 6: Once you have reviewed the summary, you may choose to instantly build the VM or schedule a time for the VM to be built. Then click on the blue button “Create VM”
You will be directed to the VM detail page showing the provisioning status.
Via API
You may need to automate a VM build from your own platform. In this case, you may use our robust and simple API to build the VM.
Step 1: You need to create an API key; please follow this guideline: Generating API Key
Step 2: You will need the following items:
- “Location name” – by calling the following API
https://api.serverstadium.com/v1/api/gateway/user/location-group-by-country - “Package ID” – by calling the following API
https://api.serverstadium.com/v1/api/gateway/user/packages/list - “Security Profile ID” – by calling the following API
https://api.serverstadium.com/v1/api/gateway/user/securityprofiles - “Storage ID” – by calling the following API
https://api.serverstadium.com/v1/api/gateway/user/storagetype/list - “Template ID” (the operating system) – by calling the following API
https://api.serverstadium.com/v1/api/gateway/user/templates/list
Step 3: By compiling all of the above items into one raw JSON format body, the example as follows:
{
    "location": "Jakarta",
    "package_id": 1,
    "hostname": "test-web02",
    "security_profile": 13,
    "public_ip_id": "automatic",
    "disk_id": 17,
    "schedule_type": "instant",
    "schedule_date": "25-07-2020",
    "schedule_time": "",
    "template_id": "d2efd681-ff1d-40d2-aa3d-90777225119b"
}
You will receive a response with your new VM id.
You may view additional API information found at https://cp.serverstadium.com/apidoc