

Set Up High Availability PostgreSQL Cluster Using Patroni on ServerStadium
PostgreSQL is a powerful OpenSource, an object-relational database management system that extends the SQL language with many features.
Meanwhile, Patroni is an OpenSource python package that we can use to manage and automate the deployment of PostgreSQL HA Clusters. Little information, Patroni was developed by Zalando.
Prerequisite
To follow this tutorial, we need three VM for PostgreSQL and one VM for HAproxy and etcd.
Below is four VMs that we will deploy in ServerStadium.
| Hostname | IP Address | Applications |
| haetcd | 199.180.130.99 | HAproxy |
| 10.3.3.166 | etcd | |
| pgsql1 | 10.3.3.12 | patroni |
| pgsql2 | 10.3.3.71 | patroni |
| pgsql3 | 10.3.3.70 | patroni |
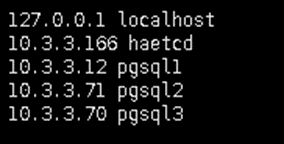
We will use haetcd as jumpbox server since the VM has Public IP Address that we can access from the outside network. In /etc/host, insert the hostname of the servers to make us easy to access the server without remembering the IP Address.
/etc/hosts
Install PostgreSQL 14
In this step, we will use PostgreSQL14 for pgsql1, pgsql2, and pgsql3. Please the command below on each server.
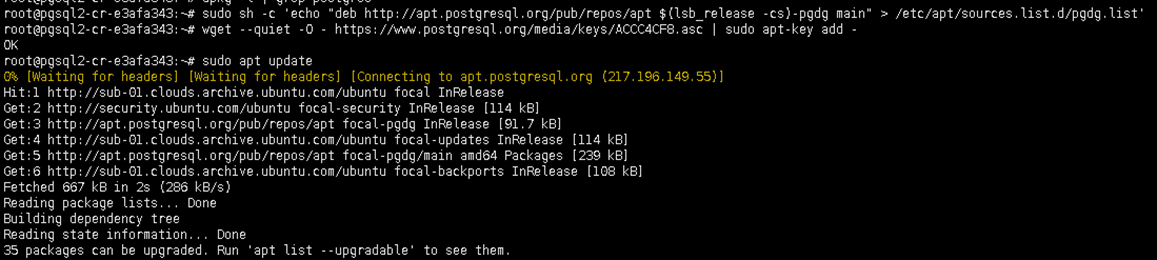
sh -c 'echo "deb http://apt.postgresql.org/pub/repos/apt $(lsb_release -cs)-pgdg main" > /etc/apt/sources.list.d/pgdg.list'wget --quiet -O - https://www.postgresql.org/media/keys/ACCC4CF8.asc | sudo apt-key add - apt update
apt -y install postgresql-14 postgresql-server-dev-14

After the postgresql installation is completed, we need to stop and disable PostgreSQL service. Then we will continue to install patroni.
systemctl stop postgresql && systemctl disable postgresql
Install Patroni
Patroni uses the utilities of PostgreSQL that we have installed previously which is located at /usr/lib/postgresql/versin/bin directory.
In this step, we create a symbolic link to PostgreSQL utilities on psql1, psql2, and psql3
ln -s /usr/lib/postgresql/14/bin/* /usr/sbin/
Next, we will install patroni on each server
apt -y install python3 python3-pip
pip install --upgrade setuptools
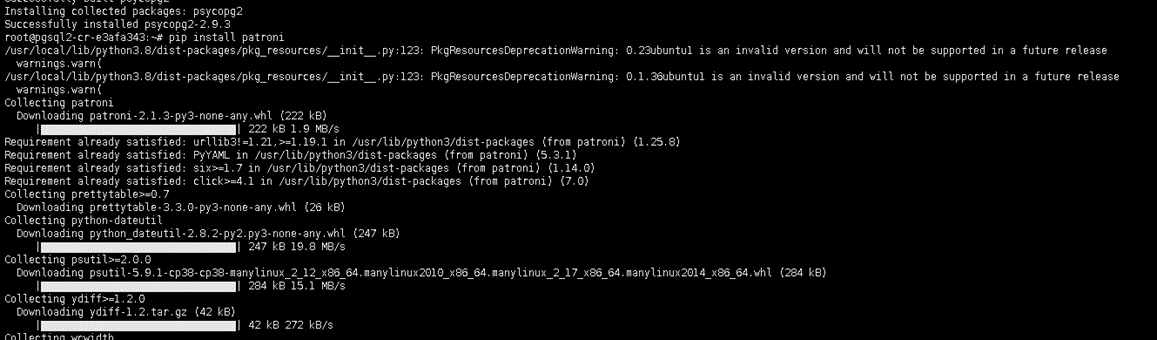
pip install psycopg2
pip install patroni
pip install python-etcd
Configure Patroni on Pgsql1, Pgsql2, and Pgsql3
Patroni uses yaml files to store the configuration. We will place the yaml file on /etc directory.
sudo nano /etc/patroni.yml

pgsql1:
scope: postgres
namespace: /db/
name: pgsql1

restapi:
    listen: 10.3.3.12:8008
    connect_address: 10.3.3.12:8008

etcd:
    host:  10.3.3.166:2379

bootstrap:
    dcs:
        ttl: 30
        loop_wait: 10
        retry_timeout: 10
        maximum_lag_on_failover: 1048576
        postgresql:
            use_pg_rewind: true

    initdb:
    - encoding: UTF8
    - data-checksums

    pg_hba:
    - host replication replicator 127.0.0.1/32 md5
    - host replication replicator 10.3.3.12/0 md5
    - host replication replicator 10.3.3.71/0 md5
    - host replication replicator 10.3.3.70/0 md5
    - host all all 0.0.0.0/0 md5

    users:
        admin:
            password: admin
            options:
                - createrole
                - createdb

postgresql:
    listen: 10.3.3.12:5432
    connect_address: 10.3.3.12:5432
    data_dir: /data/patroni
    pgpass: /tmp/pgpass
    authentication:
        replication:
            username: replicator
            password: replogin321
        superuser:
            username: postgres
            password: secretlogin321
    parameters:
        unix_socket_directories: '.'

tags:
    nofailover: false
    noloadbalance: false
    clonefrom: false
    nosync: false

pgsql2
scope: postgres
namespace: /db/
name: pgsql2

restapi:
    listen: 10.3.3.71:8008
    connect_address: 10.3.3.71:8008

etcd:
    host:  10.3.3.166:2379

bootstrap:
    dcs:
        ttl: 30
        loop_wait: 10
        retry_timeout: 10
        maximum_lag_on_failover: 1048576
        postgresql:
            use_pg_rewind: true

    initdb:
    - encoding: UTF8
    - data-checksums

    pg_hba:
    - host replication replicator 127.0.0.1/32 md5
    - host replication replicator 10.3.3.12/0 md5
    - host replication replicator 10.3.3.71/0 md5
    - host replication replicator 10.3.3.70/0 md5
    - host all all 0.0.0.0/0 md5

    users:
        admin:
            password: admin
            options:
                - createrole
                - createdb

postgresql:
    listen: 10.3.3.71:5432
    connect_address: 10.3.3.71:5432
    data_dir: /data/patroni
    pgpass: /tmp/pgpass
    authentication:
        replication:
            username: replicator
            password: replogin321
        superuser:
            username: postgres
            password: secretlogin321
    parameters:
        unix_socket_directories: '.'

tags:
    nofailover: false
    noloadbalance: false
    clonefrom: false
    nosync: false

pgsql3
scope: postgres
namespace: /db/
name: pgsql3

restapi:
    listen: 10.3.3.70:8008
    connect_address: 10.3.3.70:8008

etcd:
    host:  10.3.3.166:2379

bootstrap:
    dcs:
        ttl: 30
        loop_wait: 10
        retry_timeout: 10
        maximum_lag_on_failover: 1048576
        postgresql:
            use_pg_rewind: true

    initdb:
    - encoding: UTF8
    - data-checksums

    pg_hba:
    - host replication replicator 127.0.0.1/32 md5
    - host replication replicator 10.3.3.12/0 md5
    - host replication replicator 10.3.3.71/0 md5
    - host replication replicator 10.3.3.70/0 md5
    - host all all 0.0.0.0/0 md5

    users:
        admin:
            password: admin
            options:
                - createrole
                - createdb

postgresql:
    listen: 10.3.3.70:5432
    connect_address: 10.3.3.70:5432
    data_dir: /data/patroni
    pgpass: /tmp/pgpass
    authentication:
        replication:
            username: replicator
            password: replogin321
        superuser:
            username: postgres
            password: secretlogin321
    parameters:
        unix_socket_directories: '.'

tags:
    nofailover: false
    noloadbalance: false
    clonefrom: false
    nosync: false
According to the yml file, the data of PostgreSQL will be stored at /data/patroni. Make sure the ownership of that directory is postgres.
mkdir -p /data/patroni
chown postgres:postgres /data/patronichmod 700 /data/patroni
Create a Service
Next, we will create patroni service that allow us to start and stop the service on each server.
sudo nano /etc/systemd/system/patroni.service
Add the following parameter in the patroni.service
[Unit]
Description=High availability PostgreSQL Cluster
After=syslog.target network.target
[Service]
Type=simple
User=postgres
Group=postgres
ExecStart=/usr/local/bin/patroni /etc/patroni.yml
KillMode=process
TimeoutSec=30
Restart=no

[Install]
WantedBy=multi-user.target
Create and Enable Patroni Service
After the patroni service has been created then we enable it to make it autostart.
sudo systemctl daemon-reload
sudo systemctl enable patroni
Install Etcd and Haproxy on Haetcd VM
etcd is a fault-tolerant, a distributed key value store that can be used to store the state of PostgreSQL cluster. With etcd, it will keep the PostgreSQL cluster up and running.
Run the command below to install etcd
sudo apt -y install etcd

Next step, we will configure the etcd file. Add the below parameter in the etcd file:
sudo nano /etc/default/etcd
ETCD_LISTEN_PEER_URLS="http://10.3.3.166:2380"
ETCD_LISTEN_CLIENT_URLS="http://localhost:2379,http://10.3.3.166:2379"
ETCD_INITIAL_ADVERTISE_PEER_URLS="http://10.3.3.166:2380"
ETCD_INITIAL_CLUSTER="default=http://10.3.3.166:2380"
ETCD_ADVERTISE_CLIENT_URLS="http://10.3.3.166:2379"
ETCD_INITIAL_CLUSTER_TOKEN="etcd-cluster"
ETCD_INITIAL_CLUSTER_STATE="new"
Restart the etcd service to make a change effect
sudo systemctl restart etcd
Start Patroni on Each Pgsql Server
Before we start the patroni service, we need to activate the watchdog support to prevent split-brain on the PostgreSQL
https://patroni.readthedocs.io/en/latest/watchdog.htmlmodprobe softdog
chown postgres /dev/watchdog

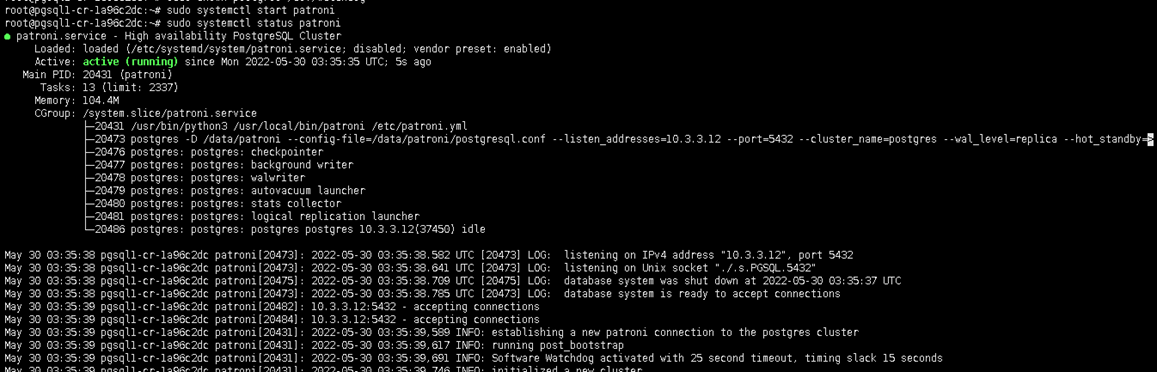
After the watchdog is activated, now we can start the patroni service again on each server.
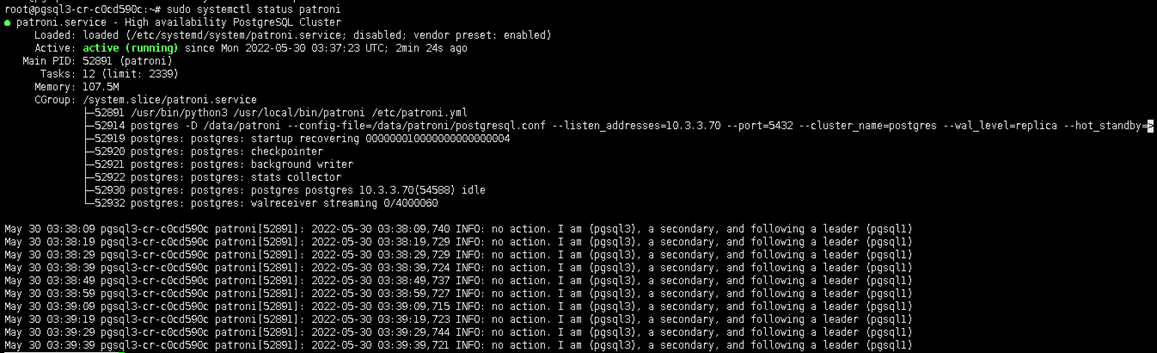
systemctl start patronisystemctl status patroni
pgsql1 as master.
We can see, the pgsql1 will act as the PostgreSQL master
pgsql2 and pgsql3 as slave

Install Haproxy
Our last step install HAproxy service to give us an endpoint to which the application can connect to the database.
sudo apt -y install haproxy

Edit the haproxy file configuration as follow
nano /etc/haproxy/haproxy.cfg
global
    maxconn 100

defaults
    log global
    mode tcp
    retries 2
    timeout client 30m
    timeout connect 4s
    timeout server 30m
    timeout check 5s

listen stats
    mode http
    bind *:7000
    stats enable
    stats uri /

listen postgres
    bind *:5000
    option httpchk
    http-check expect status 200
    default-server inter 3s fall 3 rise 2 on-marked-down shutdown-sessions
    server pgsql1 10.3.3.12:5432 maxconn 100 check port 8008
    server pgsql2 10.3.3.71:5432 maxconn 100 check port 8008
    server pgsql3 10.3.3.70:5432 maxconn 100 check port 8008
Check our haproxy configuration using the following command:
sudo /usr/sbin/haproxy -c -V -f /etc/haproxy/haproxy.cfg

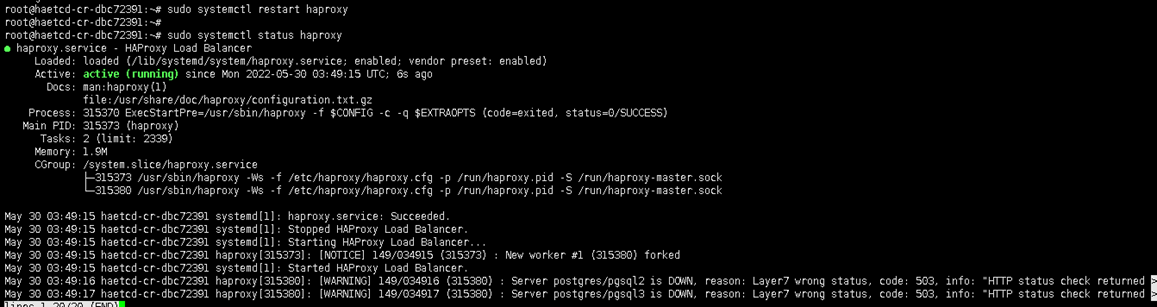
If the configuration is valid, we can restart our haproxy service
sudo systemctl restart haproxy
In the final step, we can monitor the PostgreSQL cluster using the browser as shown in the screenshot below:
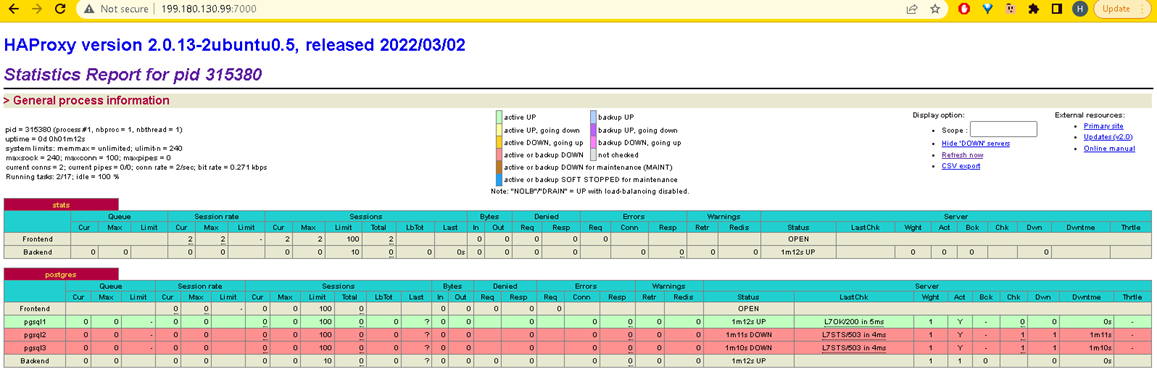
As we can see, psql1 is the leader of the PostgreSQL cluster with the green line row.
Now we will kill patroni service on psql1, to see which VM will be acting as the leader.
systemctl stop patroni
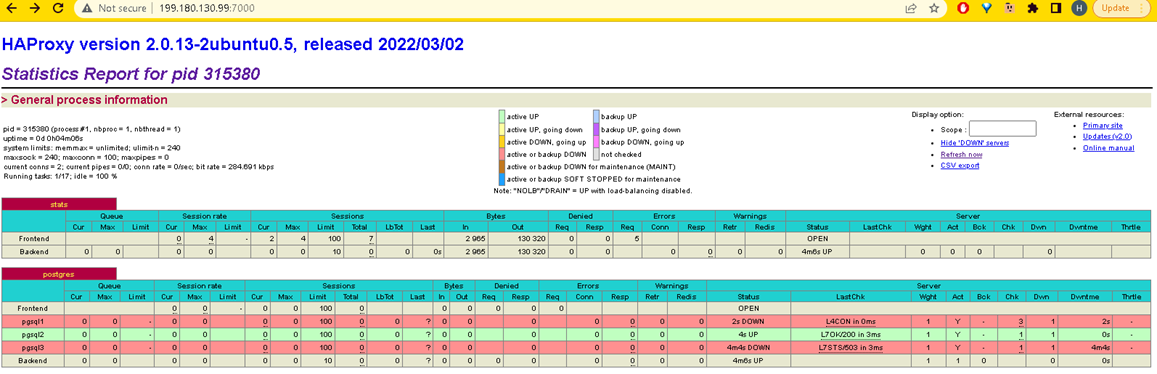
After we stop service patroni service in psql1, the psql2 will be elected as the leader node.
Test PostgresSQL Cluster
If we want to make a connection to PostgreSQL, we use the IP Address of HAProxy and port 5000.
su - postgres
psql -U postgres -h 199.180.130.99 -p 5000

You now have a high availability PostgreSQL Cluster in ServerStadium that is ready to use.
Please don’t hesitate to contact ServerStadium support if you need further assistance.
Find more tutorials articles about ServerStadium in our Knowledge Base, or if you want to get more general knowledge about technology feel free to visit our Blog.
Curious to know more about our products and panel? register here for free!.