

Kubernetes Ingress Controller using SSL in ServerStadium
Kubernetes has two techniques when deploying applications for external Access, Egress and Ingress. Egress is outgoing traffic from the pod, and Ingress is incoming traffic to the pod.
But here, we will talk about Ingress Controller in Kubernetes.
Ingress Controller
Kubernetes Ingress Controller is an L7 Load Balancer that allows a simple host or URL-based HTTP routing.
Usually, Kubernetes Ingress Controller always uses a third-party proxy. There are many Ingress Controller applications today, i.e.:
Nginx: Official ingress for NGINX and NGINX Plus
Kong: Nginx-based API Gateway or enterprise option using KongHQ
Istio: Ingress Gateway for Istio-enabled clusters
HAProxy: HAProxy Ingress Controller
F5: Support F5’s BIG-IP Container Ingress Services
Ambassador: API Gateway and L7 Load Balancer with Kubernetes Ingress support
Ingress Controller in ServerStadium
In ServerStadium Cloud, we can implement Ingress Controller using Nginx. In the previous article, we configured Rancher Kubernetes, which installed Nginx reverse proxy as the default Ingress Controller. Nginx is a popular option for simple HTTP/S routing and SSL termination cases.
This tutorial will teach using Ingress Controller, like routing http/s routing and installing SSL in Kubernetes.
With Rancher, we will create ingress with a simple click.
Below is step by step what we will do in this article:
a. Make sure Nginx Ingress Controller has been installed on Kubernetes
b. Create a new project with the name “IngressCR” and a Namespace named “IngressNS.”
c. Create two subdomains with the names apple.serverstadium.com and orange.serverstadium.com
d. Install SSL in Kubernetes
e. Configure the Ingress controller for both subdomains with SSL
f. Configure Load Balancer in ServerStadium Cloud for both subdomains
A. Make Sure Nginx Ingress Controller has been Installed on Kubernetes
Before implementing Nginx Ingress Controller in ServerStadium Cloud, we must ensure that Nginx has been installed in our Kubernetes. When we deploy Rancher for the first time, make sure the cluster.yml already has the following line :
# Required for external TLS termination with# ingress-nginx v0.22+
ingress:
provider: nginx
options:
use-forwarded-headers: "true"
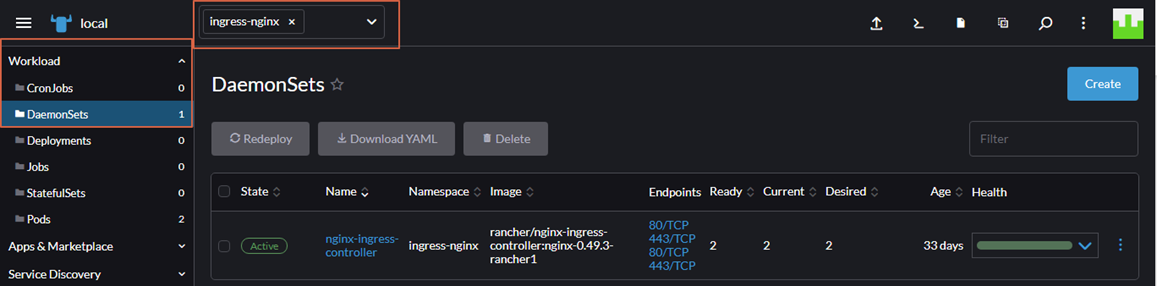
After Nginx has been installed in Kubernetes, we can verify it using Rancher Web UI
1. Change your namespace to ingress-nginx
2. Click Workload – DaemonSets, then we will see nginx-ingress-controller
B. Create a New Project with the Name “IngressCR”
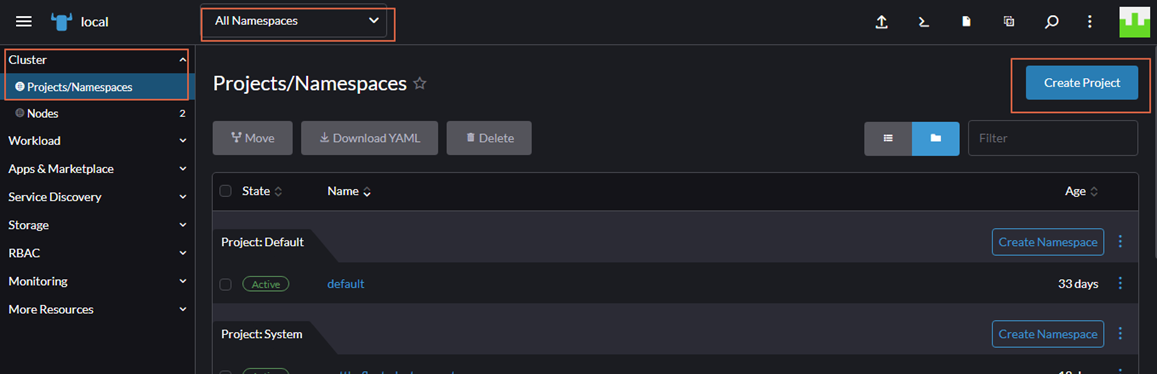
Next step, we will create a new Project in Kubernetes.
1. Change the view using “All Namespaces” – Click “Cluster” – Click “Project/Namespaces” then Click “Create Project” Button
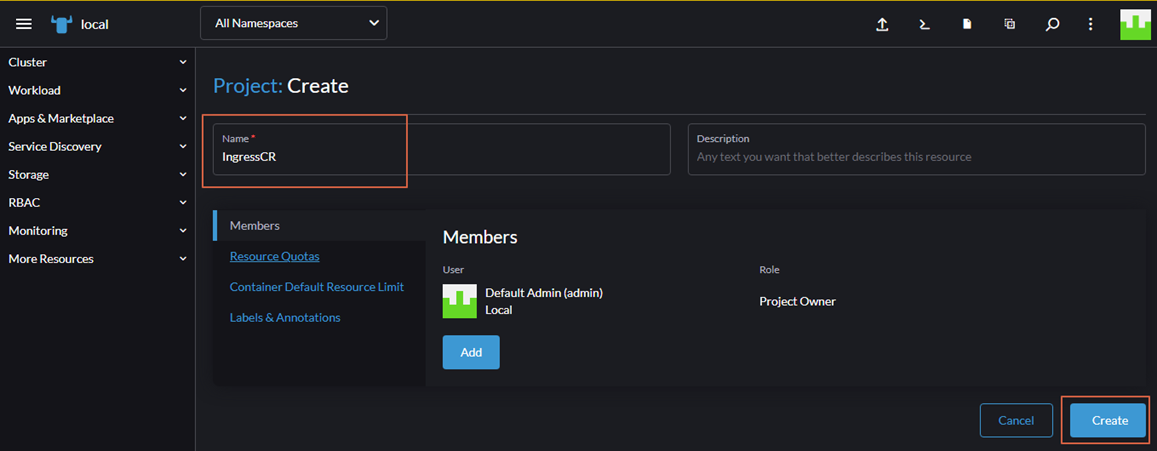
2. We will be redirected to the new Window. Fill Name of the Project with IngressCR, then click Create.
3. Next, we will create a new namespace for our website. In Project, IngressCR, click “Create Namespace” button.

4. In the new Window, fill the Name with “ingressns” to create our namespace.
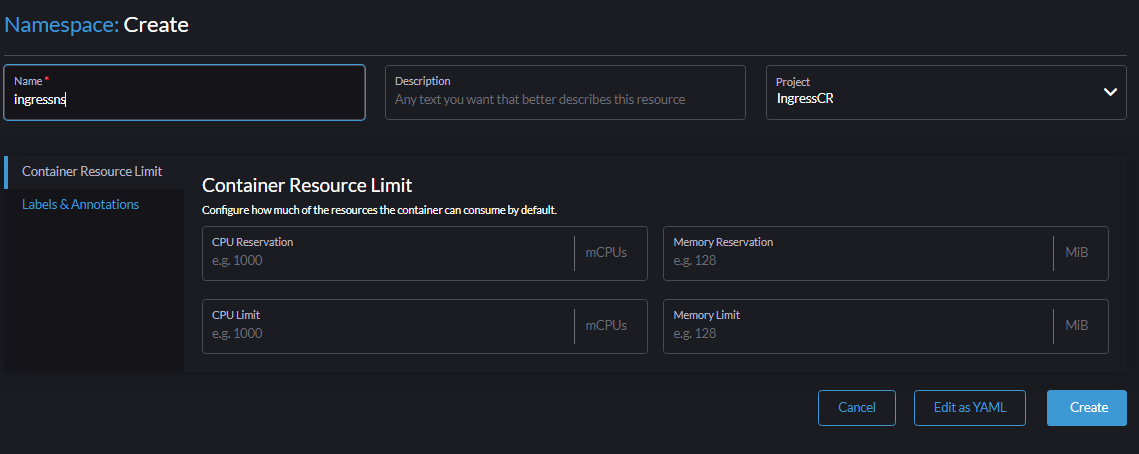
Now we have namespace IngressNS in our Kubernetes server.

C. Create Two Subdomains with Names apple.serverstadium.com and orange.serverstadium.com
In the next steps, we will create two subdomains and a simple site for both websites because we only want to know how the Nginx Ingress Controller works with SSL.
Change our namespace to ingressns then we will create a deployment for both websites.
Click Workload – Deployment
The first subdomain fills the field as follows:Namespace : ingressns
Name : appleContainer Name : nginx
Container Image : nginx
Ports :
Service Type : ClusterIP
Name : nginx-svc
Private Container Port : 80
Protocol : TCP
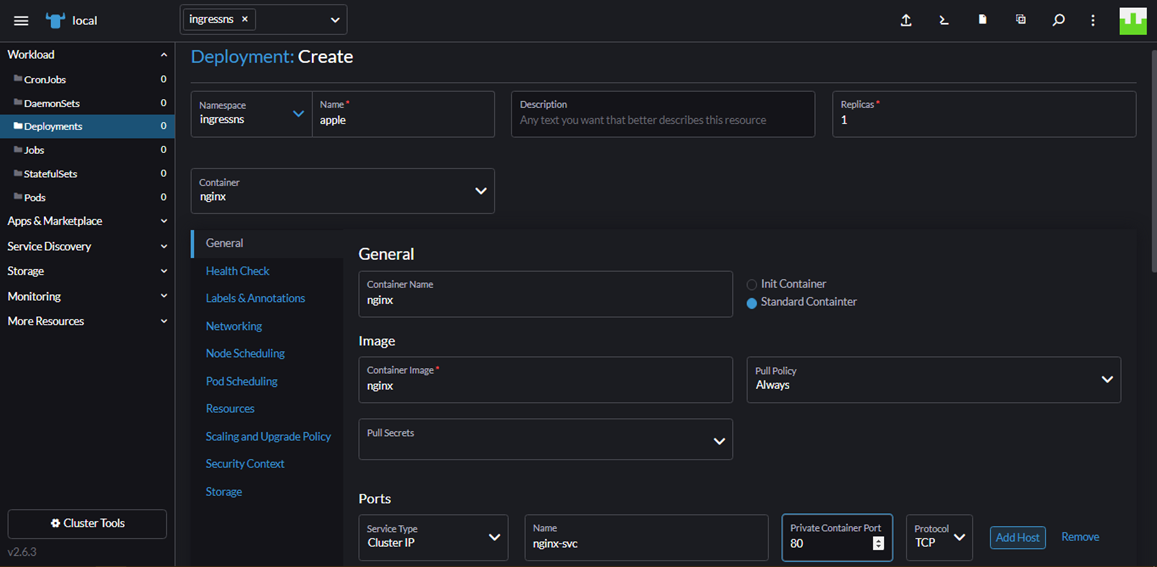
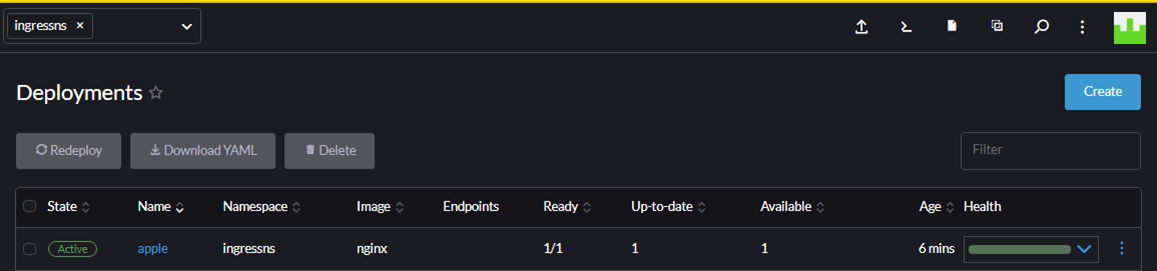
Then click Create. Please wait for a while until deployment creates the pods.
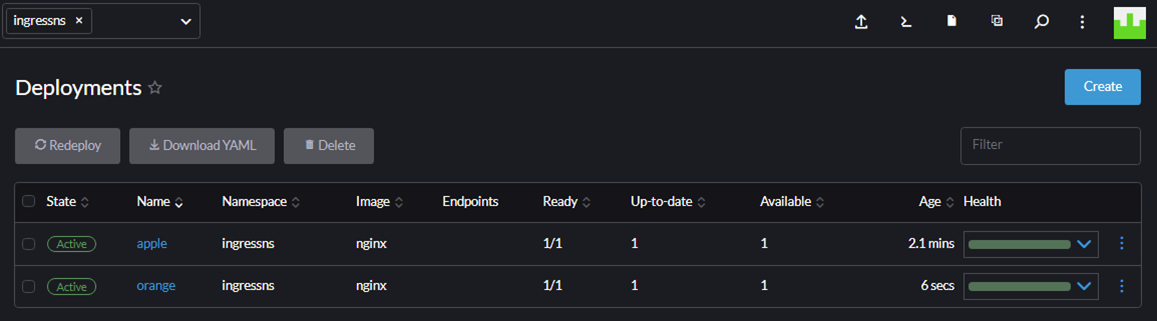
After Apple’s Deployment state is Active, we can create a new deployment for orange.serverstadium.com with the same steps.
Below is the screenshot after we create two subdomains in Rancher.
D. Install SSL in Kubernetes
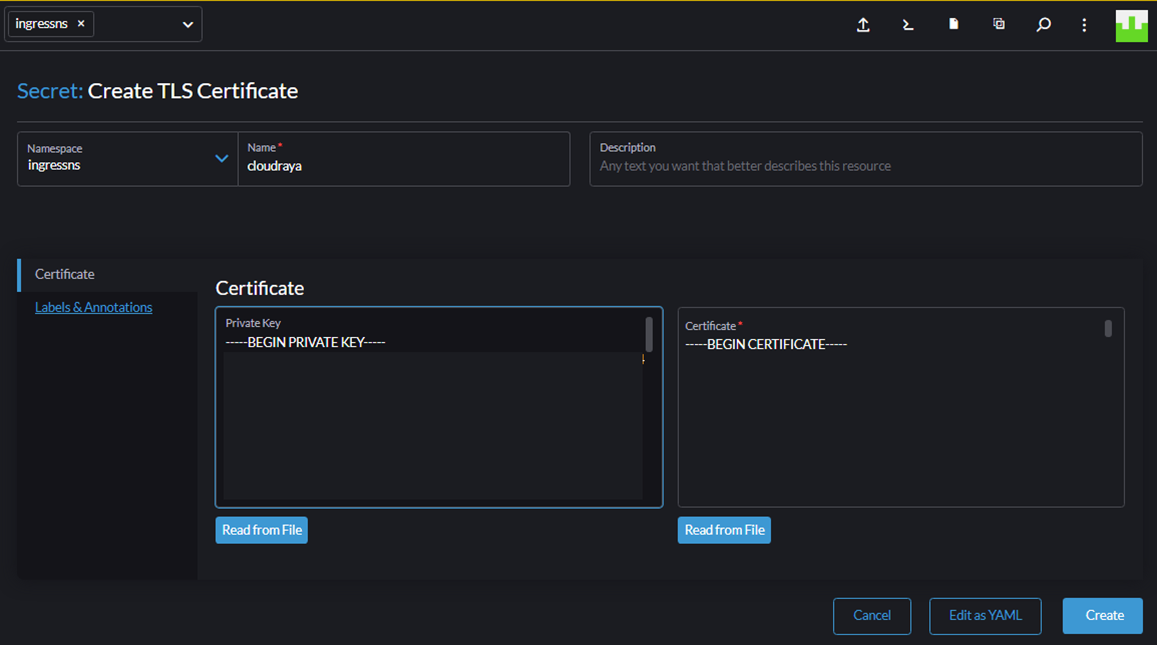
In the next steps, we will add our SSL certificate in Rancher.
Click Storage – Secrets, then Choose Create Button
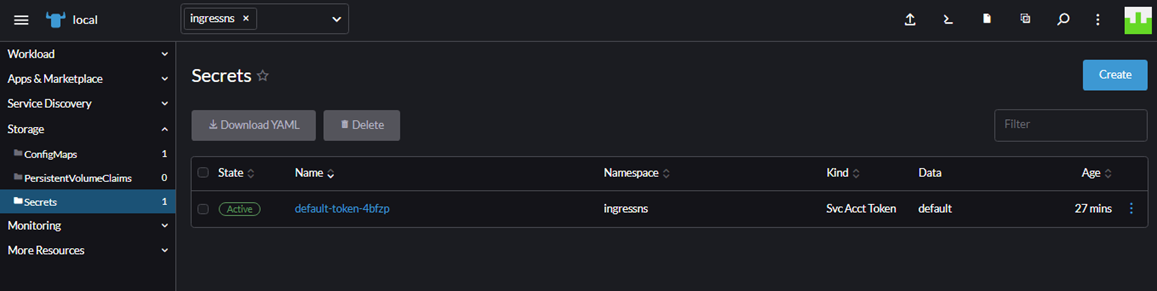
In the new windows, we choose TLS Certificate

Fill in the field as follow :Name : Cloudraya (name of your certificate)
Certificate : Insert your Private key and Certificate
Click Create
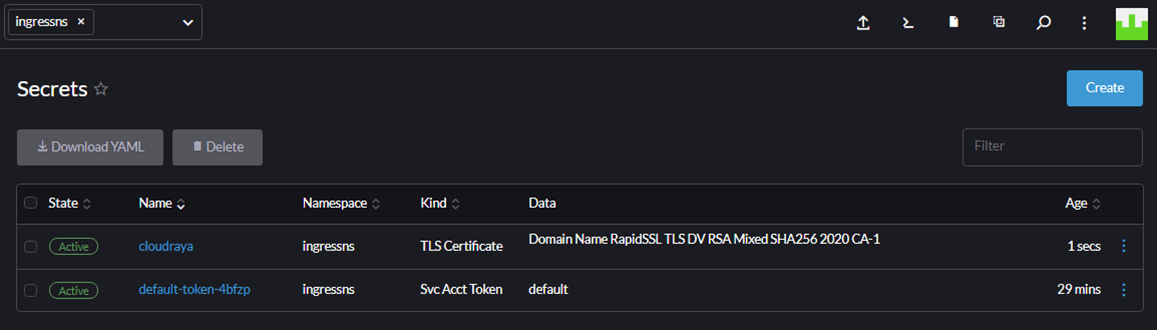
Below is the screenshot after we successfully added the certificate.
E. Configure Ingress Controller for Both Subdomains with SSL
After we configure the website and certificate, we are ready to create an ingress for both domains (apple.serverstadium.com and orange.serverstadium.com)
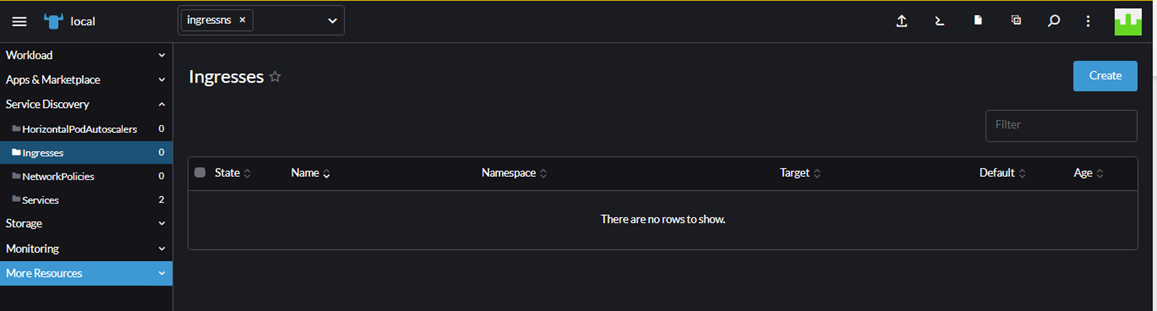
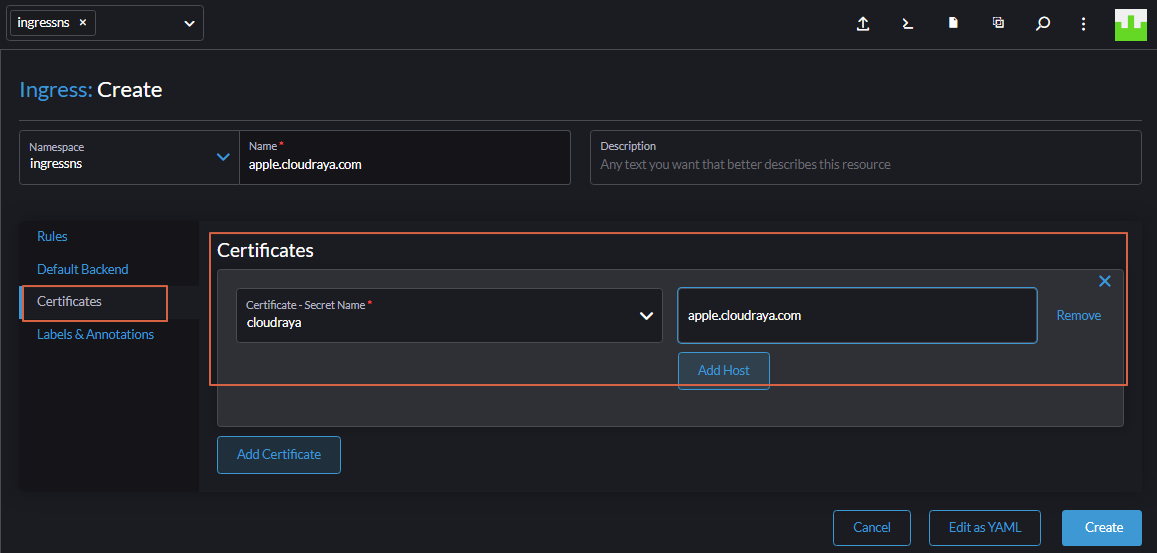
Please make sure our namespace is in ingresses. On the left page, choose Service Discovery – Ingresses, then click Create
In the new Window, fill the field as follow:Name : apple.serverstadium.comRequest Host : apple.serverstadium.com
Path : Prefix
/Target Service : apple
Port : 80
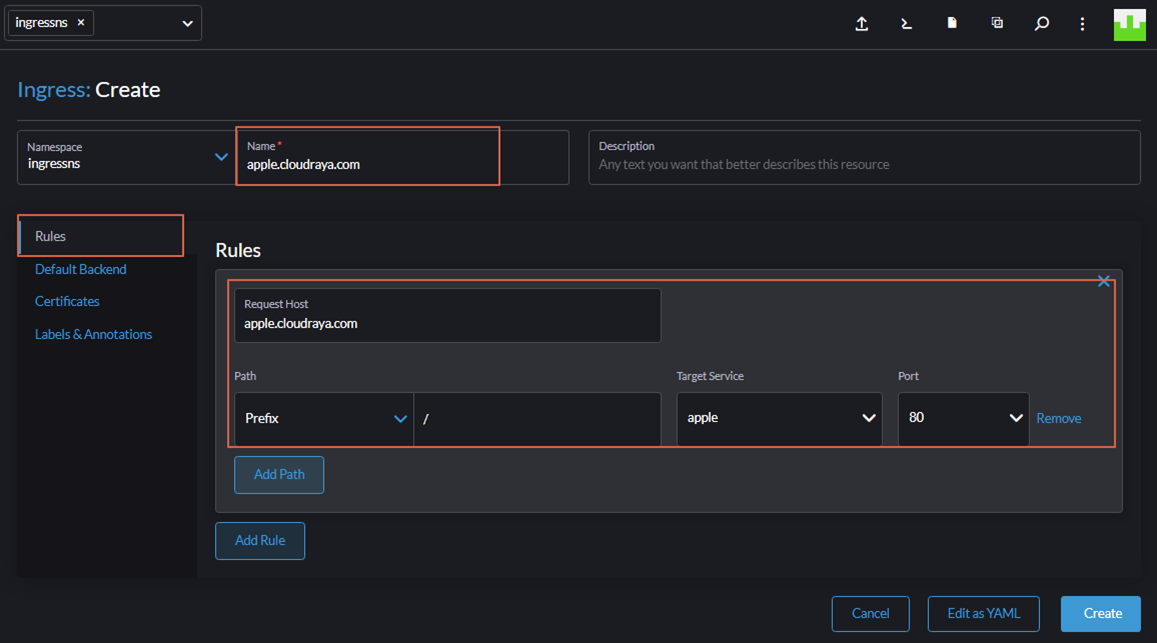
Select Certificates
Certificate-Secret Name: Choose serverstadium secret that we have created before.
Fill the hostname with apple.serverstadium.com
Then click Create
Below is the screenshot after we successfully created the Ingress
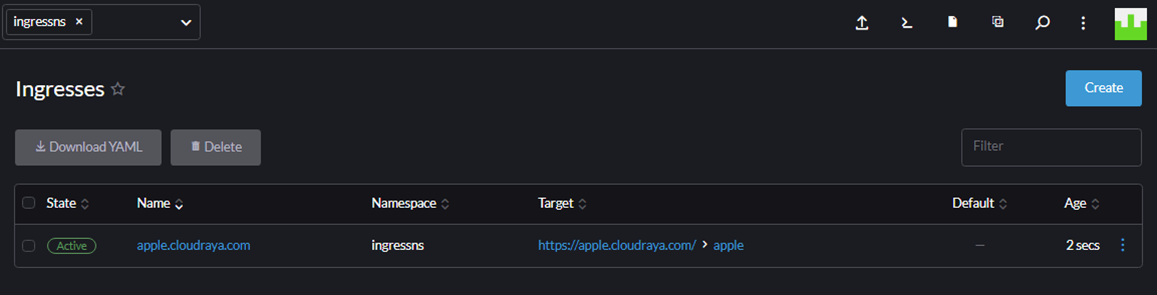
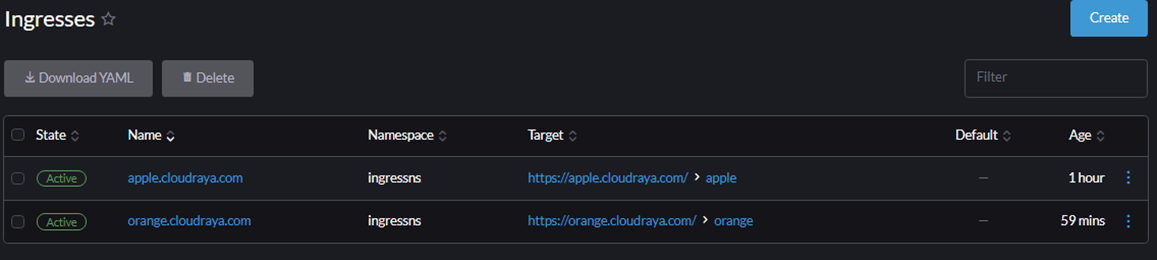
Please do the same step to create orange.serverstadium.com until we have two ingresses in Kubernetes
F. Configure ServerStadium Cloud Load Balancer
Like the previous article at this link, we assign Load Balancer IP Address for Rancher.
This IP Address is the same IP Address for Ingress Controller for Kubernetes.
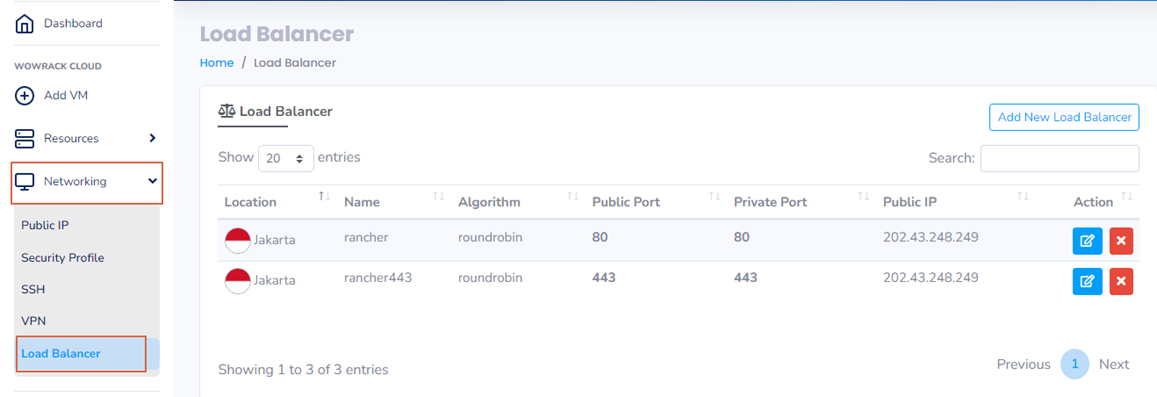
Point A record of both subdomains to IP 202.43.248.249; then we can browse it via browser.

Wow, we have successfully created Ingress in Kubernetes with SSL in ServerStadium Cloud!
Get more applicable articles on tutorials in our Knowledge Base. Or, if you have questions, feel free to contact us!