

How to Install Nextcloud on ServerStadium Cloud
Nextcloud is an open-source file-sync and file collaboration server which can be used for self-host. It also comes with an Enterprise Edition with enterprise support.
There are various methods to deploy Nextcloud :
- Manual install
- Docker image
- Web installer
This article will guide you on installing Nextcloud in ServerStadium using Manual install and Docker.
Server Requirements
Server OS:
- Ubuntu 20.04 LTS (recommended)
- Red Hat Enterprise Linux 8 (recommended)
- Debian 10 (Buster)
- SUSE Linux Enterprise Server 15
- openSUSE Leap 42.1+
- CentOS 8
Database:
- MySQL 8.0+ or MariaDB 10.2+ (recommended)
- Oracle Database 11g (only as part of an enterprise subscription)
- PostgreSQL 9.6/10/11/12/13
- SQLite (only recommended for testing and minimal-instances)
PHP runtime:
- 7.3
- 7.4 (recommended)
Manual Installation
Preparation
This section will guide you on preparing your server before installing it with Nextcloud.
Assuming that you’ve already installed and configured the server with LEMP stack. However, if you haven’t, you can read the following articles:
For RHEL 8 / CentOS 8, make sure you have turned off SELinux.
Ensure you are already allowed ports 80 and 443 globally in your Security Profile.
Getting Nextcloud Package
Get the latest Nextcloud package from here: https://download.nextcloud.com/server/releases/latest.tar.bz2
The above link will always point to the latest version of Nextcloud. But if you wish to install a specific version, you can find it here: https://download.nextcloud.com/server/releases/
Download the file using curl
cd
curl -O https://download.nextcloud.com/server/releases/latest.tar.bz2
Then extract it to somewhere you wish, but by default, it usually goes to /var/www/, for Ubuntu 20.04:
cd
tar -C /var/www -xvf latest.tar.bz2
For RHEL 8 / CentOS 8 , you will need to install bzip2 package first:
dnf install bzip2 -y
mkdir -p /var/www
tar -C /var/www -xvf latest.tar.bz2
Next, you need to change the owner of the extracted Nextcloud folder. It must be matched with the user, defined in the web server settings. The default user on Ubuntu is www-data, on RHEL 8 / CentOS 8; however, you will have to match the ownership as the web server you are using, either apache or nginx.
chown -R www-data.www-data /var/www/nextcloud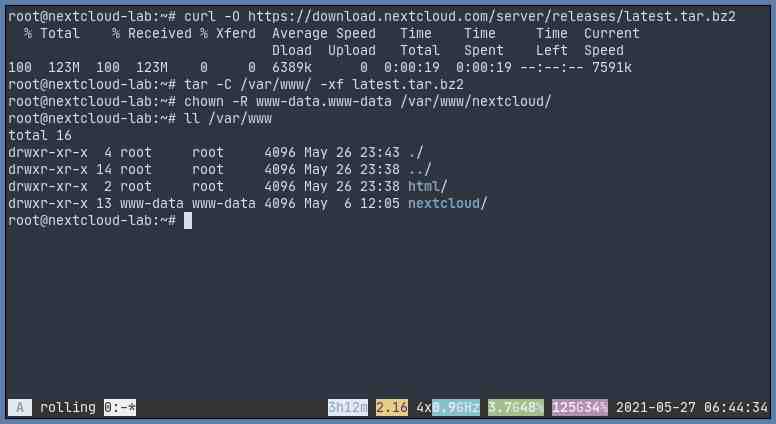
Creating Database and Database User
Create a database and a database user for our Nextcloud instance.
mysql -uroot -p
CREATE DATABASE nextclouddb;
CREATE USER 'dbuser'@'localhost' IDENTIFIED BY 'password';
GRANT ALL PRIVILEGES ON nextclouddb.* TO 'dbuser'@'localhost';
FLUSH PRIVILEGES;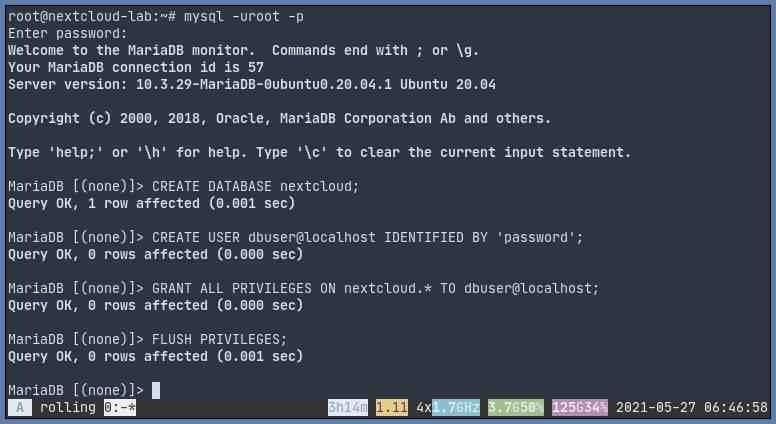
PHP Modules
Install the following PHP 7.4 modules
Ubuntu 20.04
apt install php7.4-common php7.4-curl php7.4-gd php7.4-gd php7.4-json php7.4-xml php7.4-mbstring php7.4-zip php7.4-mysql php7.4-gmp php7.4-ldap php7.4-bcmath php7.4-bz2 php7.4-imap php7.4-intl php7.4-apcu php7.4-imagick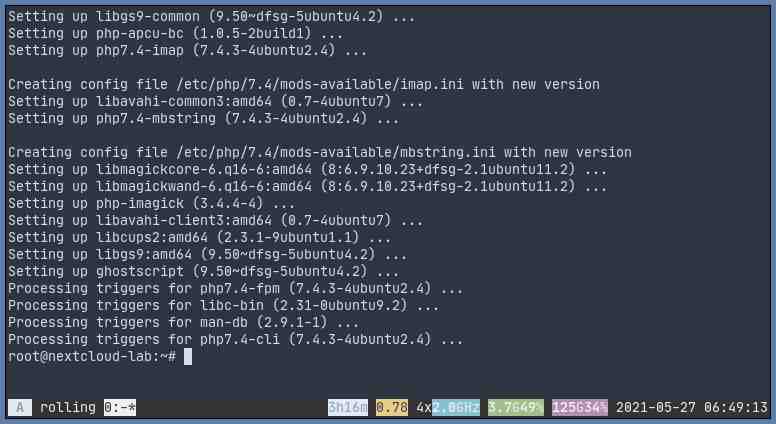
RHEL 8 / CentOS 8
Don’t forget to enable PHP 7.4 module
dnf module enable php:7.4
dnf install php-common php-curl php-gd php-json php-xml php-mysqlnd php-mbstring php-zip php-gmp php-ldap php-bcmath php-bz2 php-intl php-apcu php-imagick
PHP Configuration
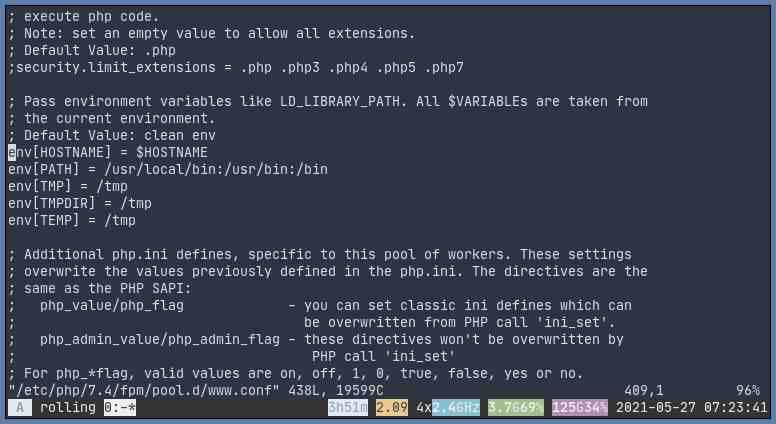
Modify the following lines in your www.conf. For Ubuntu 20.04, it should be located in /etc/php/7.4/fpm/pool.d/www.conf and for RHEL 8 / CentOS 8, it’s normally located in /etc/php-fpm.d/www.conf
;env[HOSTNAME] = $HOSTNAME
;env[PATH] = /usr/local/bin:/usr/bin:/bin
;env[TMP] = /tmp
;env[TMPDIR] = /tmp
;env[TEMP] = /tmp
Make sure those lines are uncommented.
Then restart php-fpm
Ubuntu : systemctl restart php7.4-fpm
RHEL 8 / CentOS 8 : systemctl restart php-fpm
Webserver – Nginx
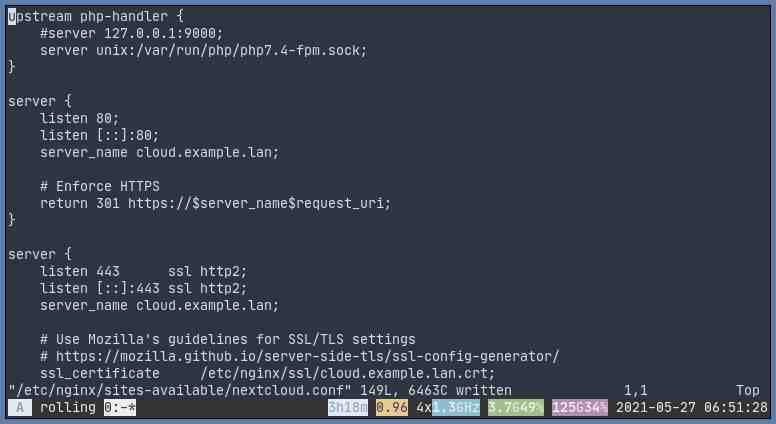
You need to create a new server block for nextcloud.conf which will serve Nextcloud files.
upstream php-handler {
    #server 127.0.0.1:9000;
    server unix:/var/run/php/php7.4-fpm.sock;
}

server {
    listen 80;
    listen [::]:80;
    server_name cloud.example.com;

    # Enforce HTTPS
    return 301 https://$server_name$request_uri;
}

server {
    listen 443      ssl http2;
    listen [::]:443 ssl http2;
    server_name cloud.example.com;

    # Use Mozilla's guidelines for SSL/TLS settings
    # <https://mozilla.github.io/server-side-tls/ssl-config-generator/>
    ssl_certificate     /etc/ssl/nginx/cloud.example.com.crt;
    ssl_certificate_key /etc/ssl/nginx/cloud.example.com.key;

    # HSTS settings
    # WARNING: Only add the preload option once you read about
    # the consequences in <https://hstspreload.org/>. This option
    # will add the domain to a hardcoded list that is shipped
    # in all major browsers and getting removed from this list
    # could take several months.
    #add_header Strict-Transport-Security "max-age=15768000; includeSubDomains; preload;" always;

    # set max upload size
    client_max_body_size 512M;
    fastcgi_buffers 64 4K;

    # Enable gzip but do not remove ETag headers
    gzip on;
    gzip_vary on;
    gzip_comp_level 4;
    gzip_min_length 256;
    gzip_proxied expired no-cache no-store private no_last_modified no_etag auth;
    gzip_types application/atom+xml application/javascript application/json application/ld+json application/manifest+json application/rss+xml application/vnd.geo+json application/vnd.ms-fontobject application/x-font-ttf application/x-web-app-manifest+json application/xhtml+xml application/xml font/opentype image/bmp image/svg+xml image/x-icon text/cache-manifest text/css text/plain text/vcard text/vnd.rim.location.xloc text/vtt text/x-component text/x-cross-domain-policy;

    # Pagespeed is not supported by Nextcloud, so if your server is built
    # with the `ngx_pagespeed` module, uncomment this line to disable it.
    #pagespeed off;

    # HTTP response headers borrowed from Nextcloud `.htaccess`
    add_header Referrer-Policy                      "no-referrer"   always;
    add_header X-Content-Type-Options               "nosniff"       always;
    add_header X-Download-Options                   "noopen"        always;
    add_header X-Frame-Options                      "SAMEORIGIN"    always;
    add_header X-Permitted-Cross-Domain-Policies    "none"          always;
    add_header X-Robots-Tag                         "none"          always;
    add_header X-XSS-Protection                     "1; mode=block" always;

    # Remove X-Powered-By, which is an information leak
    fastcgi_hide_header X-Powered-By;

    # Path to the root of your installation
    root /var/www/nextcloud;

    # Specify how to handle directories -- specifying `/index.php$request_uri`
    # here as the fallback means that Nginx always exhibits the desired behaviour
    # when a client requests a path that corresponds to a directory that exists
    # on the server. In particular, if that directory contains an index.php file,
    # that file is correctly served; if it doesn't, then the request is passed to
    # the front-end controller. This consistent behaviour means that we don't need
    # to specify custom rules for certain paths (e.g. images and other assets,
    # `/updater`, `/ocm-provider`, `/ocs-provider`), and thus
    # `try_files $uri $uri/ /index.php$request_uri`
    # always provides the desired behaviour.
    index index.php index.html /index.php$request_uri;

    # Rule borrowed from `.htaccess` to handle Microsoft DAV clients
    location = / {
        if ( $http_user_agent ~ ^DavClnt ) {
            return 302 /remote.php/webdav/$is_args$args;
        }
    }

    location = /robots.txt {
        allow all;
        log_not_found off;
        access_log off;
    }

    # Make a regex exception for `/.well-known` so that clients can still
    # access it despite the existence of the regex rule
    # `location ~ /(\\.|autotest|...)` which would otherwise handle requests
    # for `/.well-known`.
    location ^~ /.well-known {
        # The following 6 rules are borrowed from `.htaccess`

        rewrite ^/\\.well-known/host-meta\\.json  /public.php?service=host-meta-json  last;
        rewrite ^/\\.well-known/host-meta        /public.php?service=host-meta       last;
        rewrite ^/\\.well-known/webfinger        /public.php?service=webfinger       last;
        rewrite ^/\\.well-known/nodeinfo         /public.php?service=nodeinfo        last;

        location = /.well-known/carddav     { return 301 /remote.php/dav/; }
        location = /.well-known/caldav      { return 301 /remote.php/dav/; }

        try_files $uri $uri/ =404;
    }

    # Rules borrowed from `.htaccess` to hide certain paths from clients
    location ~ ^/(?:build|tests|config|lib|3rdparty|templates|data)(?:$|/)  { return 404; }
    location ~ ^/(?:\\.|autotest|occ|issue|indie|db_|console)              { return 404; }

    # Ensure this block, which passes PHP files to the PHP process, is above the blocks
    # which handle static assets (as seen below). If this block is not declared first,
    # then Nginx will encounter an infinite rewriting loop when it prepends `/index.php`
    # to the URI, resulting in a HTTP 500 error response.
    location ~ \\.php(?:$|/) {
        fastcgi_split_path_info ^(.+?\\.php)(/.*)$;
        set $path_info $fastcgi_path_info;

        try_files $fastcgi_script_name =404;

        include fastcgi_params;
        fastcgi_param SCRIPT_FILENAME $document_root$fastcgi_script_name;
        fastcgi_param PATH_INFO $path_info;
        fastcgi_param HTTPS on;

        fastcgi_param modHeadersAvailable true;         # Avoid sending the security headers twice
        fastcgi_param front_controller_active true;     # Enable pretty urls
        fastcgi_pass php-handler;

        fastcgi_intercept_errors on;
        fastcgi_request_buffering off;
    }

    location ~ \\.(?:css|js|svg|gif)$ {
        try_files $uri /index.php$request_uri;
        expires 6M;         # Cache-Control policy borrowed from `.htaccess`
        access_log off;     # Optional: Don't log access to assets
    }

    location ~ \\.woff2?$ {
        try_files $uri /index.php$request_uri;
        expires 7d;         # Cache-Control policy borrowed from `.htaccess`
        access_log off;     # Optional: Don't log access to assets
    }

    location / {
        try_files $uri $uri/ /index.php$request_uri;
    }
}
You’ll need to adjust the server_name to match your domain, and don’t forget to fix the SSL certificate and key location as well. You may also need to modify the php-fpm configuration, whether you use a Unix socket or not.
For the certificate, you might want to put your commercially signed certificate or use letsencrypt or even a self-signed one. Here’s how to generate a self-signed certificate: LINK
Ubuntu 20.04
Place the configuration on /etc/nginx/sites-available then you’ll have to do this to activate it:
cd /etc/nginx/sites-enabled
ln -s ../sites-available/nextcloud.conf .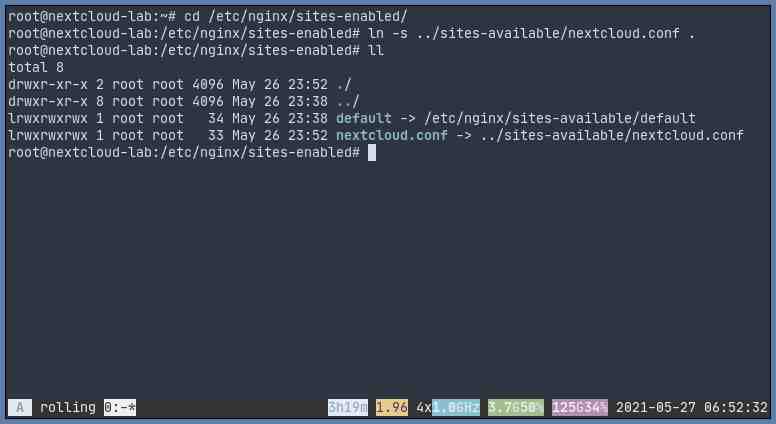
RHEL 8 / CentOS 8
Put the configuration on /etc/nginx/conf.d/
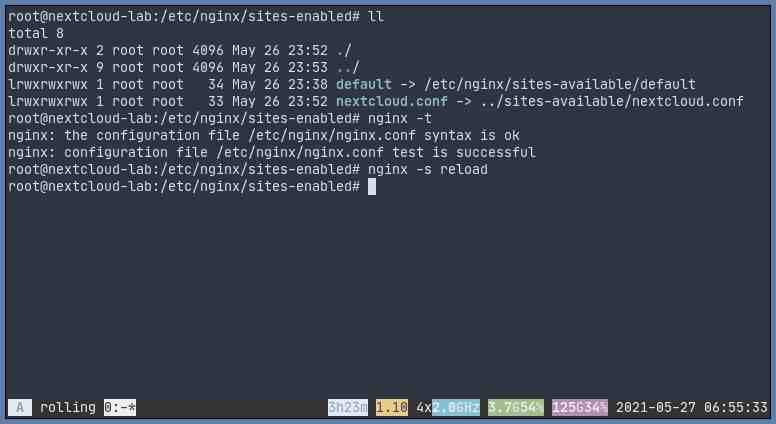
Then make sure that the configuration is correct and then reload nginx:
# check configurations
nginx -t
# reload nginx
nginx -s reload
For RHEL 8 / CentOS 8, you might need to adjust your php-fpm configuration if it’s not done yet. Find the below lines in /etc/php-fpm.d/www.conf and change the values accordingly:
..
user = nginx
group = nginx
..
listen.owner = nginx
listen.group = nginx
..
Later on, after Nextcloud installation, if you encounter a login redirect loop, you might want to check the ownership of /var/lib/php/session to make sure it’s owned by nginx group at least.
Installing Nextcloud
Open your browser and access your predefined domain. Mine was https://cloud.example.lan. Then fill out the fields with the required data. For the Data Folder field, if you’re unsure, then just leave it untouched.
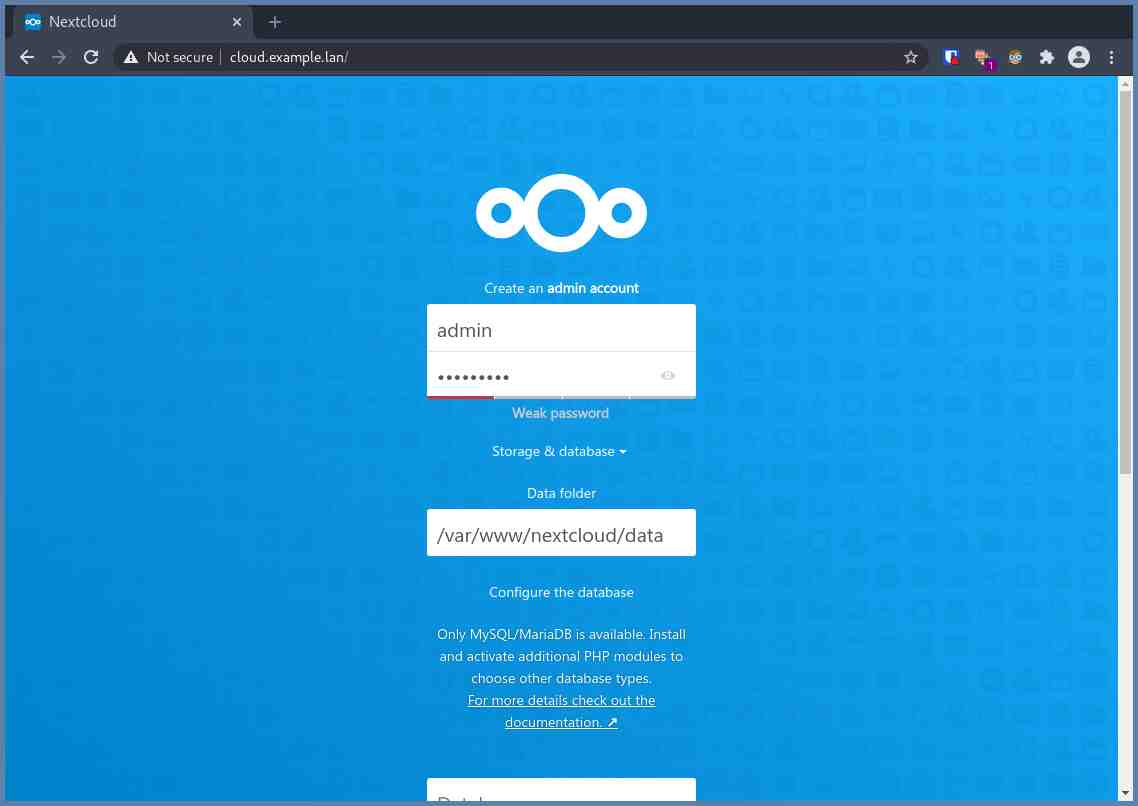
After filling out everything, then click Finish setup.
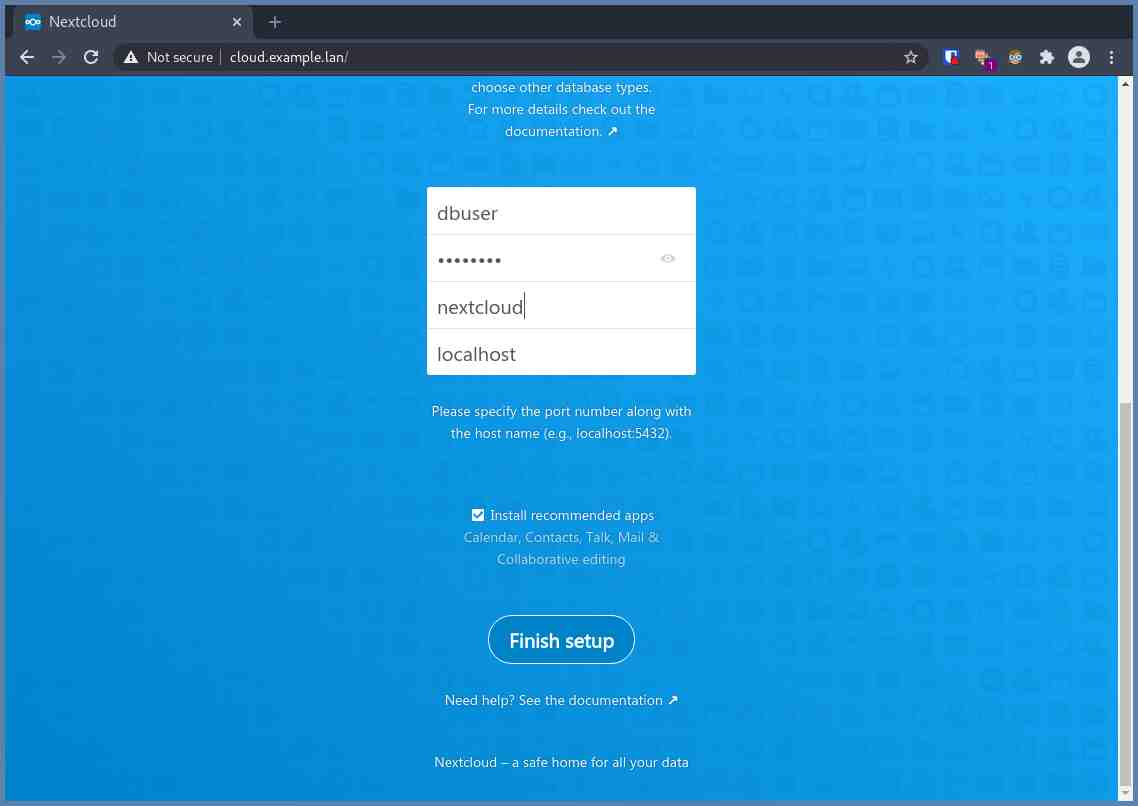
Wait for the installation and pay attention, do not close this tab / browser until the installation finishes.
The last thing to do is go to https://YOUR_NEXCLOUD_DOMAIN/settings/admin/overview and do what the checklist says. It’s to make sure that your setup is complete.
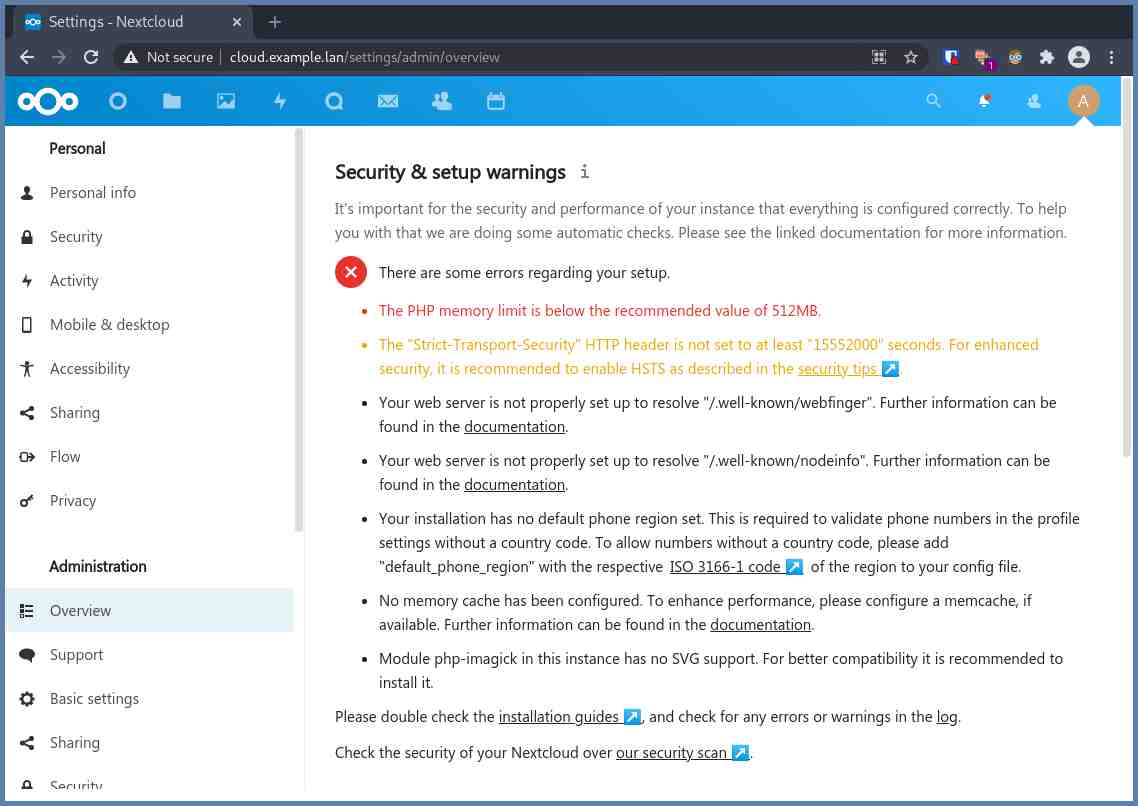
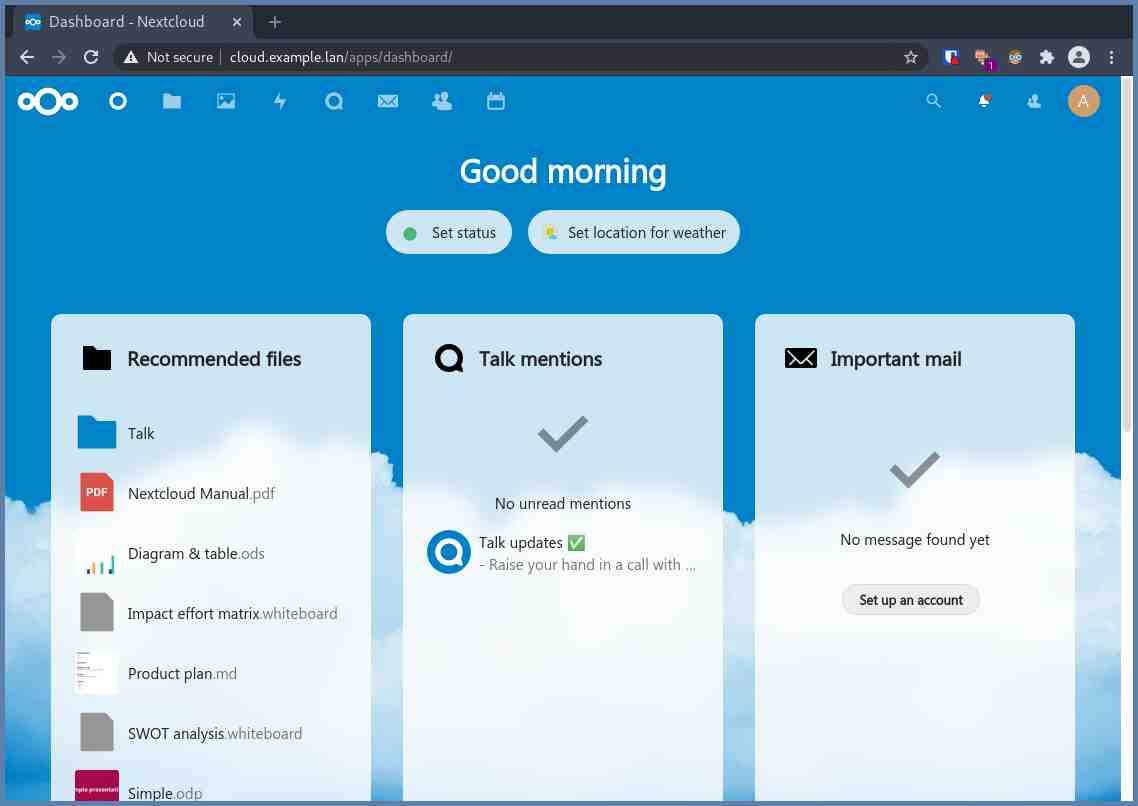
Once you complete them, then your Nextcloud is ready to be used! Yay
Docker Image
Deploying Nextcloud using Docker image is a lot easier than the manual one. You’ll need to pull the nextcloud image and then run it. That’s it.
Assuming that you already have docker installed on your machine. But if you haven’t yet, you can read the tutorial via this link.
Here’s how to deploy Nextcloud using Docker
Docker Compose (recommended)
Copy and paste the following snippet and save it as docker-compose.yml
---
version: "2.1"
services:
  nextcloud:
    image: ghcr.io/linuxserver/nextcloud
    container_name: nextcloud
    environment:
      - PUID=1000
      - PGID=1000
      - TZ=Asia/Jakarta
    volumes:
      - /path/to/appdata:/config
      - /path/to/data:/data
    ports:
      - 443:443
    restart: unless-stopped
Make sure you have adjusted the necessary values to match your environment.
Finally, run the below command to deploy it:
docker-compose up
Docker CLI
Using docker-compose is preferred. You can easily make changes and then redeploy the container. But if you prefer the CLI way, here’s the snippet:
docker run -d \\
  --name=nextcloud \\
  -e PUID=1000 \\
  -e PGID=1000 \\
  -e TZ=Asia/Jakarta \\
  -p 443:443 \\
  -v /path/to/appdata:/config \\
  -v /path/to/data:/data \\
  --restart unless-stopped \\
  ghcr.io/linuxserver/nextcloud
As always, you’ll have to modify some values to match your environment.
Installation
The installation process is the same as the manual approach.
If you need a thorough guide, you can read the official documentation here: https://docs.nextcloud.com/server/latest/admin_manual/contents.html