

How to deploy Portainer on Linux to easily manage your docker containers
This article will talk about how to deploy portainer on linux. In short, portainer is a tool that lets you manage your Docker containers using a user-friendly GUI. You can also easily manage your Docker images, run application stacks, and even manage a Kubernetes cluster.
Portainer comes in two editions. Community Edition (CE) and Business Edition (BE). Portainer CE is free and open-source, while Portainer BE is a commercial version of Portainer. It offers dedicated support for sure.
Here we will focus on Portainer CE. So, let’s get right to it. Shall we?
TLDR (Too long didn’t read!)
- Install
docker-celatest - Install Portainer CE
docker volume create portainer_data
docker run -d -p 8000:8000 -p 9000:9000 --name=portainer --restart=always -v /var/run/docker.sock:/var/run/docker.sock -v portainer_data:/data portainer/portainer-ce:2.6.3- Access Portainer dashboard via
https://THE-IP:9443 - Do the initial setup as shown on the screen.
Enjoy!
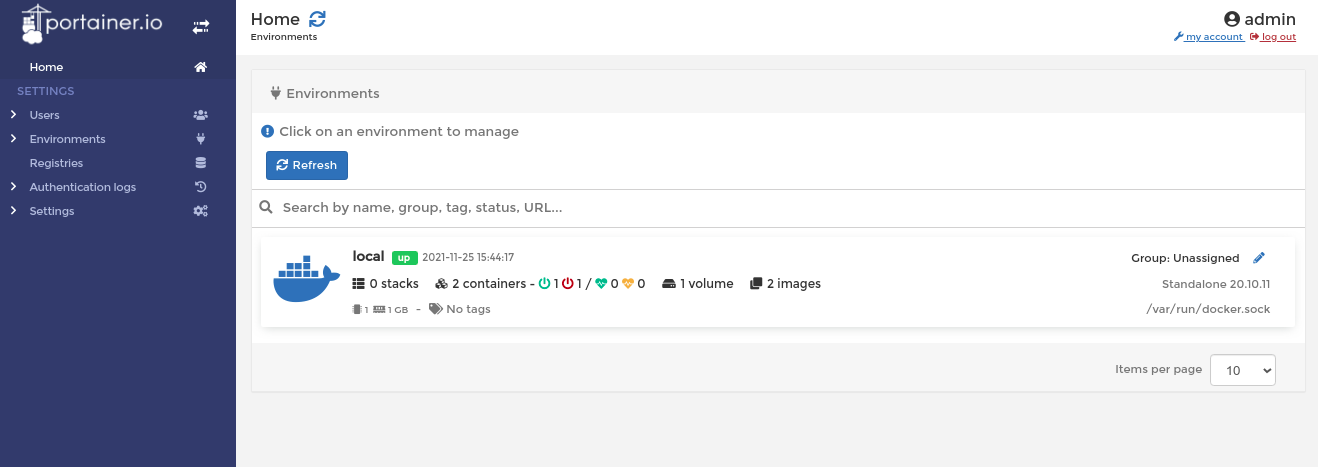
Portainer UI Overview
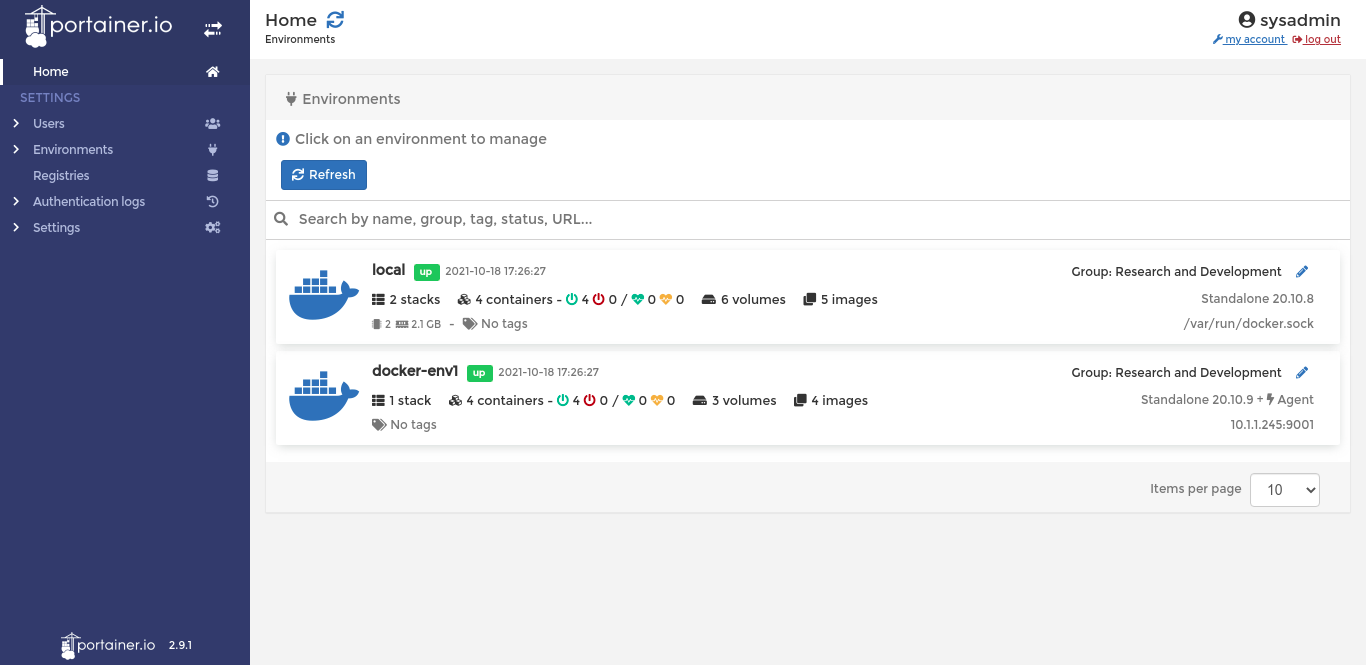
The main dashboard shows all connected environments. It could be either a local docker environment (the one in which the Portainer deployed), a remote docker environment, Kubernetes, etc.
If you click one of the environments, the left panel will show more menus that allow you to manage any docker things, from managing docker images, stack deployment, docker networks, volumes, etc.
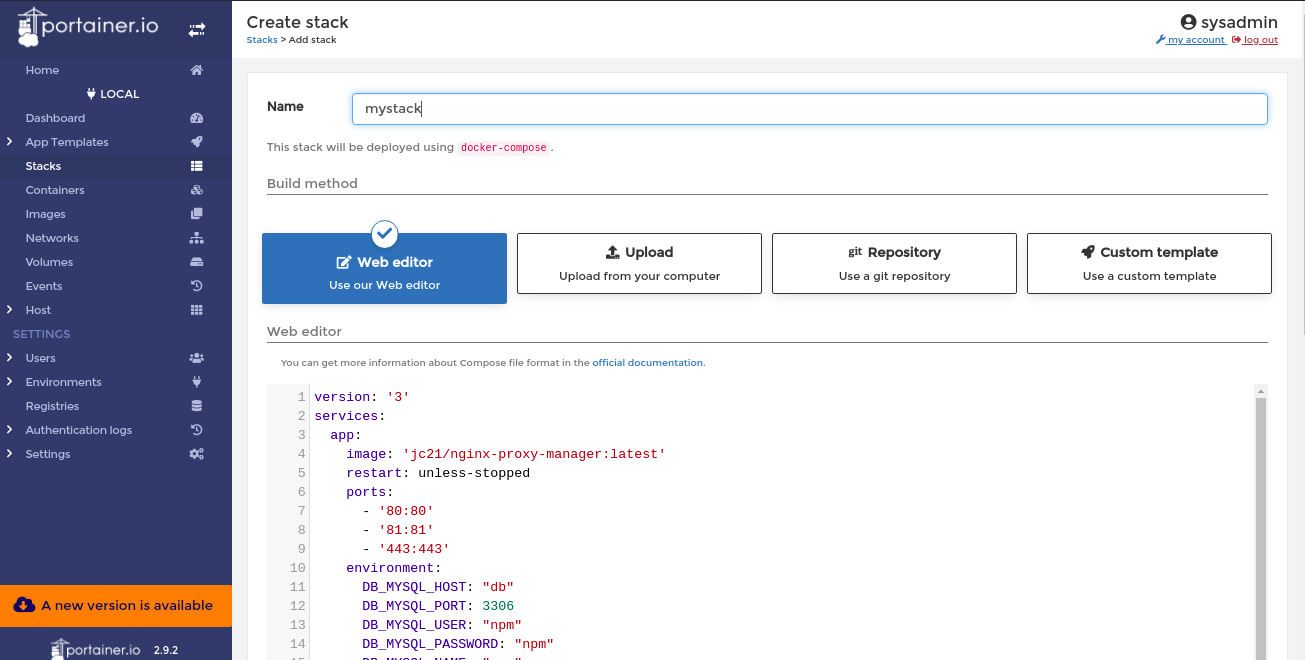
Portainer also allows you to deploy application stacks using a docker-compose-style yaml file.
And many more! I’ll let you discover it by yourself!
Step-by-step Installation Guide
Assuming that the server is a freshly installed system, then always do a full system upgrade before performing the installation:
For Debian/Ubuntu-based systems:
sudo apt update && sudo apt upgrade -yFor RHEL-based systems:
sudo yum upgrade -yInstalling Docker Engine
This part can be skipped if you already have docker in your system.
We will use the official Docker repository to retrieve the Docker binaries. First, import the official GPG key:
For Debian/Ubuntu-based systems only
curl -fsSL https://download.docker.com/linux/ubuntu/gpg | sudo gpg --dearmor -o /usr/share/keyrings/docker-archive-keyring.gpgThen proceed to import the repository:
For Debian/Ubuntu-based systems:
echo "deb [arch=$(dpkg --print-architecture) signed-by=/usr/share/keyrings/docker-archive-keyring.gpg] https://download.docker.com/linux/ubuntu $(lsb_release -cs) stable" | sudo tee /etc/apt/sources.list.d/docker.list > /dev/nullFor RHEL-based systems (make sure yum-utils has been installed)
sudo yum-config-manager --add-repo https://download.docker.com/linux/rhel/docker-ce.repoNext, install the Docker Engine:
For Debian/Ubuntu-based systems:
sudo apt-get update
sudo apt-get install docker-ce docker-ce-cli containerd.io
For RHEL-based systems:
sudo yum install docker-ce docker-ce-cli containerd.ioAfter the installation is done, make sure that docker services are running automatically on boot:
For both Debian and RHEL-based systems:
sudo systemctl enable docker --nowAnd finally, perform a test if the docker engine is running:
sudo docker run hello worldIt should output something like this:
Hello from Docker!
This message shows that your installation appears to be working correctly.

To generate this message, Docker took the following steps:
 1. The Docker client contacted the Docker daemon.
 2. The Docker daemon pulled the "hello-world" image from the Docker Hub.
    (amd64)
 3. The Docker daemon created a new container from that image which runs the
    executable that produces the output you are currently reading.
 4. The Docker daemon streamed that output to the Docker client, which sent it
    to your terminal.

To try something more ambitious, you can run an Ubuntu container with:
 $ docker run -it ubuntu bash

Share images, automate workflows, and more with a free Docker ID:
 https://hub.docker.com/

For more examples and ideas, visit:
 https://docs.docker.com/get-started/
An additional step, add your current user to docker group to allow running docker commands without sudo/root:
sudo usermod -aG docker $USERInstalling Portainer
This is the easiest part! Copy and paste these two commands, and BOOM, you have your own Portainer installed.
First, create a docker volume to make Portainer configurations persistent
docker volume create portainer_dataThen run the Portainer container. Run it as-is unless you want to modify some configurations:
docker run -d -p 8000:8000 -p 9443:9443 --name portainer \
    --restart=always \
    -v /var/run/docker.sock:/var/run/docker.sock \
    -v portainer_data:/data \
    cr.portainer.io/portainer/portainer-ce:2.9.3
And make sure it’s running by doing docker ps command:
CONTAINER ID   IMAGE                                          COMMAND        CREATED              STATUS              PORTS                                                                                            NAMES
f27917cf9cca   cr.portainer.io/portainer/portainer-ce:2.9.3   "/portainer"   About a minute ago   Up About a minute   0.0.0.0:8000->8000/tcp, :::8000->8000/tcp, 0.0.0.0:9443->9443/tcp, :::9443->9443/tcp, 9000/tcp   portainer
It exposes TCP port 8000 and 9443, and make sure to allow them in your Firewall configuration and in the Security Profile as well.
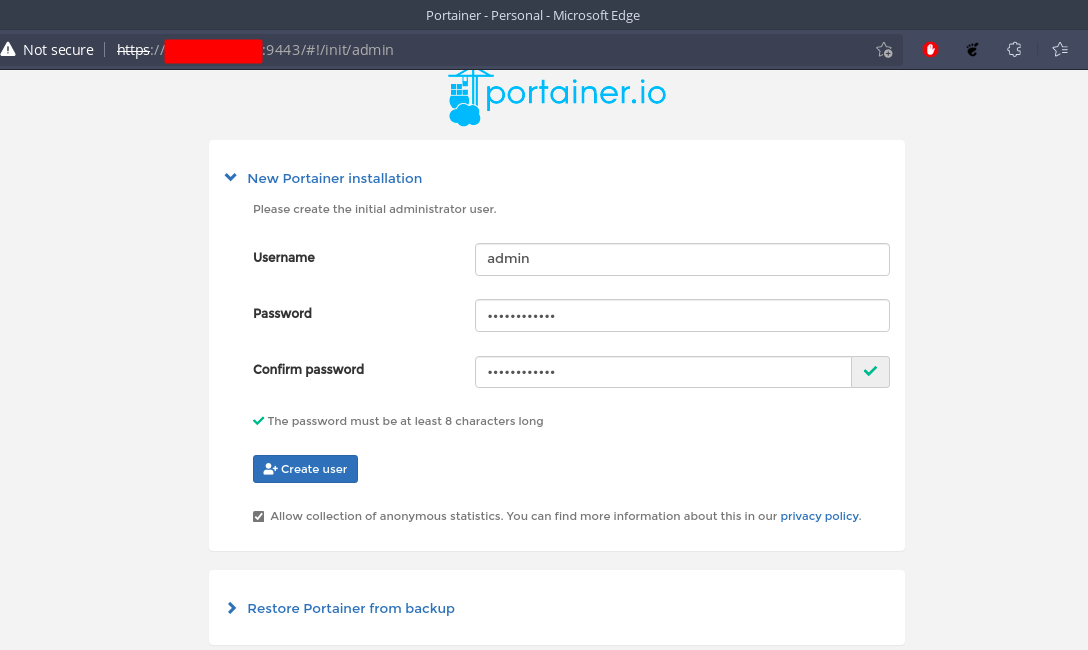
Initial Setup
Access your Portainer dashboard via https://YOUR-IP:9443, and an initial setup page will show up. Fill in the required fields for the admin user. Then click Create User.
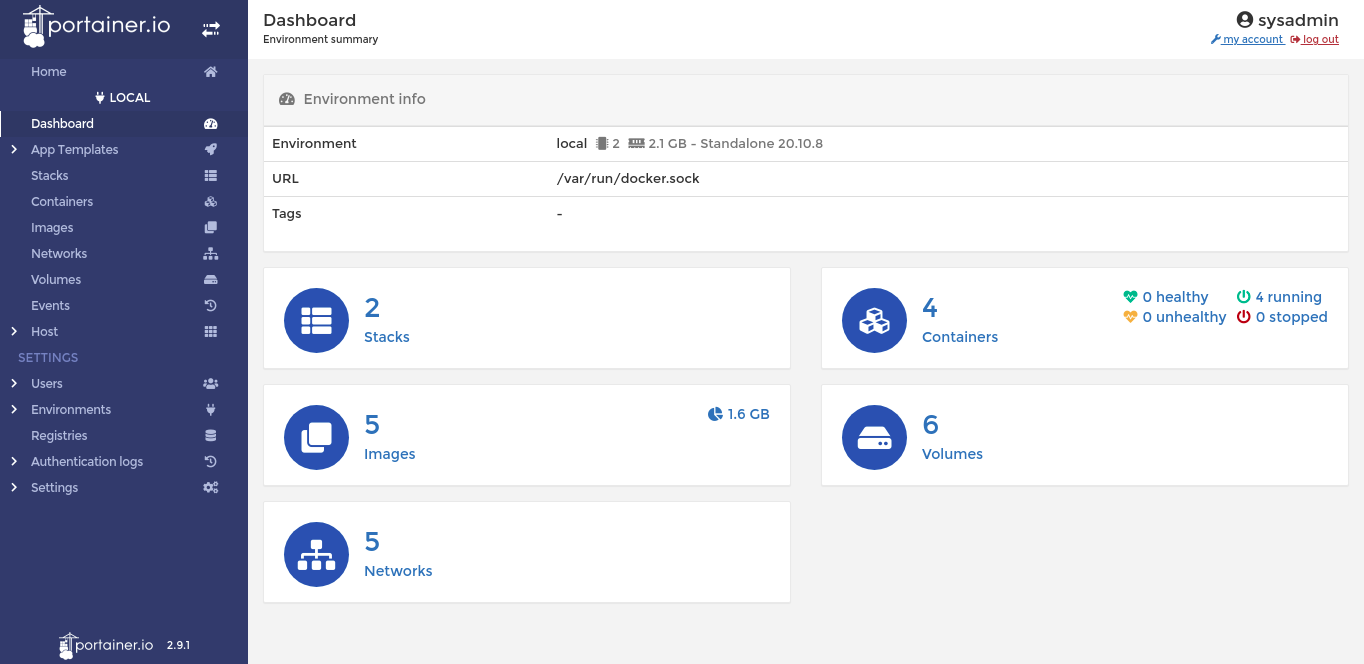
On the next page, click the Get Started option to configure the current local deployment install directly:
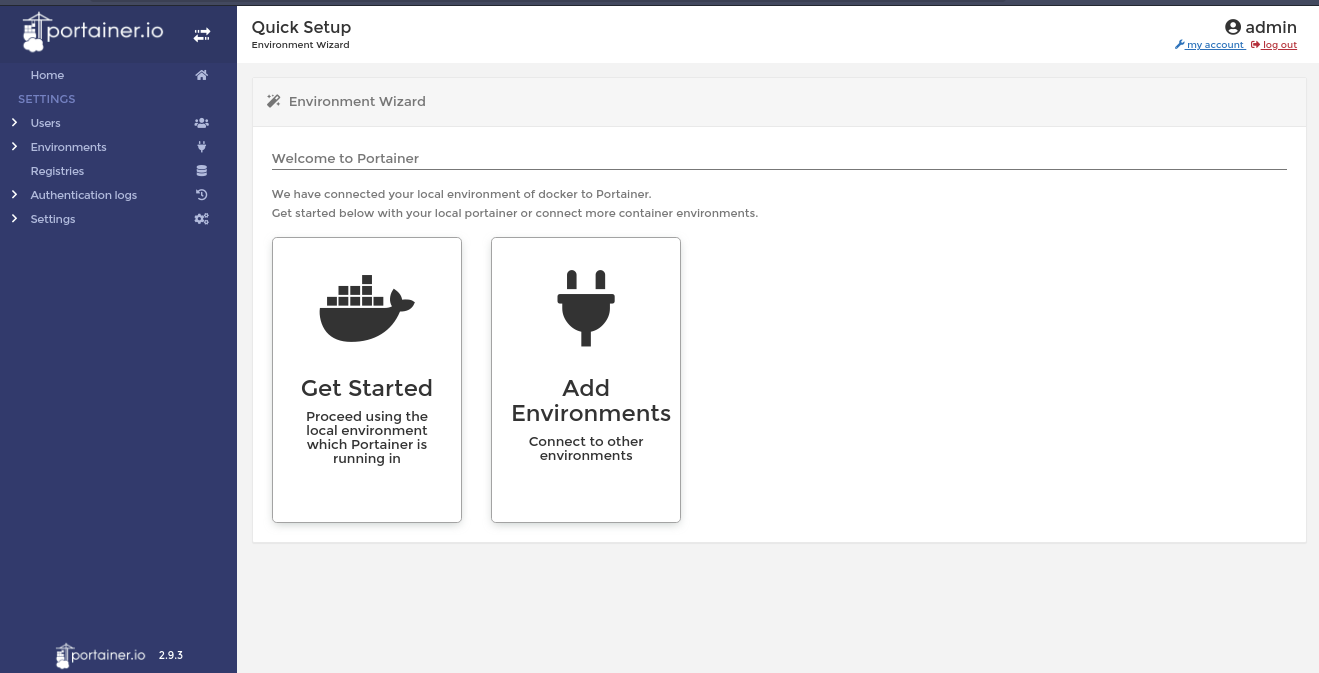
You’re all set! Now, you’re ready to use Portainer!
Deploy your first application.
This section will demonstrate how to deploy your first app via Portainer dashboard.
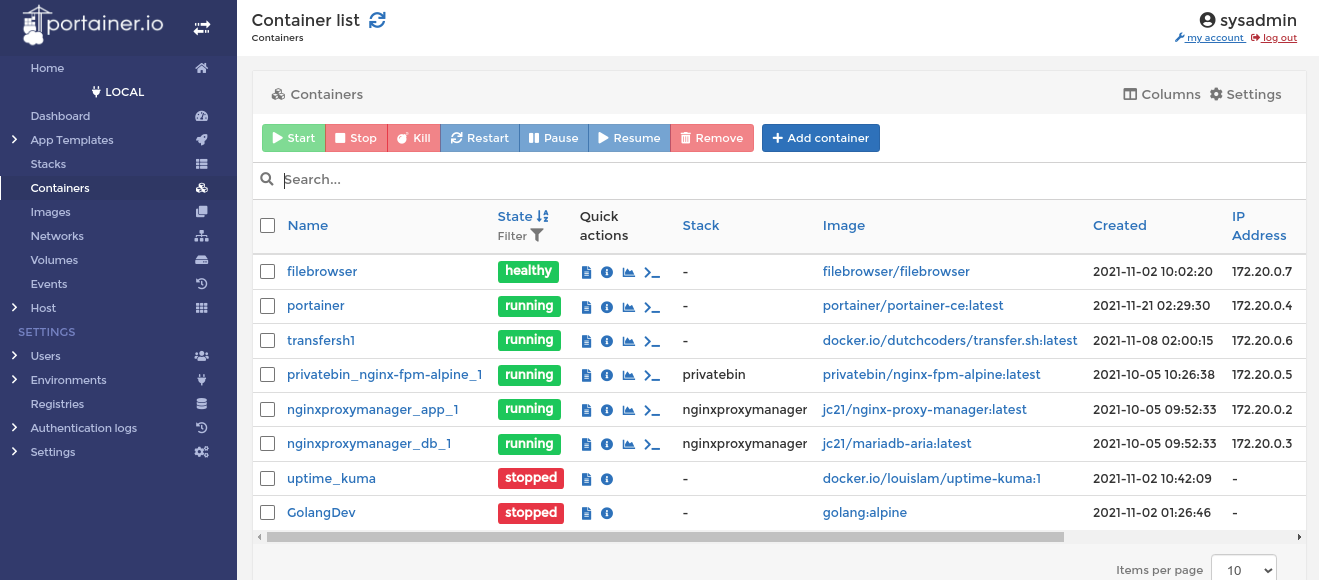
Go to Containers menu, click Add container
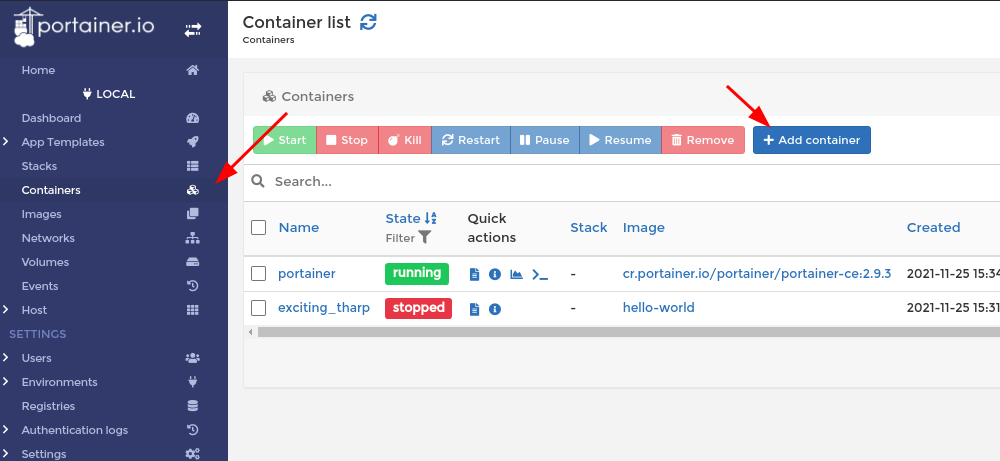
For this example, I will deploy a simple Nginx webserver. Fill in the necessary fields, like the following:
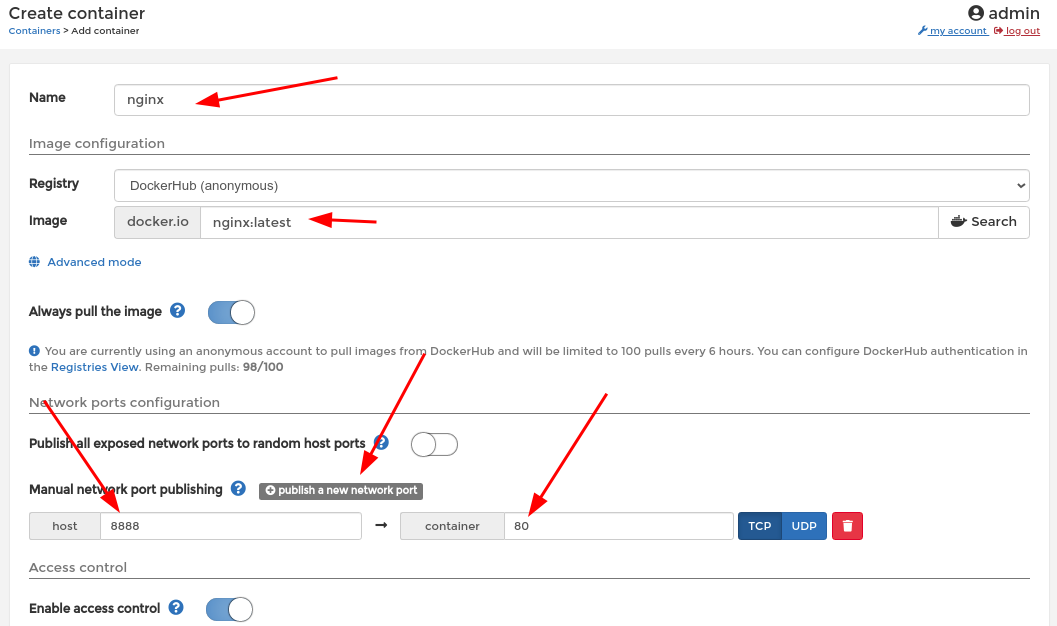
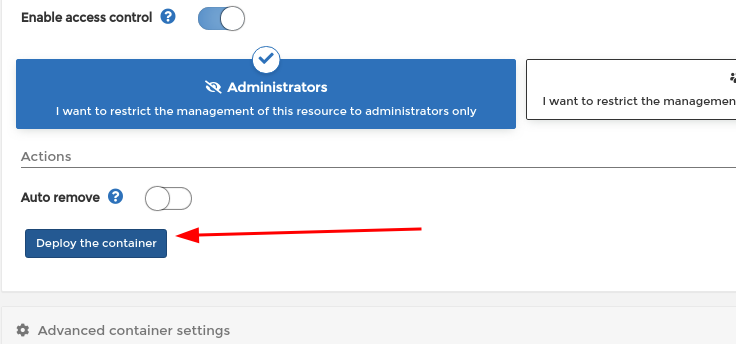
For the rest, I leave it to its default value. Then, click Deploy the container
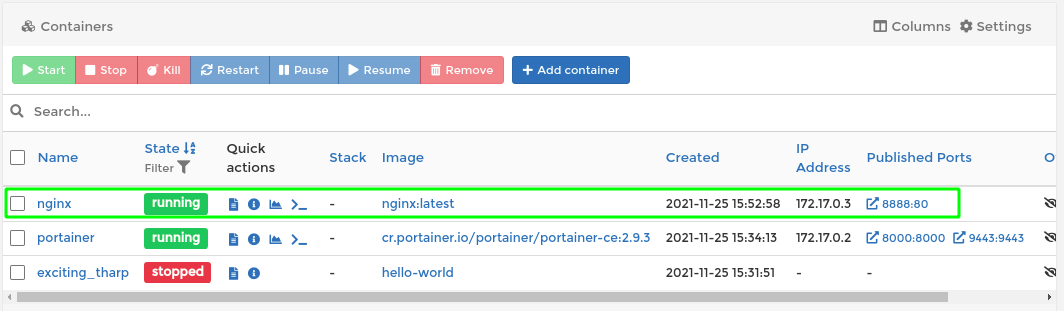
After a few seconds, your container will be deployed, and it will show up in the containers list:
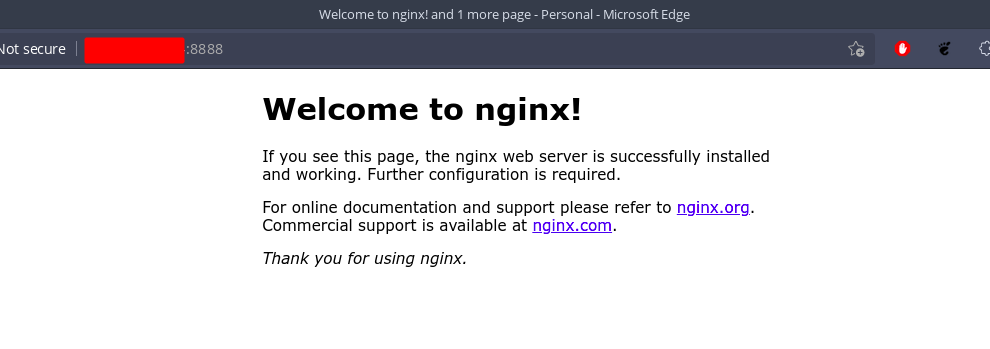
And if you access it, it works!
Conclusion
That is how you can successfully deploy your Portainer on Linux. Portainer lets you administer your docker apps deployment and management with ease!
Be rich in knowledge by checking more of our Knowledge Base articles here.