

How to backup Linux VM via Acronis in ServerStadium
This article will tell how to back up Linux VM via Acronis in ServerStadium Cloud. But, have you known about Acronis? In short, Acronis is a popular data protection software with core features as a backup facility for a server or VM.
Acronis on-premises and cloud backup and recovery software products have the reputation of being user-friendly, stable, and innovative. Its software has been designed to use minimal CPU and memory and can also be written to different destinations, including storage arrays, the cloud, and tape. This gives administrators greater flexibility with regard to mixing and matching media and destination types within their data backups.
Acronis supports many Operating Systems like Microsoft Windows, Linux, macOS, etc. Thus, we can use Acronis as a robust backup facility for many servers and VM’s in various Operating Systems.
Here are the steps for backing up a Linux VM via Acronis in ServerStadium.
Prerequisites
– VM installed with Linux OS (for this case, we use CentOS 7).
– Security Profile with list opening ports below :
TCP port 43234 for remote installation and remote upgrade
TCP ports 445 and 25001 for remote installation
TCP port 6109 for Active Protection
TCP ports 7780, 7755, 7756, 7765, 9852, 9860, 9862, 9876, 9877 for communication between components
TCP ports 9850 and 9851 for command line (acrocmd, acropsh) commands
TCP ports 443 and 902 to access the vCenter Server and ESX(i) hosts
TCP ports 443 and 44445 for backup to cloud
TCP port 30800 and 30801 for Alert Feed Manager
TCP port 2600, 2700 for Archive Server Core
TCP port 6110 for Acronis Cyber Protect service
TCP port 31009 for Active Protection Manager
TCP port 9773 for Antimalware backups scanning
TCP port 9999 for Authorization and routing requests for different components
TCP port 18018, 18019, TCP and UDP incoming port 6888, UDP port 6771 for Acronis updater
TCP port 1337 for syncing protection policies between server and agent
TCP port 8081 for Acronis Scheduler2 service
TCP port 9772 for Acronis Cyber Protect Agent
Preparation
For the CentOS (RHEL) based Linux, there are some packages needed by Acronis which is :
- kernel-devel
- gcc
- make
- elfutils-libelf-devel
- perl
Most of the packages above will be downloaded and installed when the Acronis setup program runs. But, for the Perl package, you have to install it manually by using the command :
# yum install perlIn some cases, the downloaded kernel-devel version does not match with the kernel build version when installing using the Acronis setup program. However, we have to download and install the binary package manually in this case.
To check the kernel-devel and perl installation, you can check it by using the command :
# yum list installed | grep kernel-devel# perl --version
Installation
To begin with the installation process, first, open the Acronis portal with the URL link :
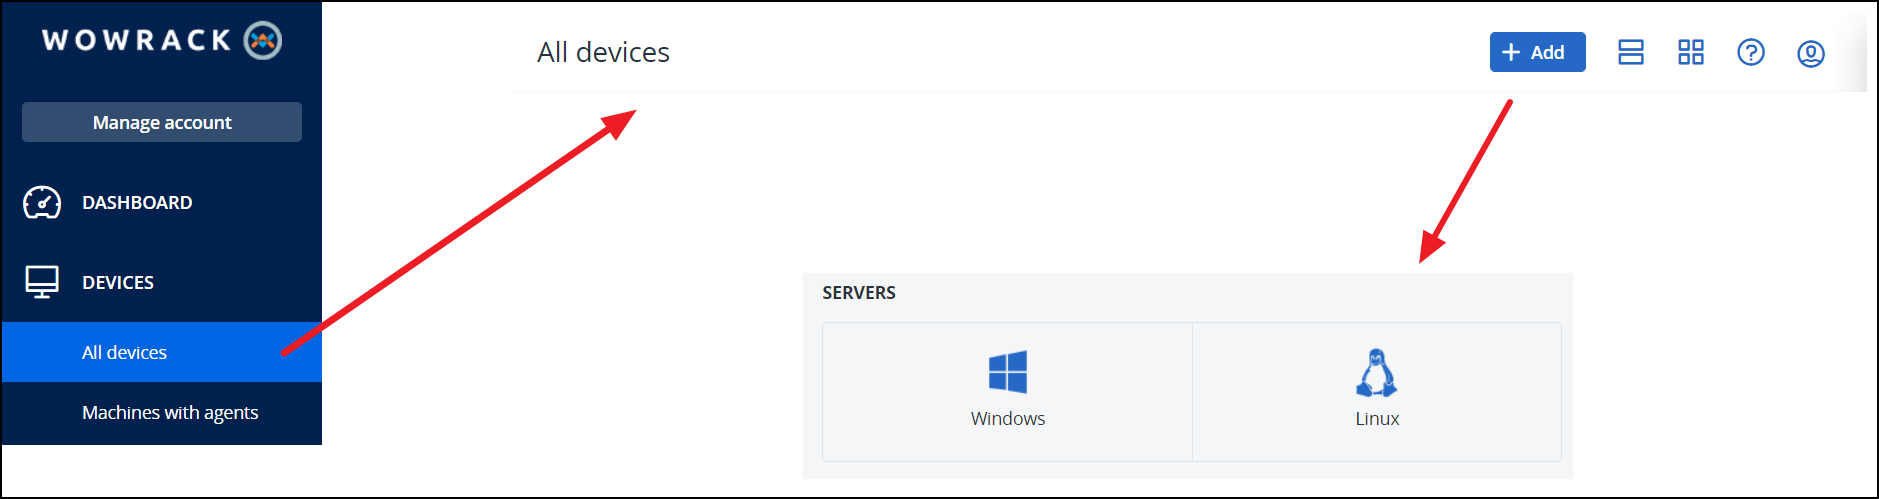
https://cloud.acronis.com/loginAfter that, add a new device. Then choose “Linux Servers”
Then SSH into your Linux VM, and download the Acronis Cyber Protection Agent Installer with the URL link :
https://sg-cloud.acronis.com/download/u/baas/4.0/15.0.27305/Cyber_Protection_Agent_for_Linux_x86_64.bin
The latest Acronis Cyber Protection Agent Installer version when this article was written is 15.0.27305. After the Acronis Cyber Protection Agent Installer is downloaded, change the permission of the file by adding “execute” permission with this command below :
# chmod +x Cyber_Protection_Agent_for_Linux_x86_64.bin
Execute the installer by using this command below :
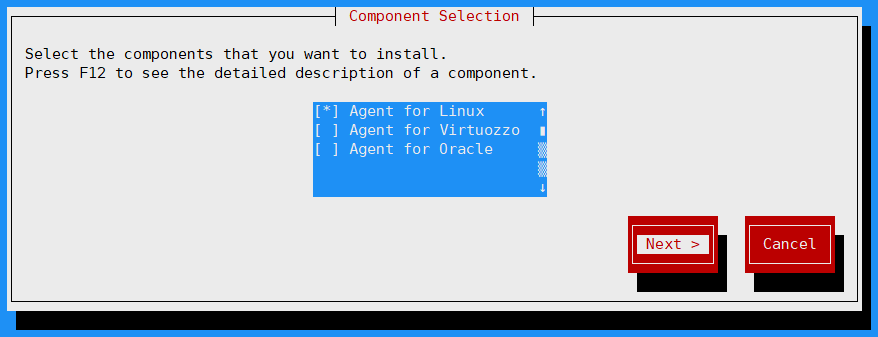
# ./Cyber_Protection_Agent_for_Linux_x86_64.binThe installer will start shortly. When the “Component Selection” pop-up appears, choose the “Agent for Linux” option. Then, proceed to the installation step with the “Next” button.
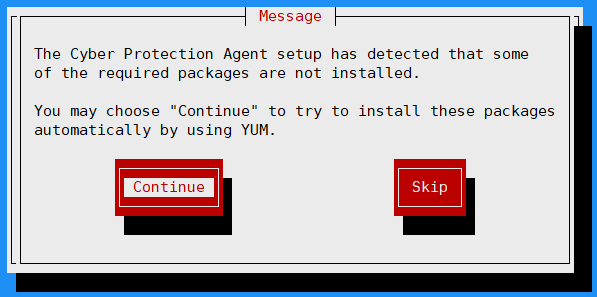
Another pop-up message will appear. Click the “Continue” button to install the additional package using “YUM“.
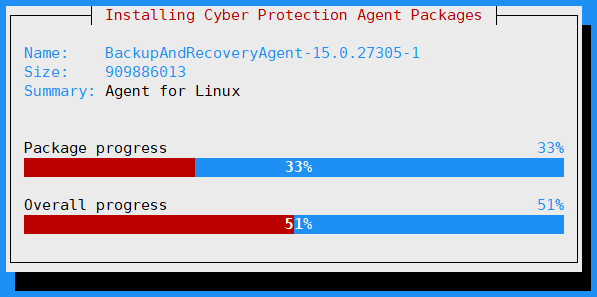
Wait for the installation progress until finished.
When the installation process is finished, due to the Linux VM with Command-Line Interface does not have a web browser installed in the first place, we have to register the VM manually by choosing “Show Registration Info” button.

Then, the registration Link and the Registration Code will appear in the next pop-up window.
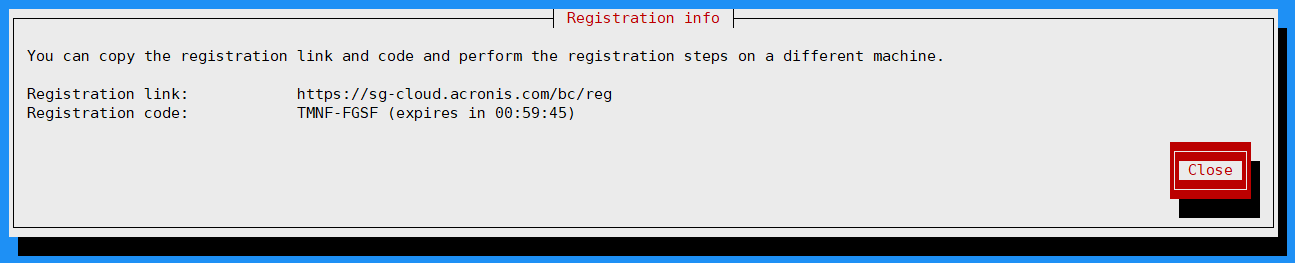
Keep in mind that the Registration Code has an expiration of 1 hour. Therefore, you have to successfully register the machine in 1 hour period.
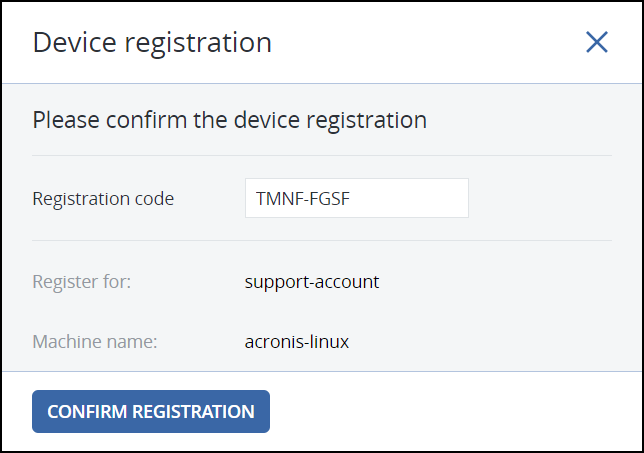
Open the Registration Link with your other device (PC, Laptop, Smartphone, etc), then enter the Registration Code that you got before, and click the button “Confirm Registration”.
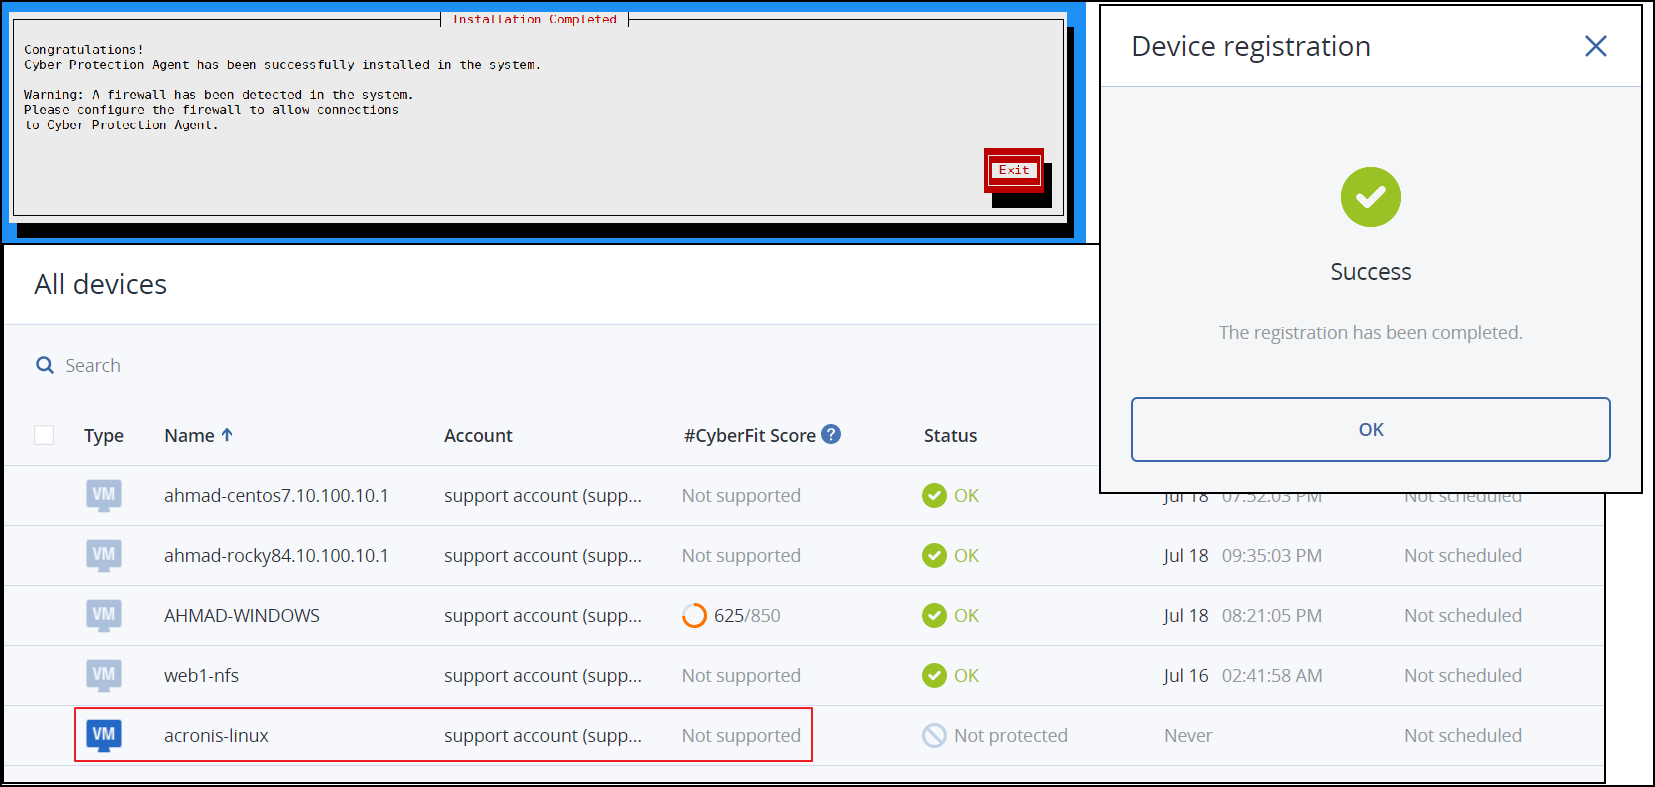
After that, you will get a pop-up notification that the machine is successfully registered and will appear in the machine list.
Backup Configuration
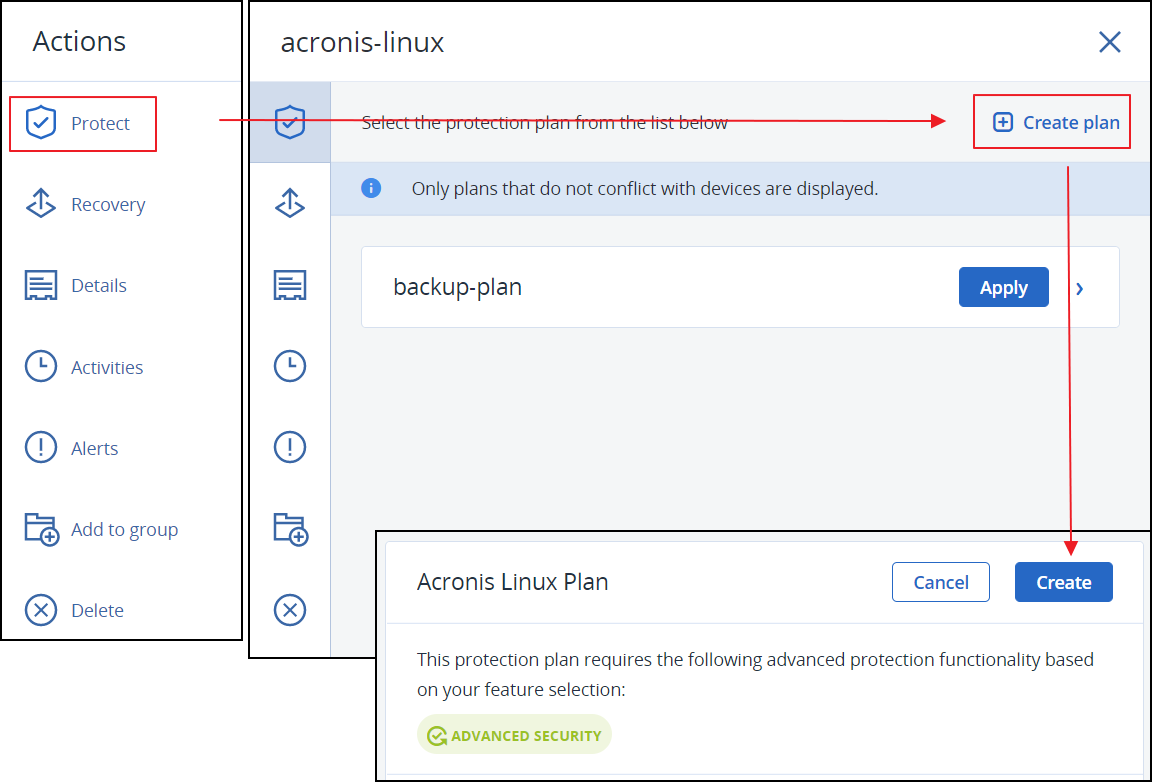
The last step is we have to configure the backup plan of the Linux VM, in order to back up the VM data into Acronis. After the machine is successfully registered on the Acronis, click the machine on the “All devices” page. On the right side, a new sidebar will appear. Choose the “Protect” section, and click the “Create plan” button. Then, click the “Create” button.
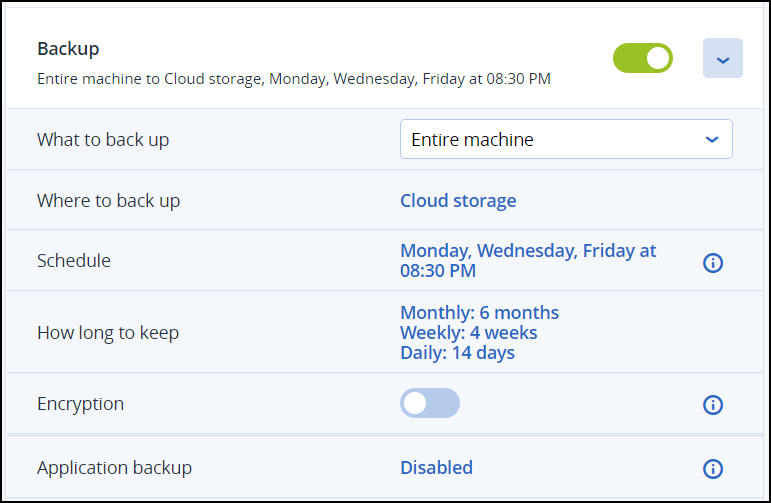
After the “Create” button is clicked, a new page will appear. On this new page, you have to set up some parameters like :
- What is to backup –> Is it “Entire Machine”, “Certain Files / Folder”, “SQL data”, etc.
- Where to backup –> On the ServerStadium, currently, we have only one destination to backup. Which is the “Cloud Storage”.
- Backup schedule –> Monthly / Weekly / Daily / Hourly period.
- How long to keep the backup.
- Enable Encryption or Not.
- Enable Application backup or Not (Application Backup example is for Exchange Server, cPanel, SQL Server, etc).
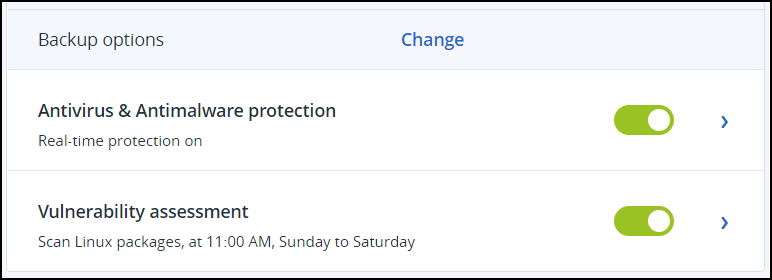
- Enable Antivirus & Antimalware protection or Not.
- Enable Vulnerability assessment or Not.
Finally, the backup plan is created with the configuration setup above. Since our created backup plan above is scheduled, in order to trigger the backup process, we have to click the “Run now” button.
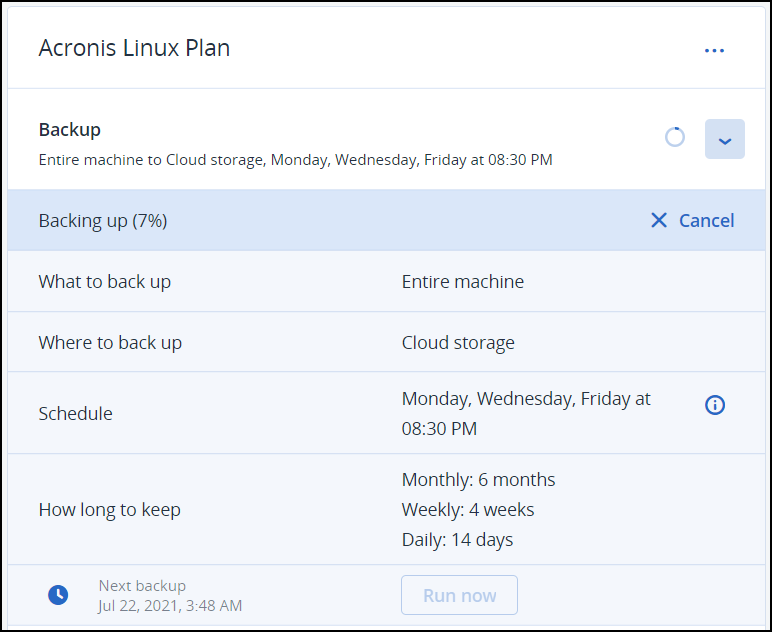
Wait for a while until the backup process is complete.
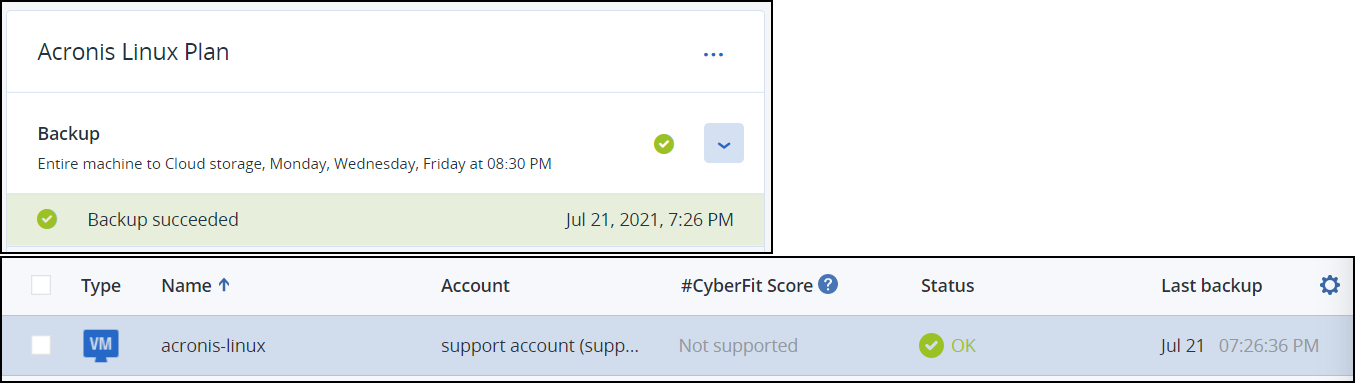
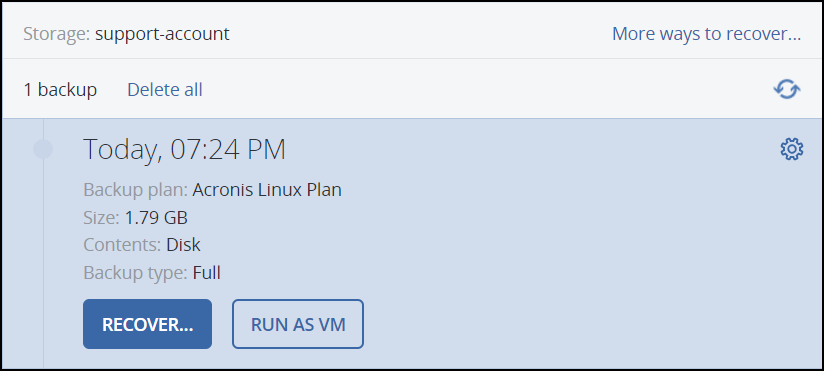
Then, after the backup process is successful, we have a few options to threaten this saved backup. Do we want only to keep this backup, recover this backup into the VM, or we can run this saved backup as a new VM if we choose the backup plan option “Entire Machine”. You can adjust this saved backup to meet your needs.
Conclusion
To sum up, in this guideline, we have installed and configured Acronis as a backup facility for backing up a Linux VM in ServerStadium. Also, we know that Acronis can be used as a robust backup facility that has the flexibility to meet user requirements in the Linux environment.