

Exporting ServerStadium Cloud VM to outer ServerStadium’s Infrastructure using Acronis Cyber Protect
When we have VMs in ServerStadium Cloud, sometimes we need to be able to back up these VMs outside the main infrastructure of ServerStadium, backup the image files to our local for example, or to our DRC server.
One way we can do this is to use Acronis Cyberprotect backup.
The main feature of Acronis is to backup & restore VMs in a more advanced manner because there are so many features that we can do. One of them is anti-ransomware, RTO and RPO configuration, and many more.
And one of the features that we will be bringing up in this tutorial is the backup of our VM and restoring to infrastructure outside of CR.
To start doing it, there are some prerequisites that we need:
- Have a VM you want to backup
- The VM OS must be compatible and can be backed up by Acronis (Windows, Linux)
- Have an active Acronis subscription
- Have determined the destination to export the VM images. It can be according to your preferences, or you can use mainstream virtualization tools on the market *(VirtualBox, VMWare)
Download the Acronis agent
First of all, we install the Acronis agent in the VM.
This agent functions to connect our VM to our Acronis Cyber Protect service.
Acronis Cyberprotect supports backup for many types of devices, ranging from workstations & servers, mobile devices, virtualization hosts, and to application-based backups.
In this tutorial, my VM uses Linux Ubuntu Server OS.
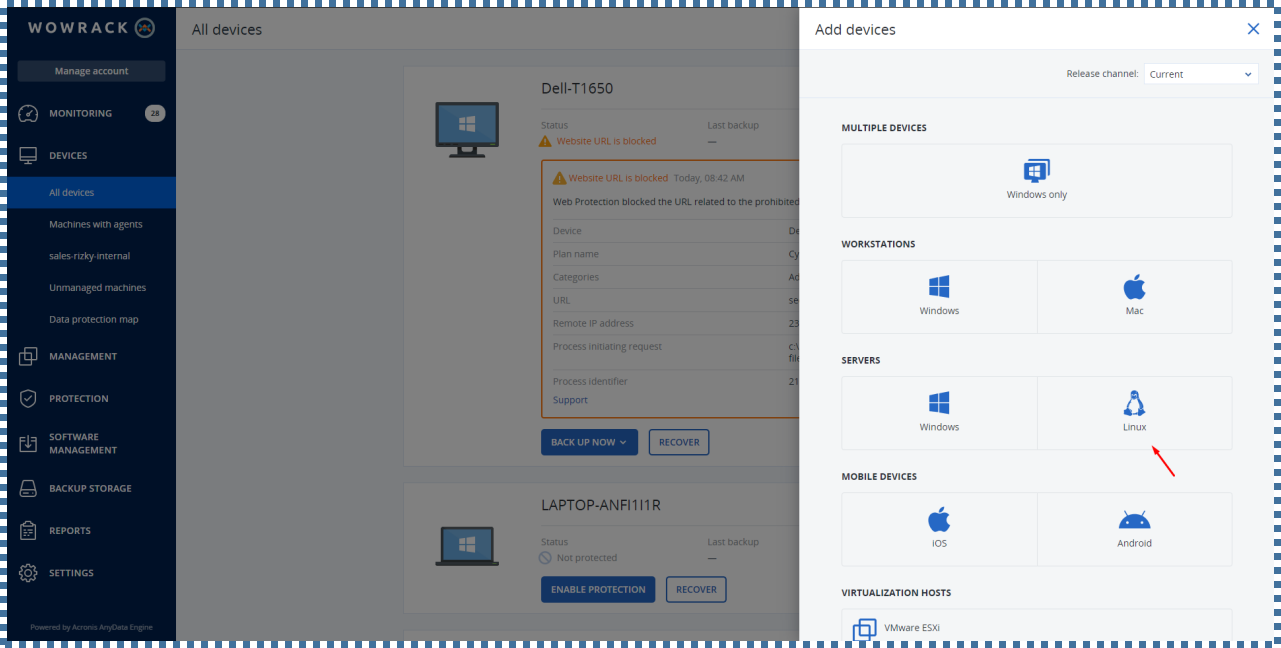
So we will select the “Linux” option.
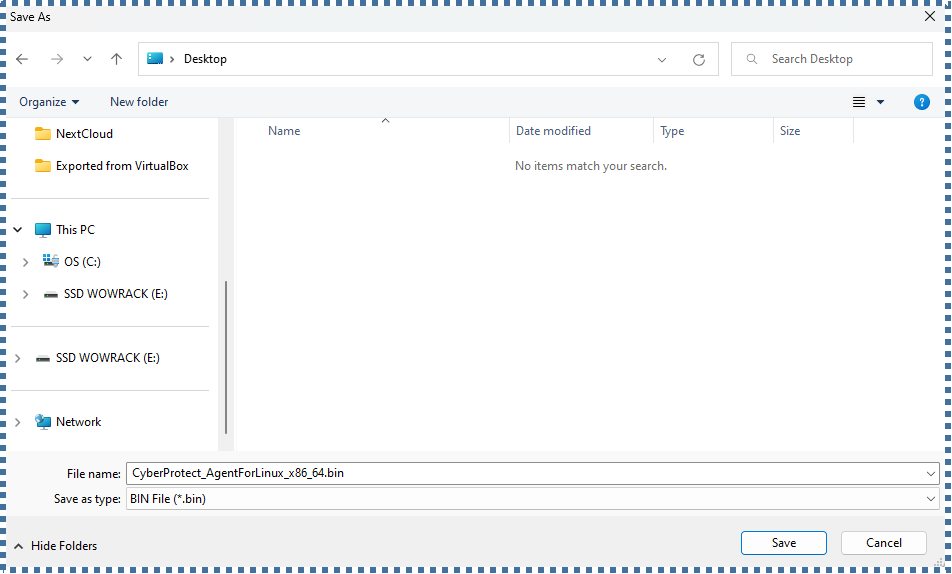
↳ The agent file will be .bin, and later we need to adjust the file permissions so that we can execute it via the terminal.
After the agent file download succeeds on our local PC, we need to upload the agent file to our VM. There are several methods we can do:
- Can use S3CMD : https://s3tools.org/s3cmd
- Cyberduck : https://cyberduck.ch/
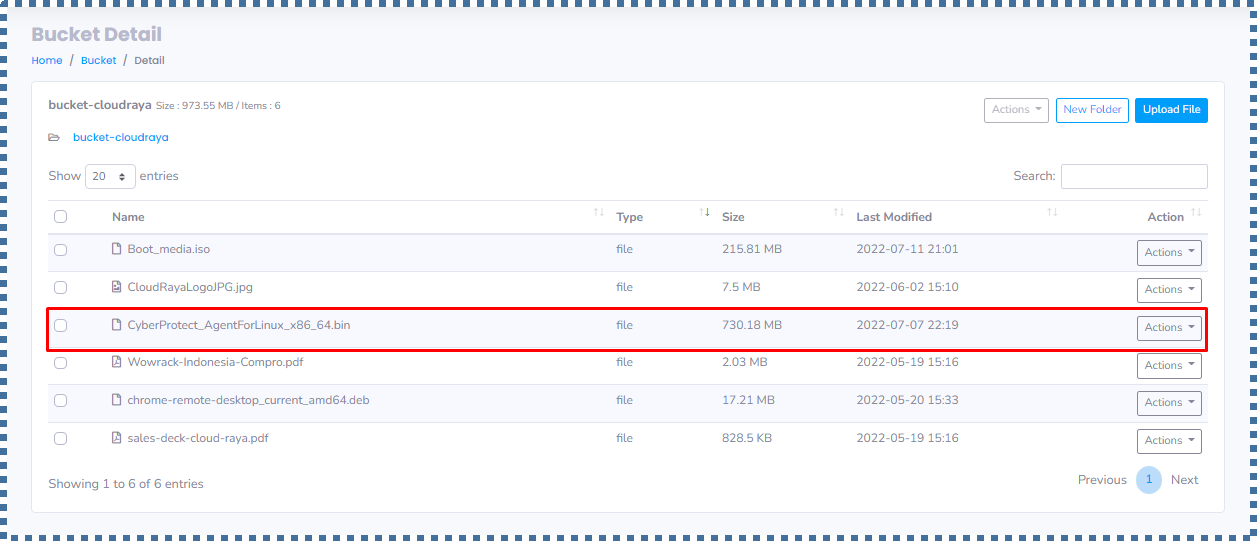
- Or by uploading this agent file into ServerStadium’s Object Storage.
Because I want to use this agent file again in the future. Then I will upload it into the ServerStadium’s Object Storage.
For those of you who want to know what ServerStadiums’s Object Storage is. Feel free to check this article and video.
Install the Acronis Agent into the VM
Now we access the VM that we want to backup, then download the Acronis Agent from the Object Storage link we already have.
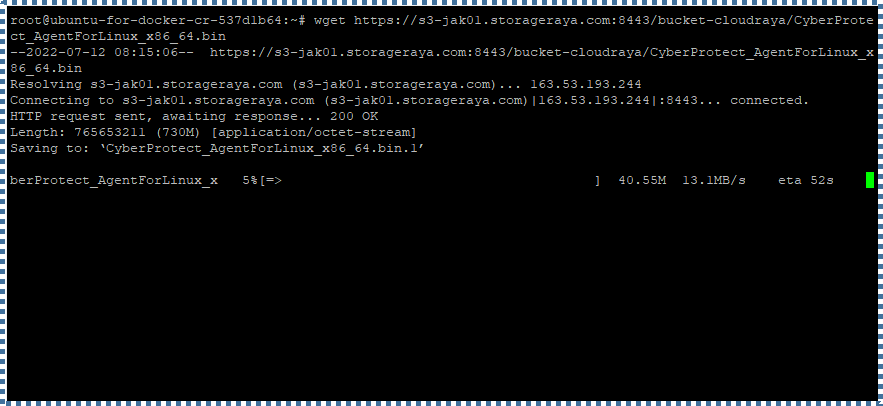
If so, according to my previous explanation, we need to change the file permissions of this .bin so that we can execute it via the terminal.
# chmod a+x CyberProtect_AgentForLinux_x86_64.binWhere the intent of the syntax is to allow all users (users, groups, and others) to be able to execute the CyberProtect_AgentForLinux_x86_64.bin file like a program.
Then we execute the file with the following command:
./CyberProtect_AgentForLinux_x86_64.bin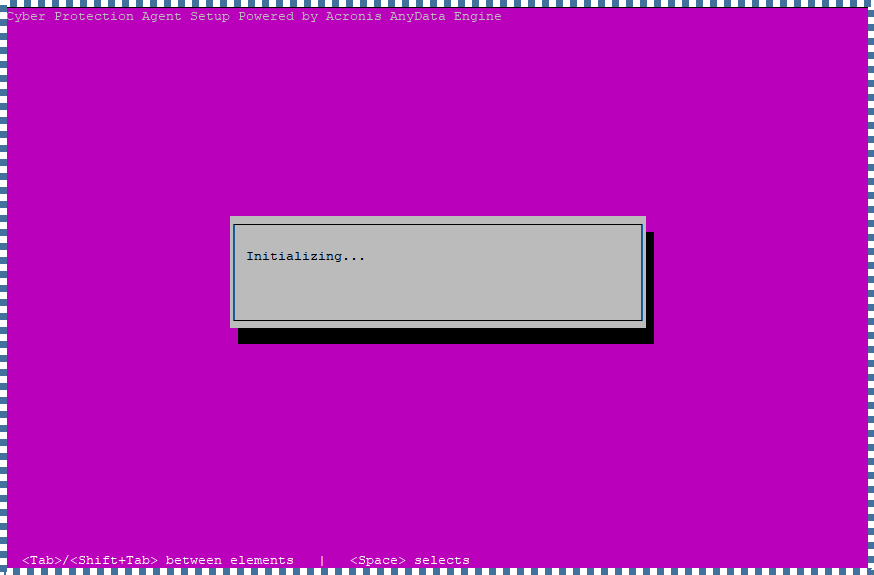
↳ After that, the launcher of the Acronis Agent installation will appear.
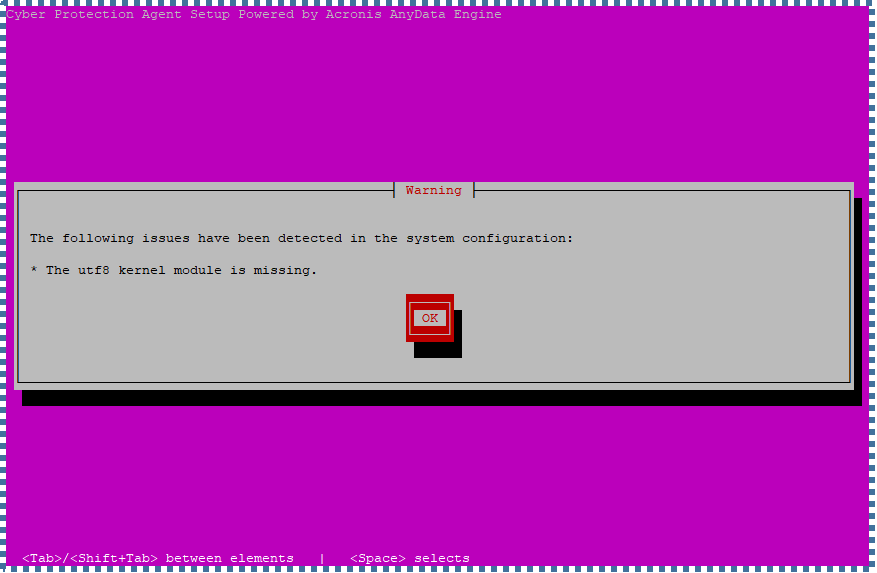
↳ At this warning, we can leave it alone, then click OK.
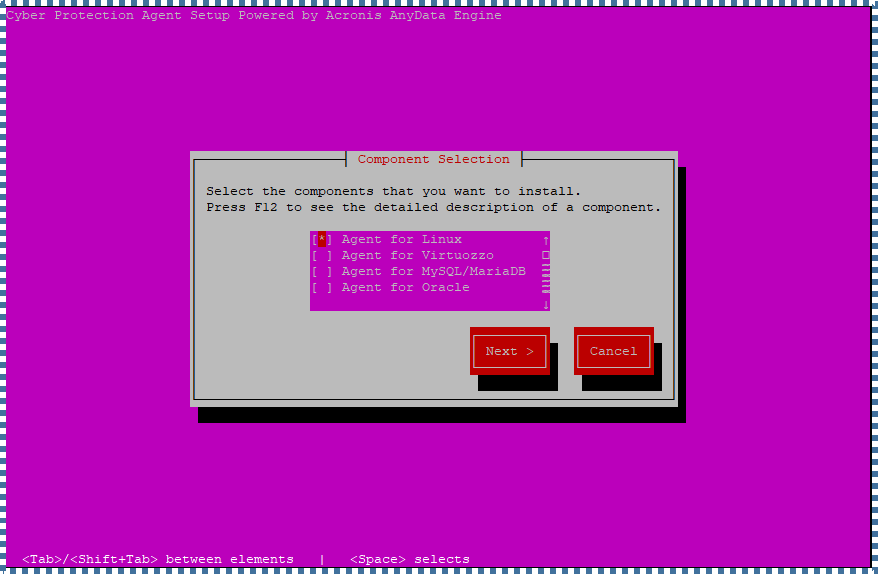
↳ In the component selection, select “Agent for Linux”.

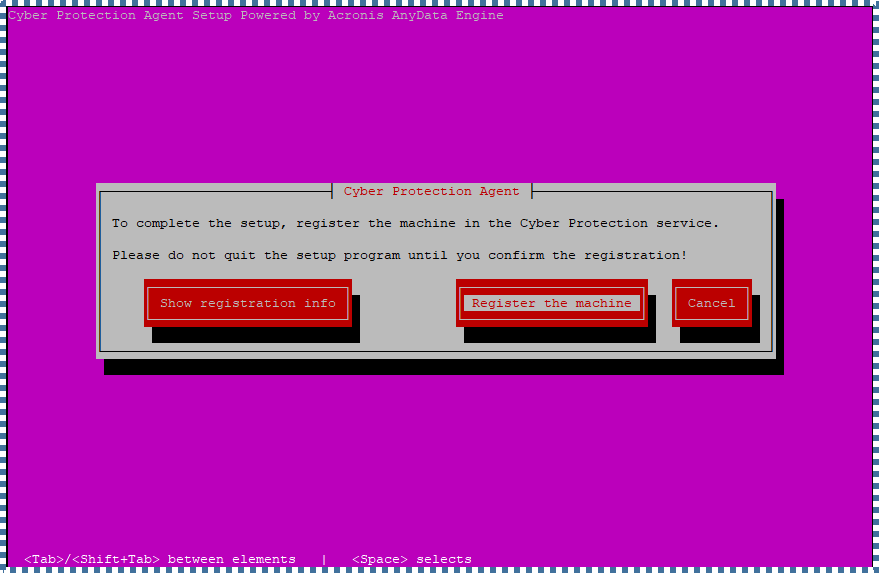
↳ To complete the setup of this agent, we need to register this machine/VM with the Cyber Protection Service.

↳ If we select the “Register the machine” option, an error will appear as above. This error is because our Ubuntu Server VM is only CLI-based, not desktop-based GUI.
↳ Then we can select the option “Show registration info”.
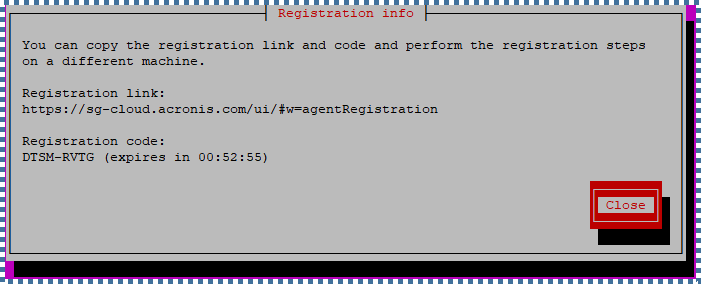
↳ The Registration Code for our VM will be displayed. Now we register via the link provided. This registration code also has an active period of only 1 hour.
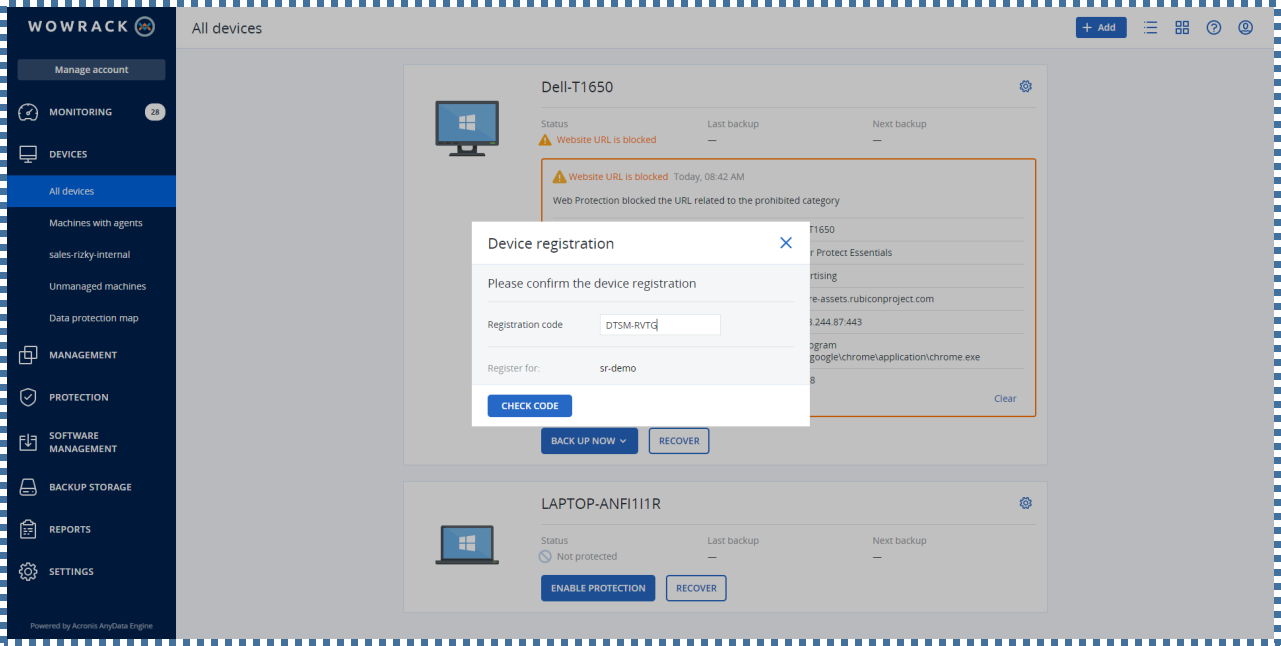
↳ Enter the registration code in the provided form.
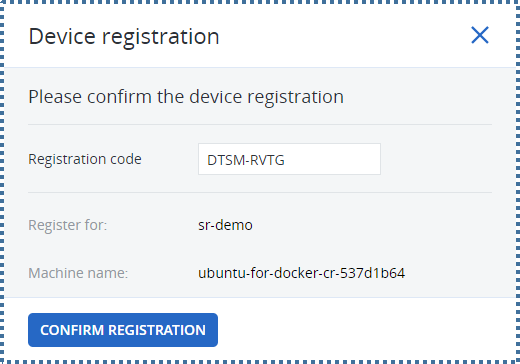
↳ Click on “Confirm Registration”
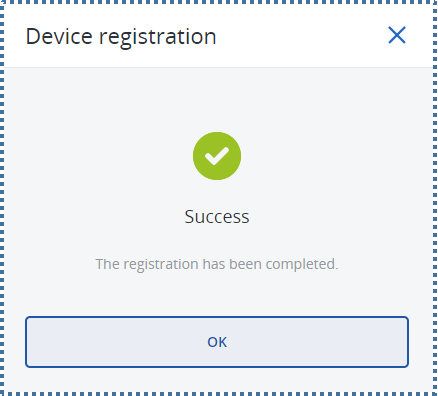
↳ If the device is successfully registered, the following dialog box will appear.
↳ Our VM will also automatically appear on the Acronis Cyberprotect dashboard.
Adding the entire machine backup of our ServerStadium Cloud VM
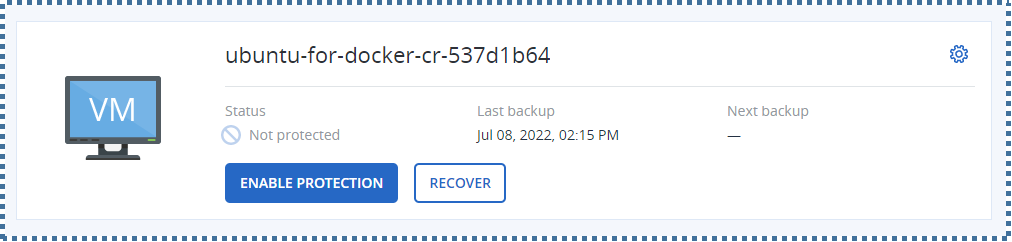
The next step, we can start backing up our VM. We can do this by clicking on “Enable Protection”.
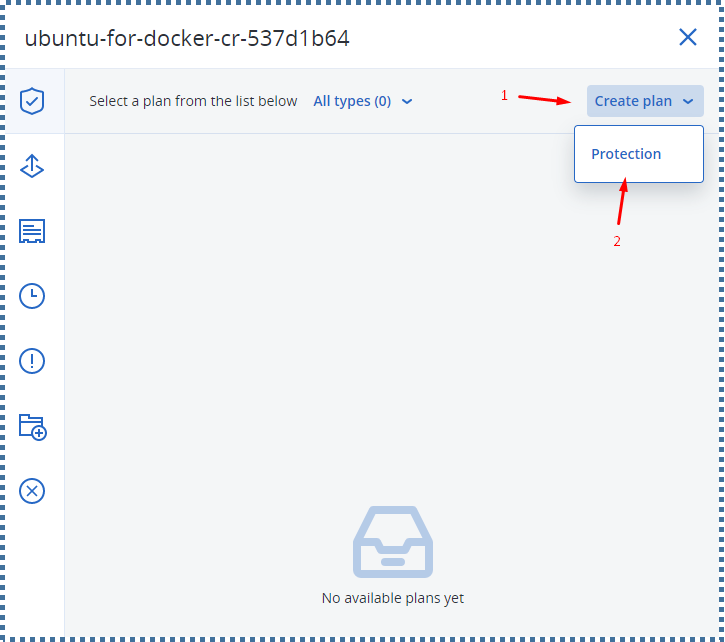
↳ On this page, select “Create plan” then “Protection”.
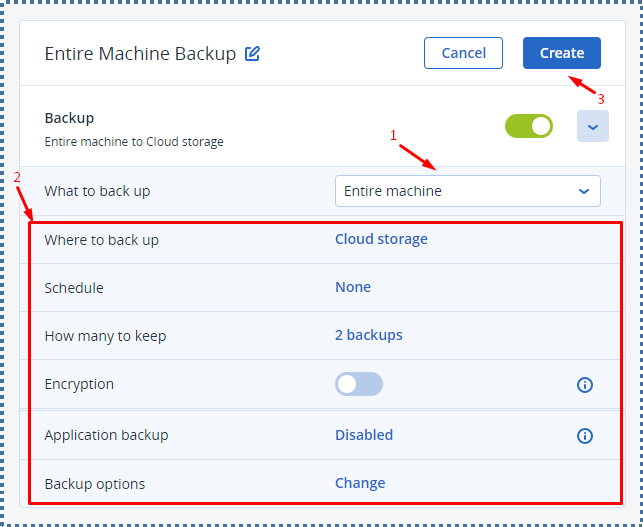
↳ In the New Protection Plan, we select backup for “Entire Machine”. There are several supporting options, such as schedules, how many to keep, etc.. Still, I didn’t set them specifically because, in this case, we only need a one-time backup to export the results to infrastructure outside ServerStadium. If so, click on “Create”.
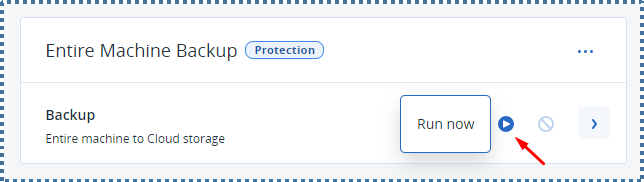
↳ Now we run this backup and wait for the process for a while. It depends on the overall amount of data and the OS system on your VM. Because we will backup one whole machine.
Deploying the Local Virtual Machine
After we have done the backup, we now try to export this backup file out of the ServerStadium infrastructure.
For example, in this tutorial, I will export the backup VM into my local VM, which I will deploy in VirtualBox.
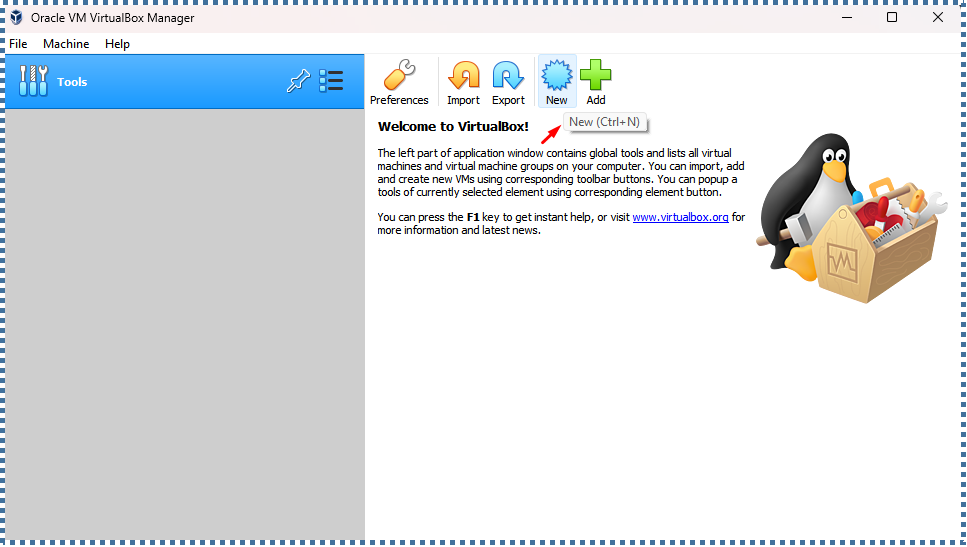
↳ On the main panel, click “New”
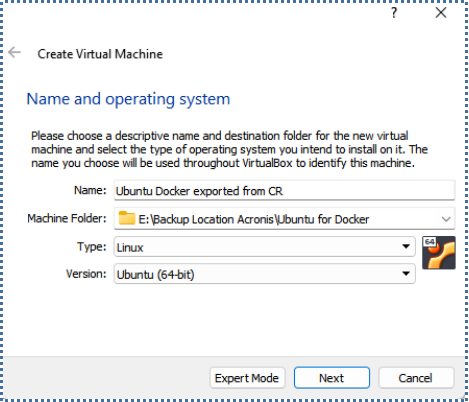
↳ Enter the details of the VM name, VM storage location, type, and version of the OS that we will run on it.
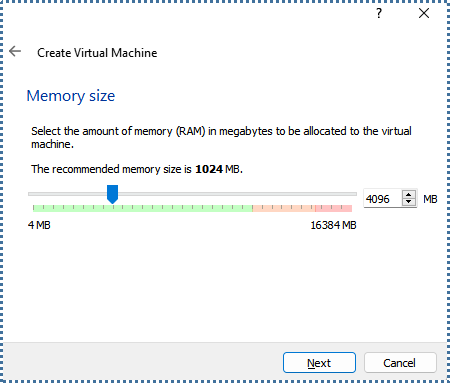
↳ Determine the amount of RAM.
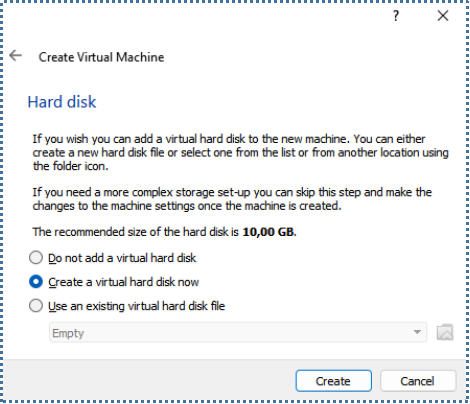
↳ We create the virtual hard drive.
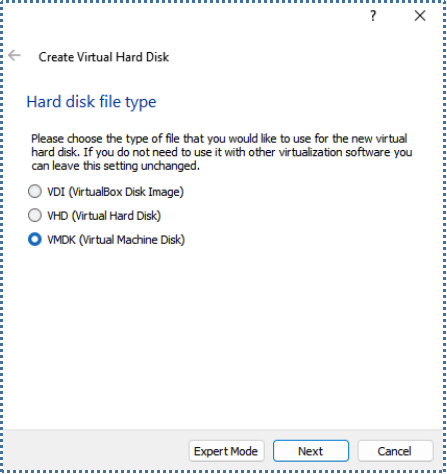
↳ On the virtual hard disk file type, for flexibility in exporting to other virtualization software (such as VMWare Workstation), I will choose VMDK.
↳ Adjust to your needs; if so, now let’s access the Acronis panel to recover the results of our ServerStadium Cloud VM backup to this local VM.
Export the Backup VM to the Outside Infrastructure
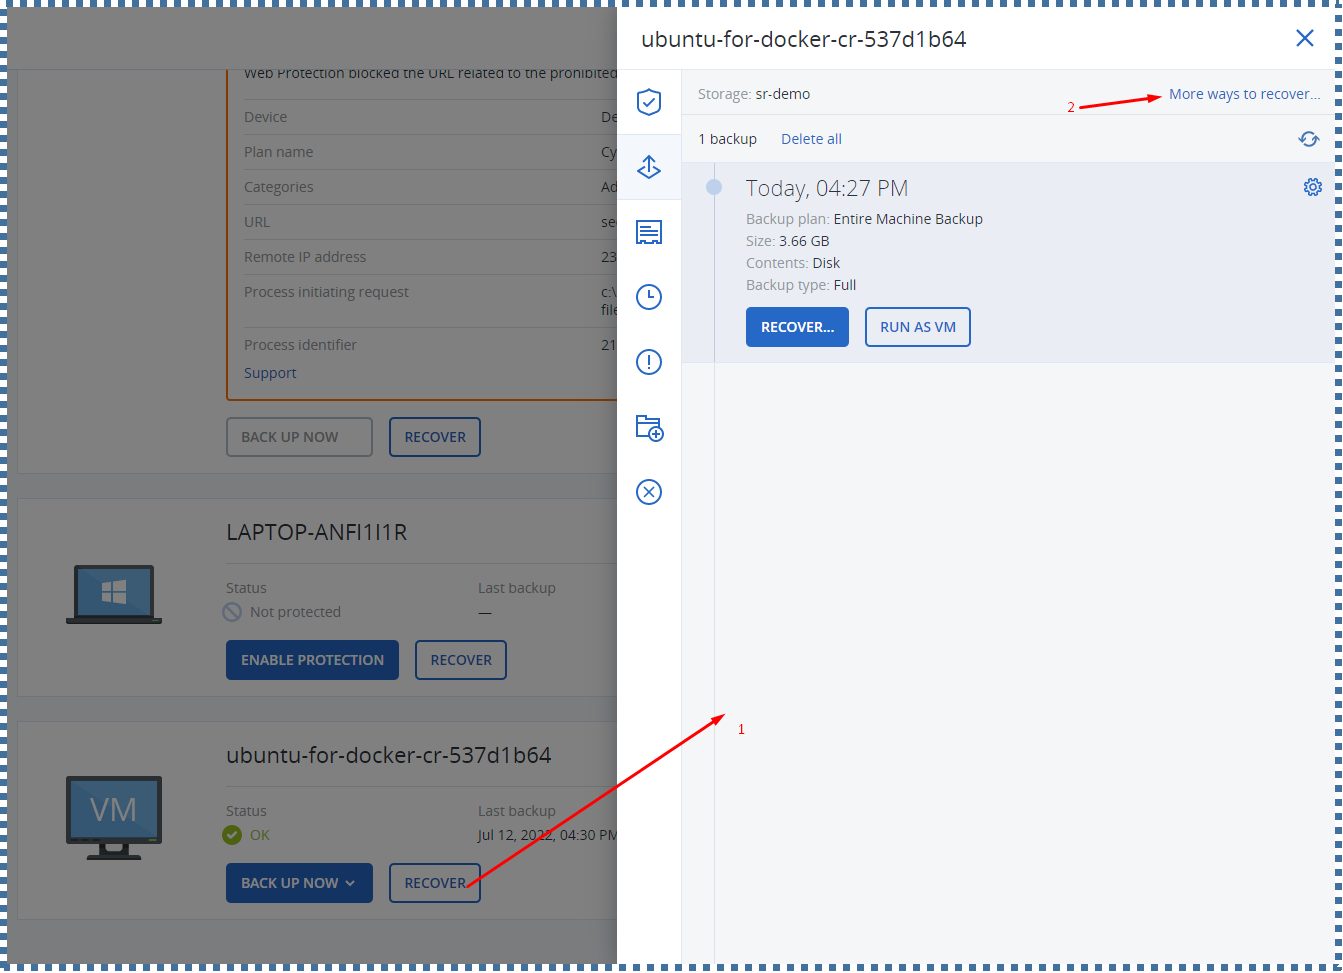
Now log back into the Acronis Cyber Protect dashboard panel. On the ServerStadium Cloud VM, we previously backed up, click “Recover”, then select “More ways to recover”.
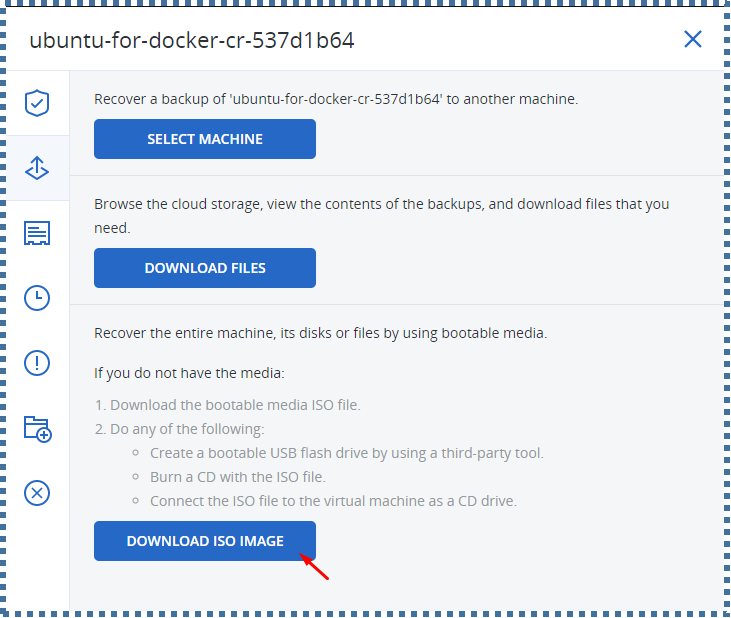
↳ On the available tabs, click on “Download ISO Image”.
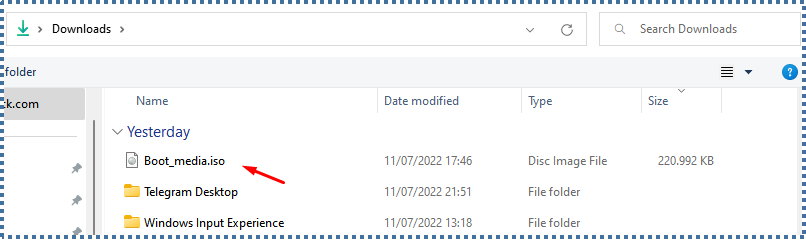
↳ After that, the Boot_media.iso file will be downloaded on our local PC.
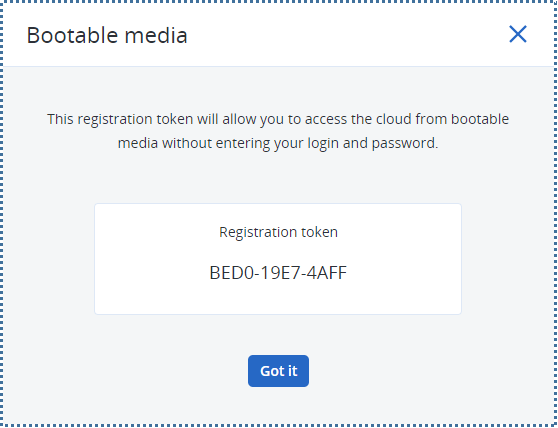
↳ If we check again on the Acronis Cyber Protect panel, a popup dialog informing the Registration token of our account will appear. Please save this token because we will use it later.
This registration token functions so that we can access our Acronis services via bootable media without entering our account username and password.
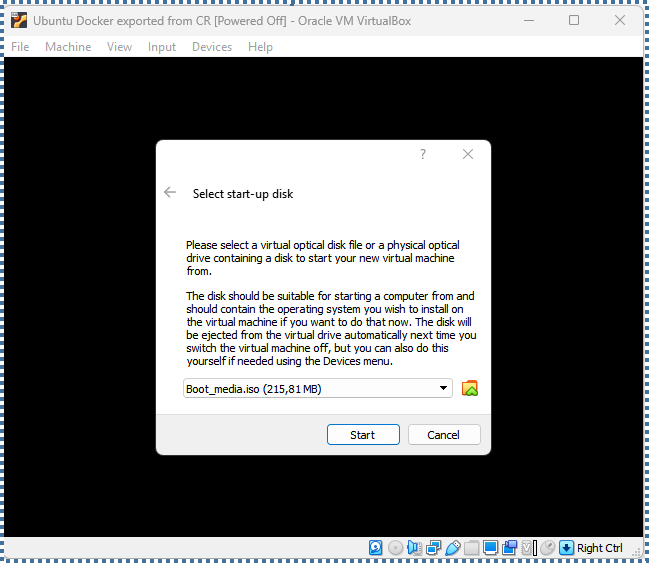
↳ Now we open the .iso file on our local Virtual Machine.
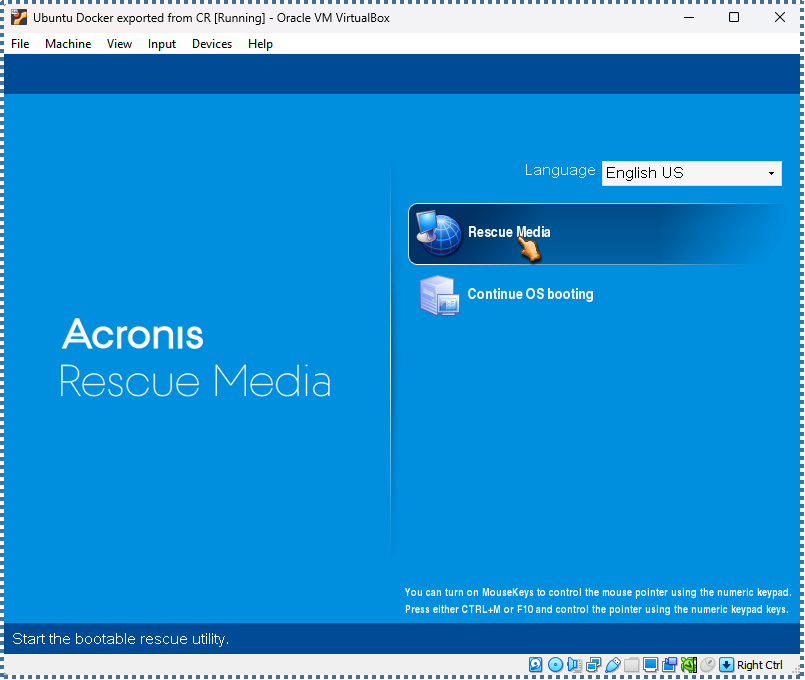
↳ After that, the Acronis Rescue Media user interface will appear. In the available options, select “Rescue Media”.
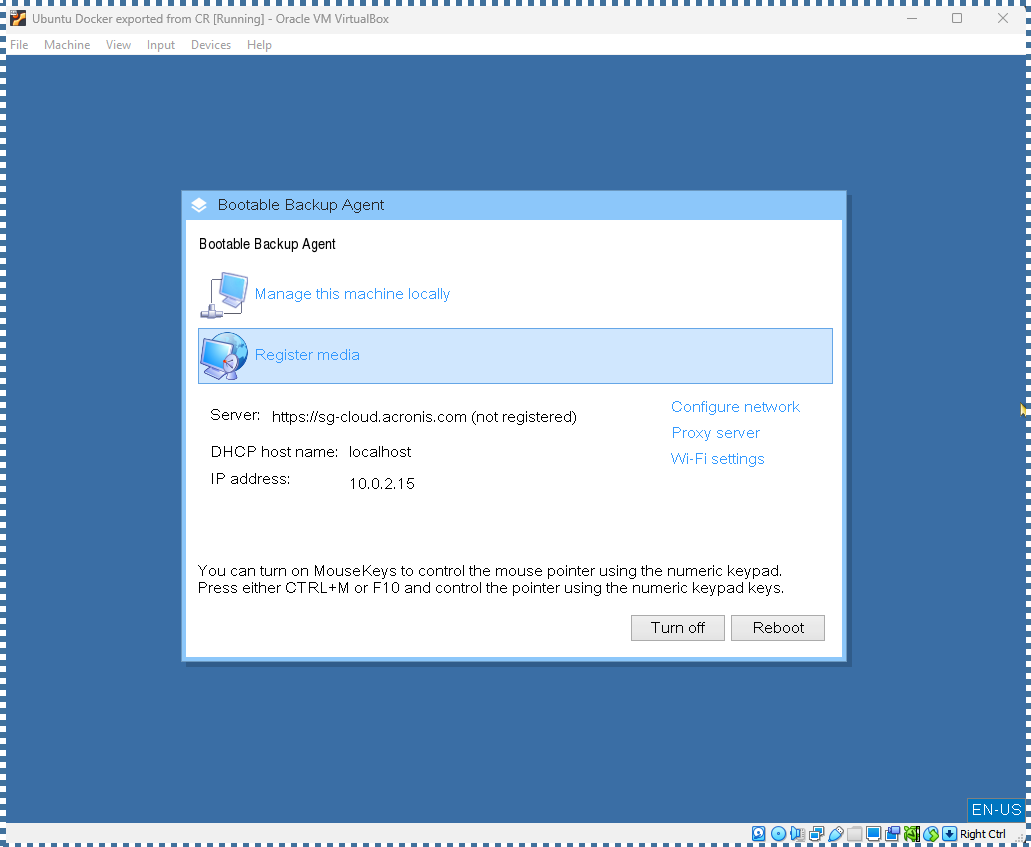
↳ Select “Register media”.
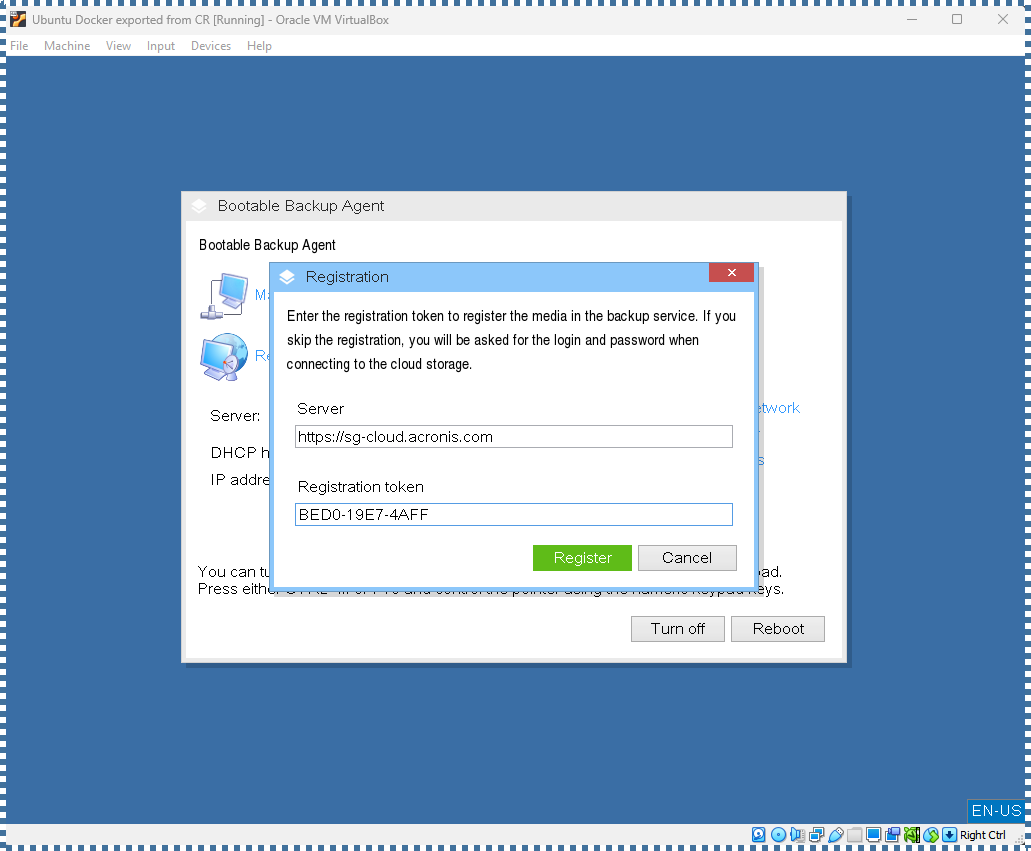
↳ In the dialog box that appears, enter the server from Acronis Cyber Protect, namely https://sg-cloud.acronis.com, and enter the Registration token we got earlier.
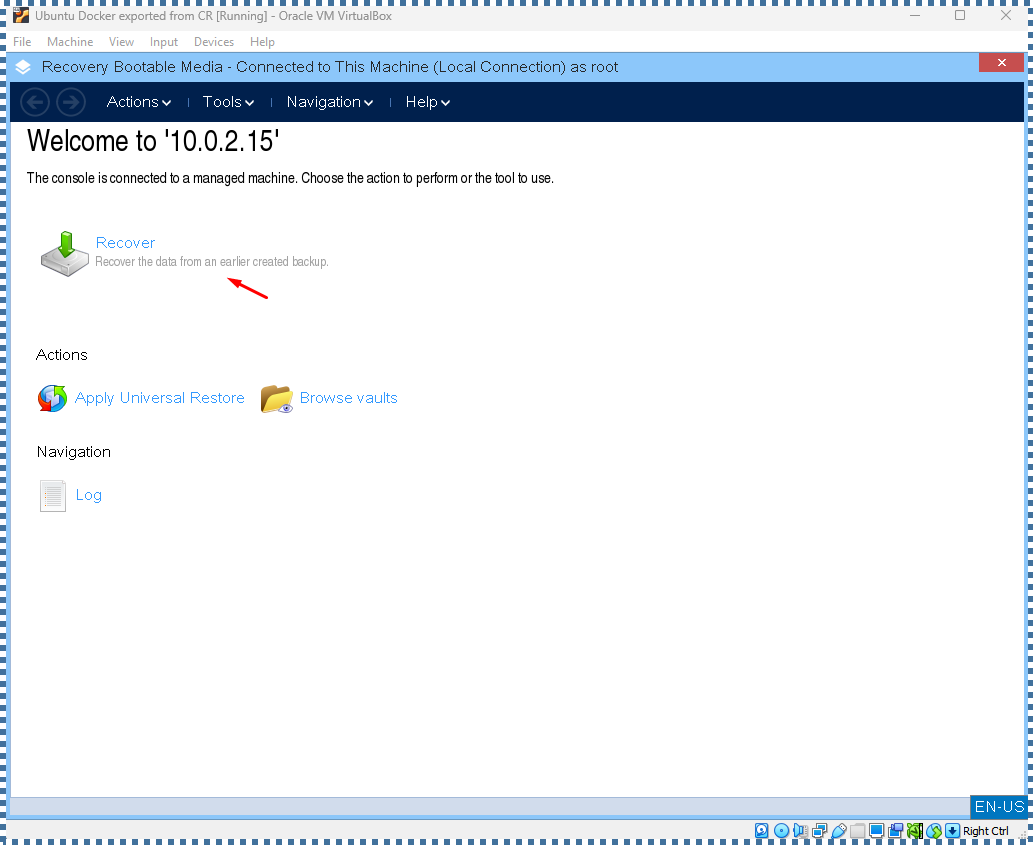
↳ In the window that appears next, click on “Recover”.
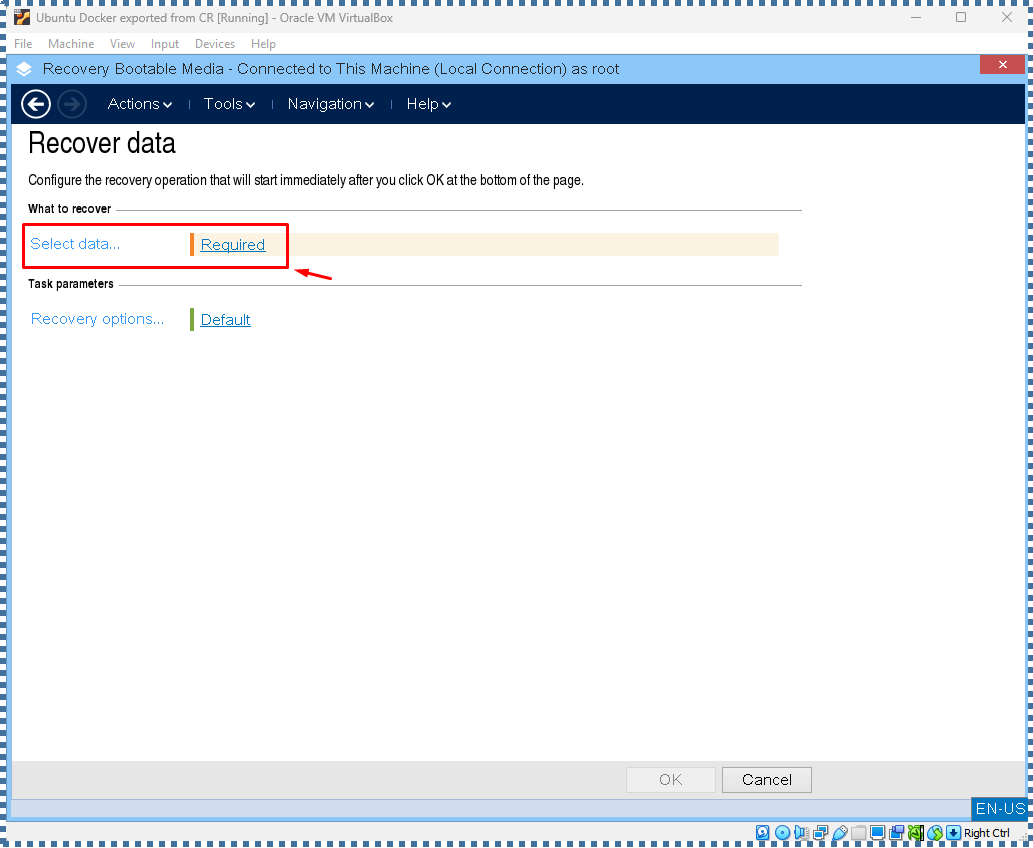
↳ In the “Recover data” step, select the backup we will restore to this Local VM.
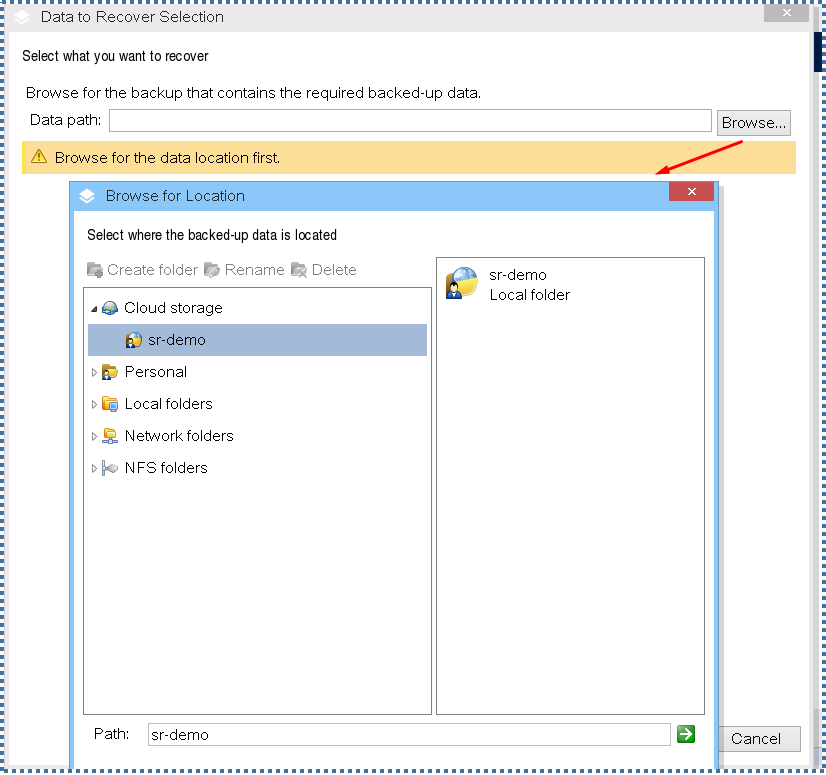
↳ Select “Cloud storage”, then select our Acronis Cyber Protect account.
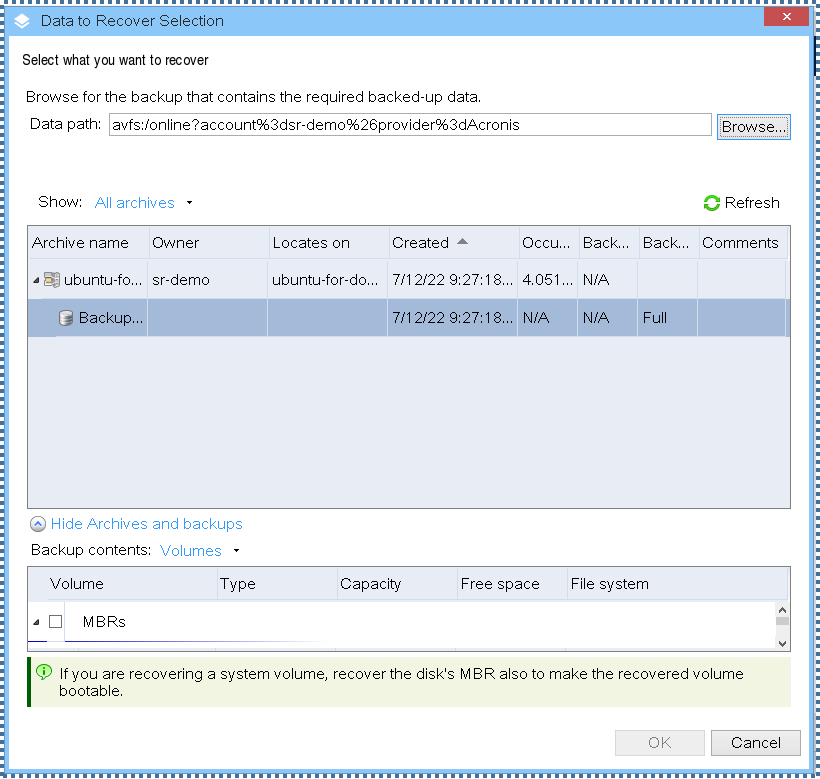
↳ Select the Backup file that we created earlier.
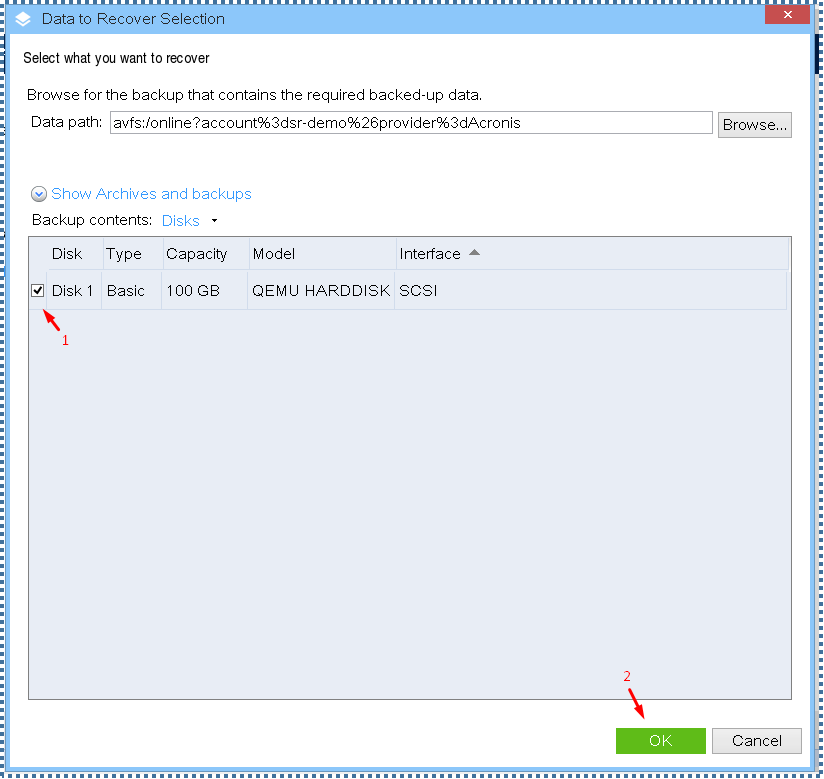
↳ Now we specify the location we want to recover this backup data.
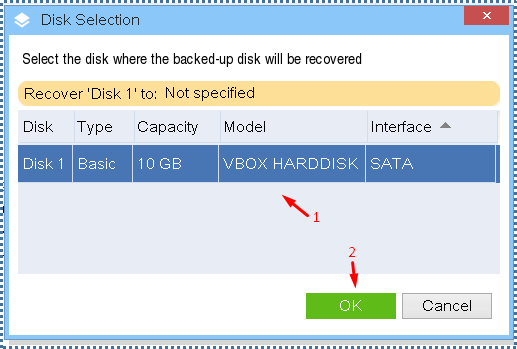
↳ Select storage from our Local VM. If so, click OK
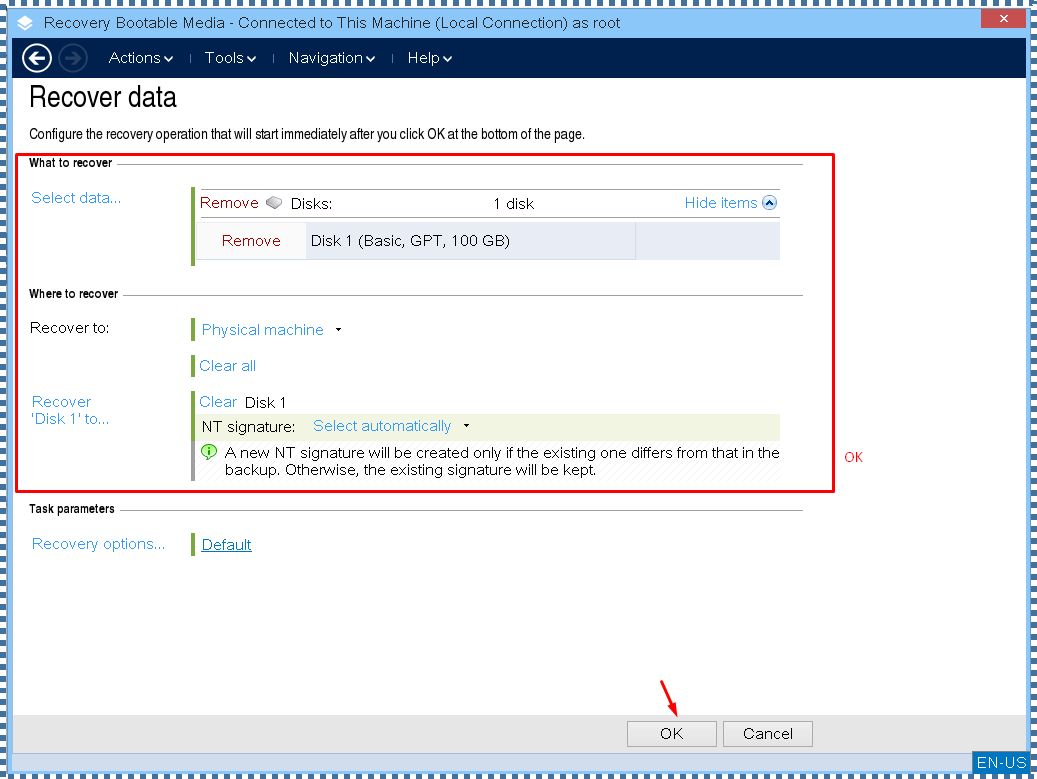
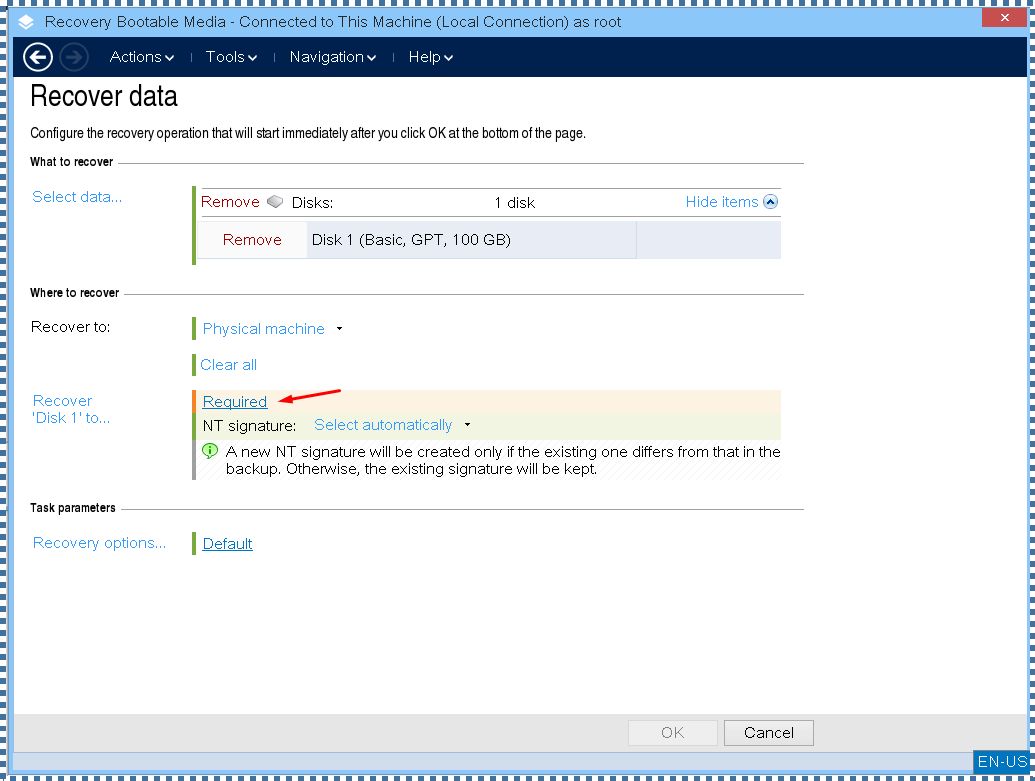
↳ When everything is done, click OK to start recovering backup data from the ServerStadium Cloud VM to our local VM.
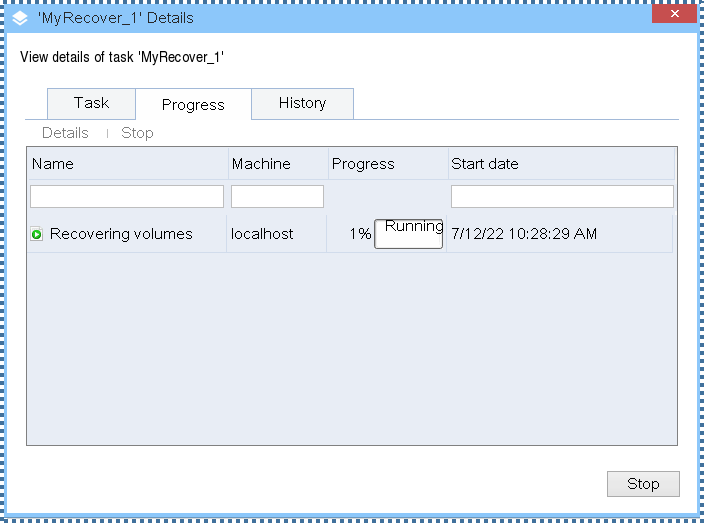
↳ Let’s wait a while for the process. The speed of the process depends on the size of the backup we already have and the speed of our connection.
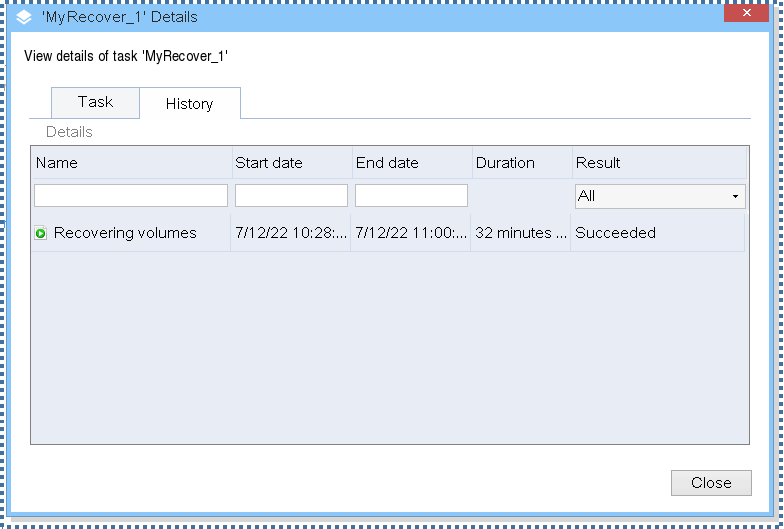
↳ Here’s the result when the recovery process is complete.

↳ Now we unplug the Bootable Media, then reboot this local VM.
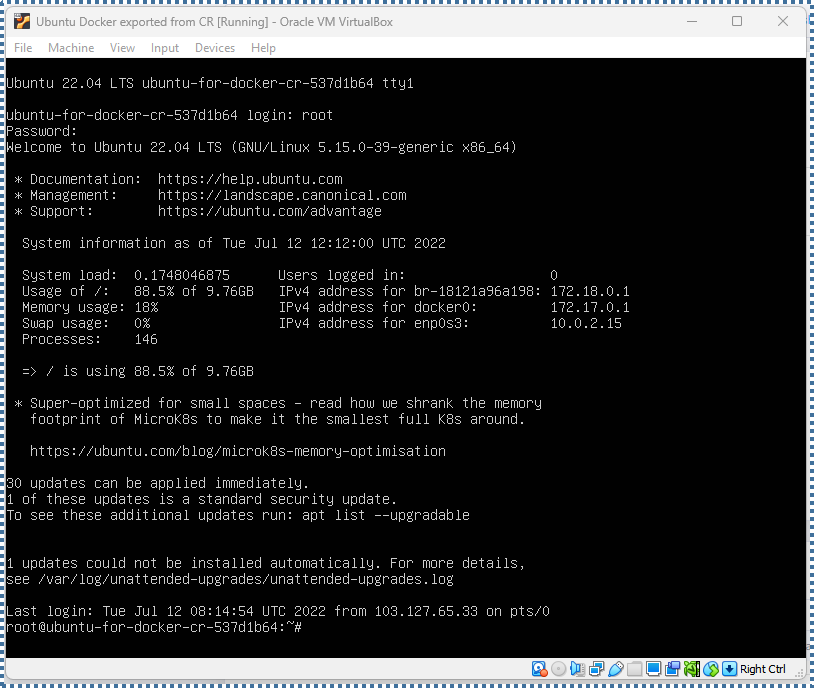
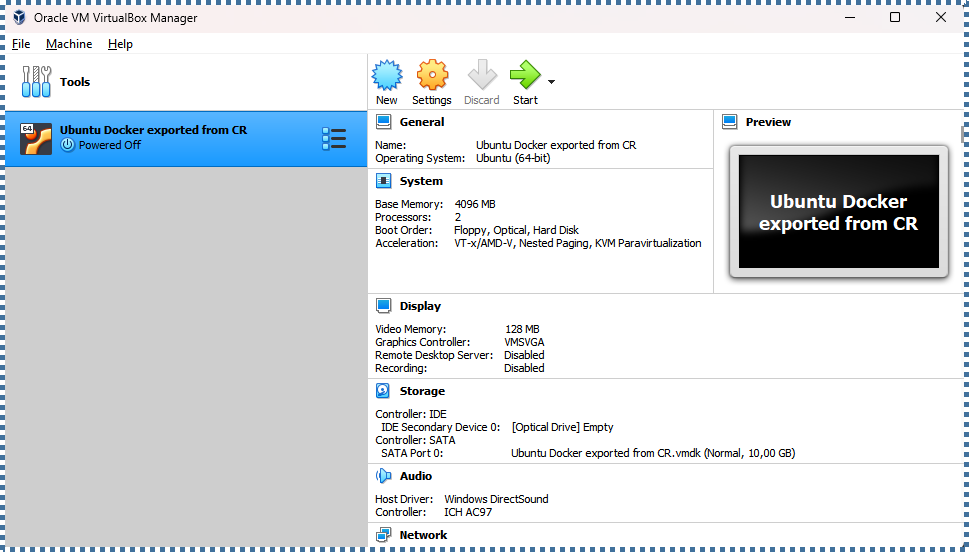
↳ After rebooting, our local VM will automatically be recovered in the exact same condition as our ServerStadium Cloud VM.
Exporting the local VM to another Virtualization Platform
Now we try to export our backup results on this local VM into .ova form.
An OVA file is a virtual appliance used by virtualization applications such as VMware Workstation and Oracle VM Virtualbox.
The OVA file is saved in the Open Virtualization Format (OVF), a standard format used to package and distribute software run in virtual machines.
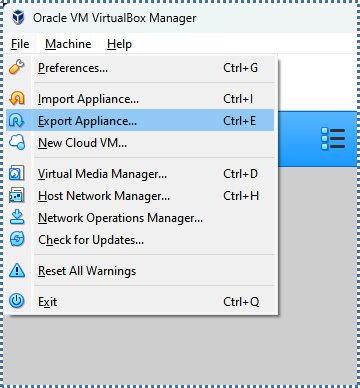
↳ In Oracle VirtualBox, select “File”, then “Export Appliance”.
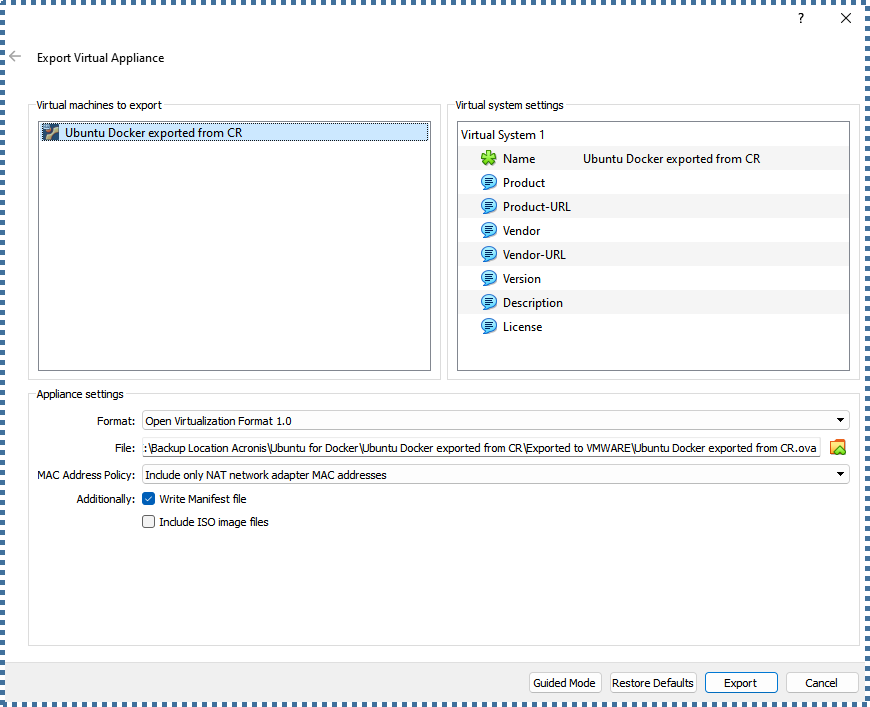
↳ Under “Format”, select Open Virtualization Format 1.0 for better compatibility.

↳ Wait for the process
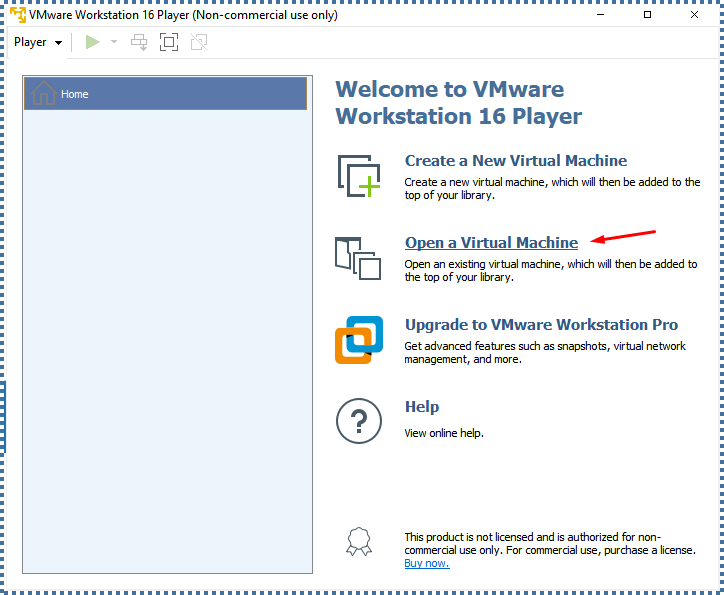
↳ Now let’s try on other Virtualization platforms, in this example, VMWare.

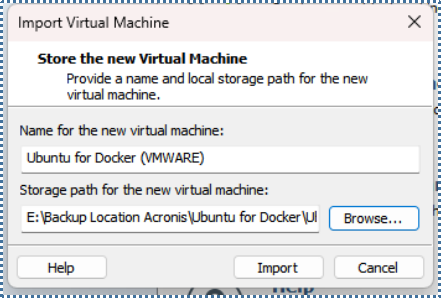
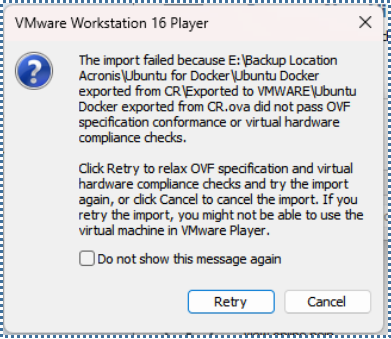
↳ We select the .ova file and then restore.
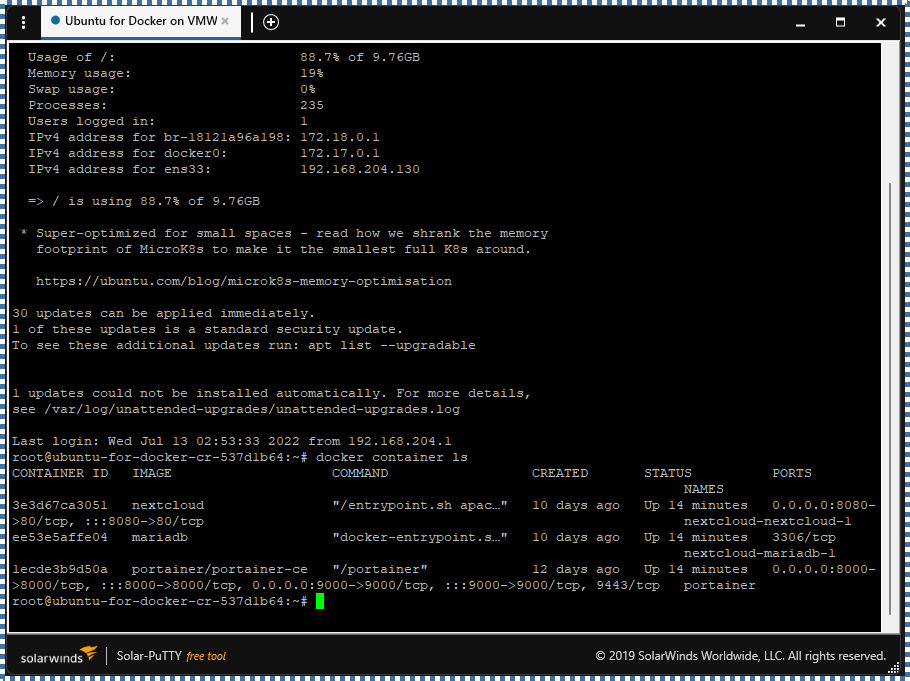

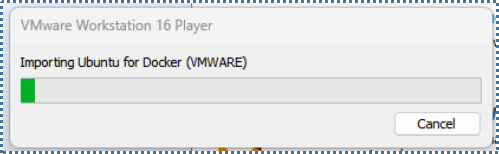
↳ We can see that our ServerStadium Cloud VM has also been successfully restored in VMWare. And the application inside the VM is also running normally.
Conclusion
Hopefully, this article will be a help for you and your project. Find more tutorial articles in our Knowledge Base, or even better, if you want to try ServerStadium’s Cloud VM, you can directly register here for free.