

Binding NextCloud with ServerStadium S3 Object Storage as External Storage Mount
In the previous tutorial we discussed NextCloud, starting from its definition, features, and how to implement it in ServerStadium VM, to one of the extensions uses in using Nextcloud, namely utilizing Collabora Online.
Well, because NextCloud has a very large and wide potential in its use, then in this tutorial, let’s discuss one of the potentials that NextCloud can give us. And, of course, this is a game changer for all of you in seeing and using NextCloud in the future.
Yes, we will talk about configuring S3 Object Storage from ServerStadium so that it can be integrated with our NextCloud service in the VM.
The Benefits
By configuring S3 Object Storage on the NextCloud server, we will get a lot of advantages in terms of storage space.
As we know, by default, NextCloud will use the storage space of our VM as a place to store its files.
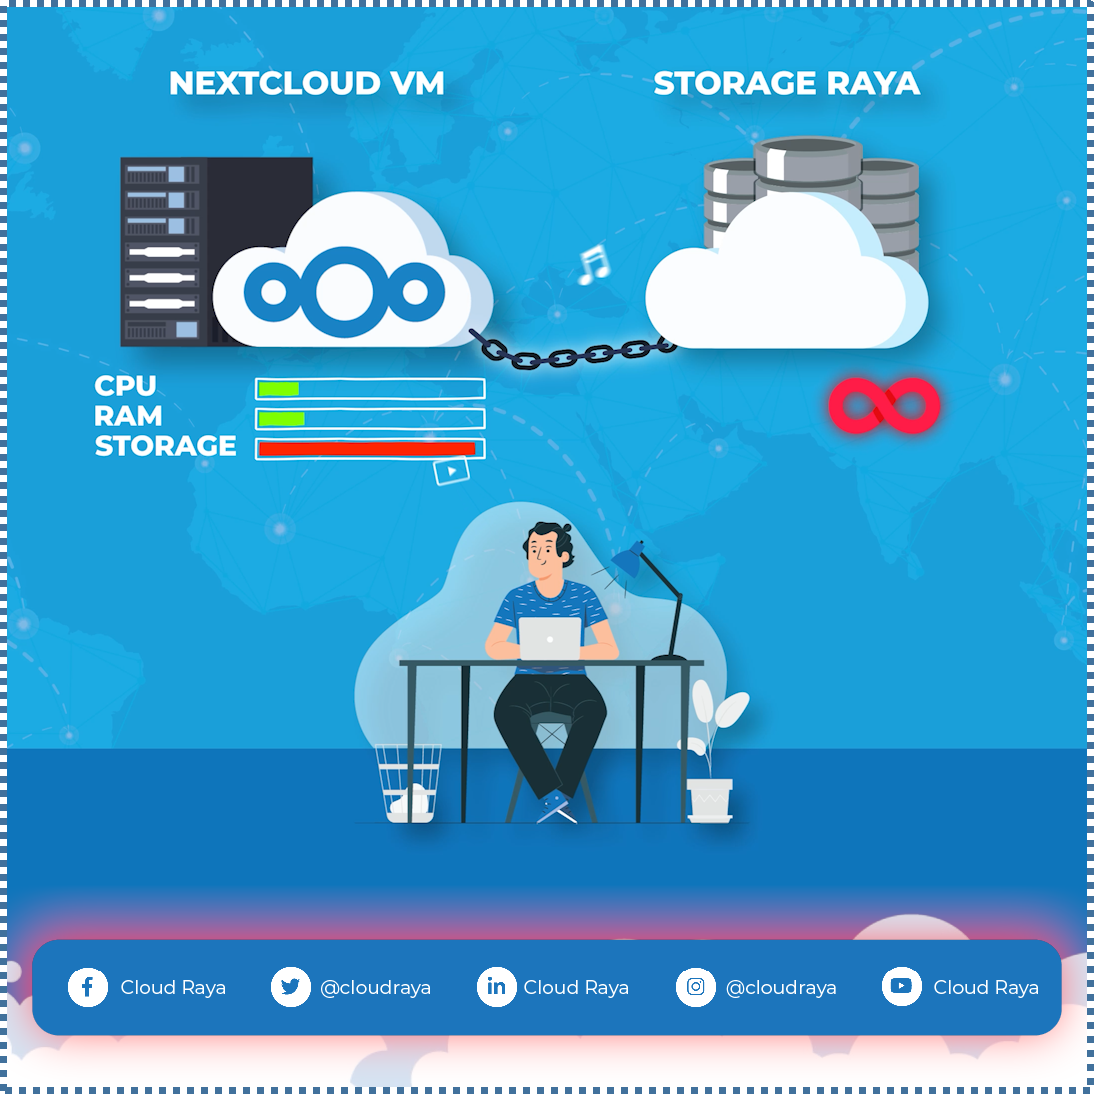
By binding NextCloud with S3 object storage, you don’t have to worry about running out of storage space on your VM.
Because basically, the NextCloud system doesn’t need a VM specification that is too big, but the only problem is the storage space.
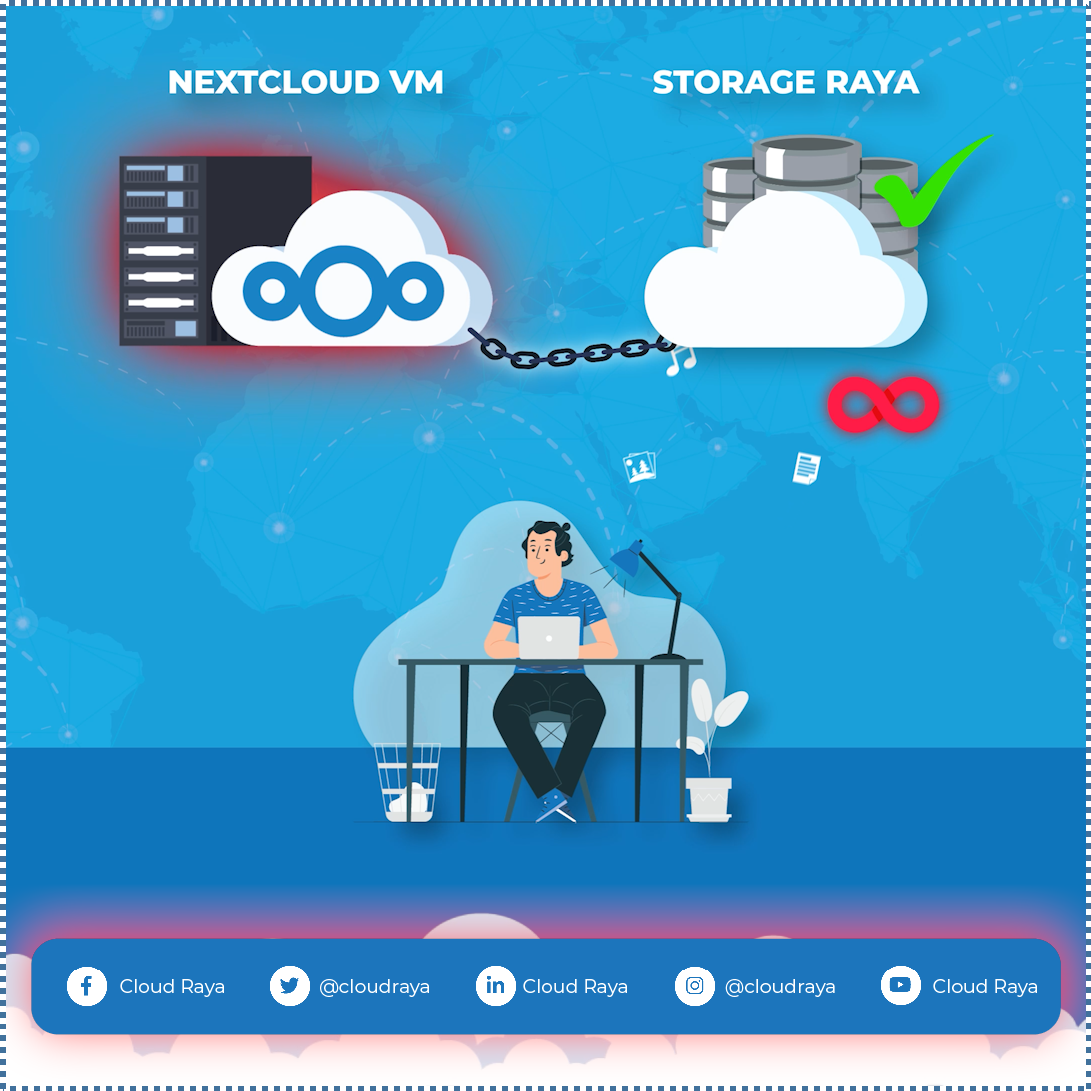
What’s more, this configuration will also separate your content that is in the VM from your content that is in S3 Object Storage. So if our VM goes down for whatever reason, at least you still have access to your S3 bucket.
This is one of the benefits that I think is very good!
Prerequisites
OK, let’s move on to the implementation.
Before we get into the discussion, there are a few things you should do:
- Have a ServerStadium VM that has NextCloud installed in it. If you don’t know how to install NextCloud in a ServerStadium VM, you can check the following tutorial.
- Have Object Storage service in ServerStadium and have created the bucket. If you are not familiar with the S3 Object Storage service from ServerStadium, you can also check the following tutorial.
Implementation
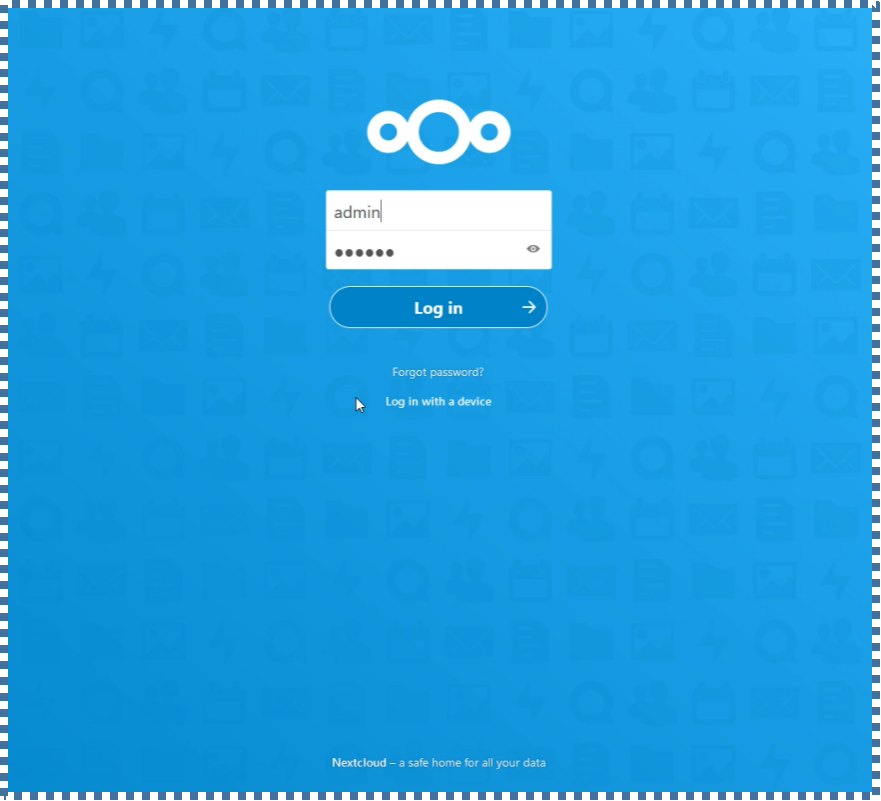
↳ First of all, access your NextCloud dashboard. Make sure you are logged in as an admin.
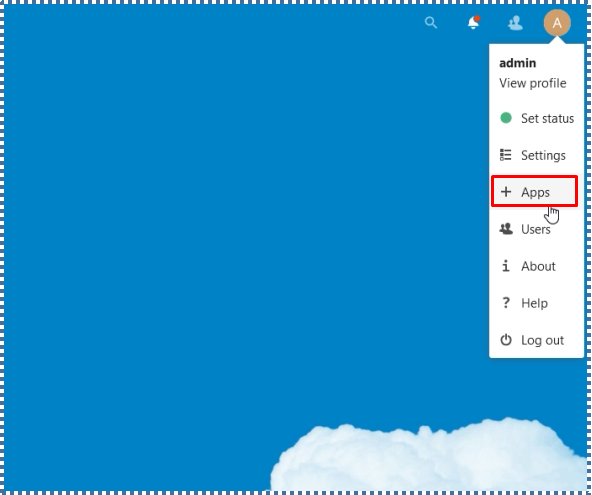
↳ On the “user icon”, click Apps
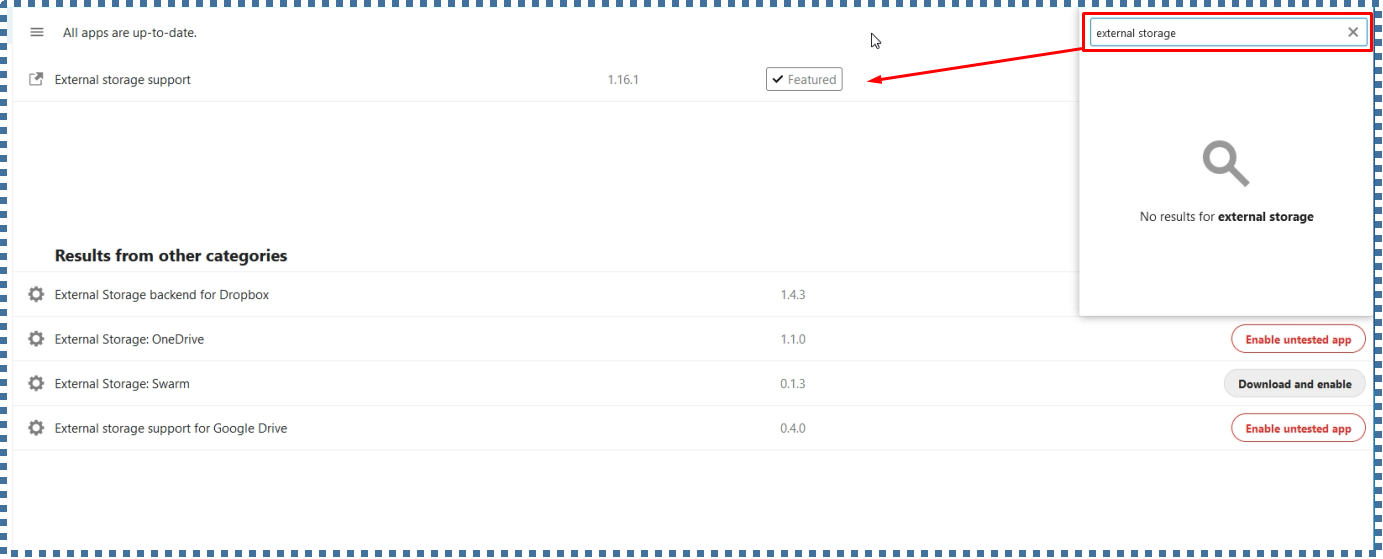
↳ Then in the search field, type “External storage”, after which several results will be displayed.
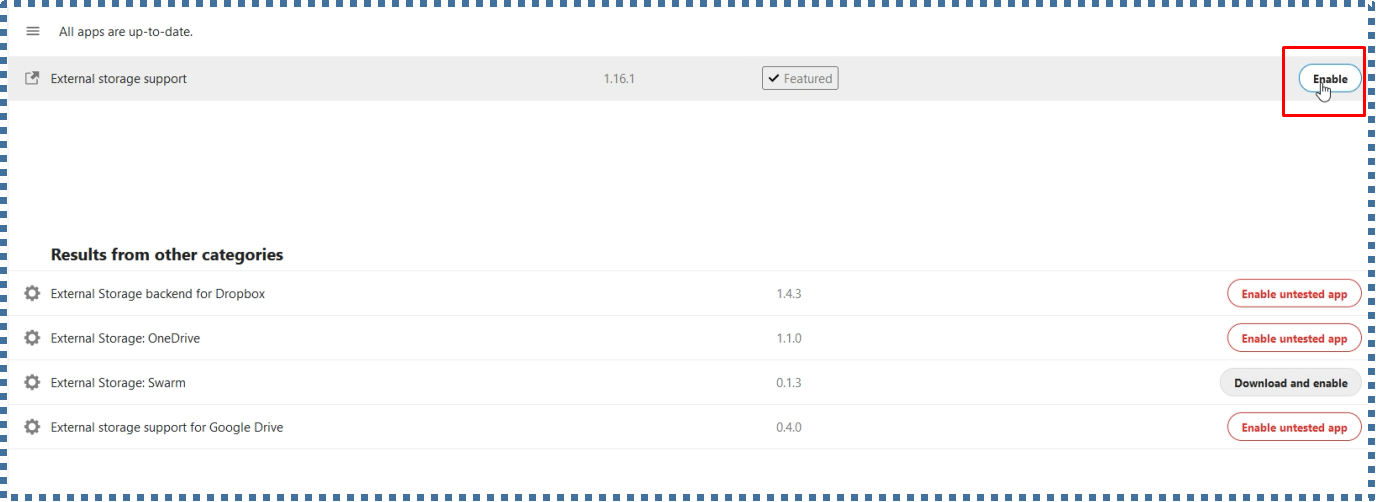
↳ In the External storage support result, change it to enable
Okay, now we are ready to add external storage to our NextCloud. According to this tutorial, we will connect ServerStadium with NextCloud.
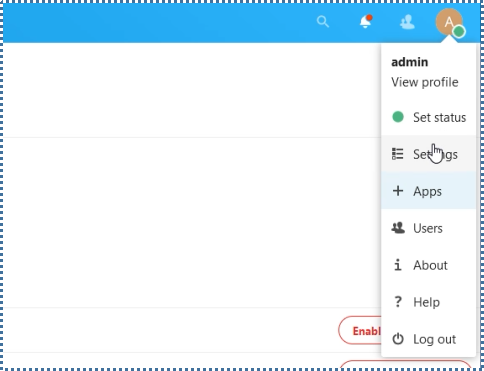
↳ Now click on the user icon again, then click on Settings.
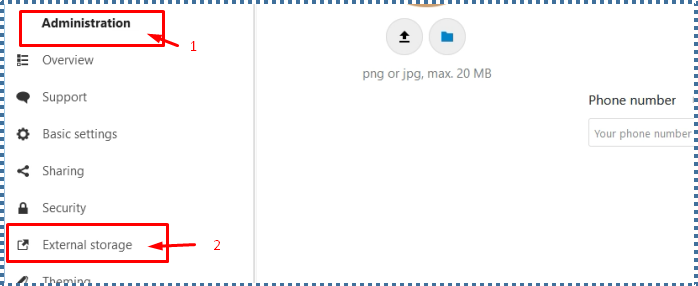
↳ On the left menu, select External storages in the “Administration” section. Later the configuration page will appear.
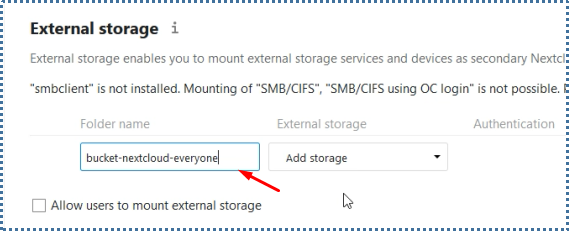
↳ In the “Folder Name” field, enter a name for this external storage directory in NextCloud.
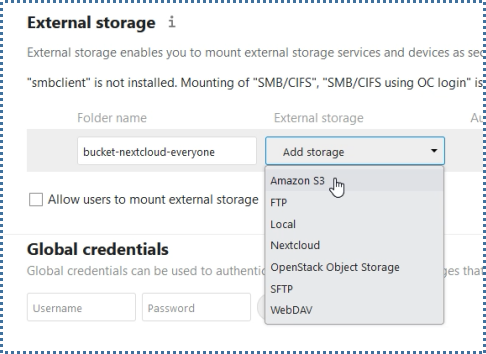
↳ Select Amazon S3, In the “External Storage” dropdown.
For those who are still wondering why we choose Amazon S3, so, ServerStadium itself is an S3-compatible Object Storage service. And by default, NextCloud connects to the Amazon Object Storage service. However, we can still override this by inputting the host from ServerStadium instead.

↳ OK, if so, in the “Authentication” dropdown, select the Access key.
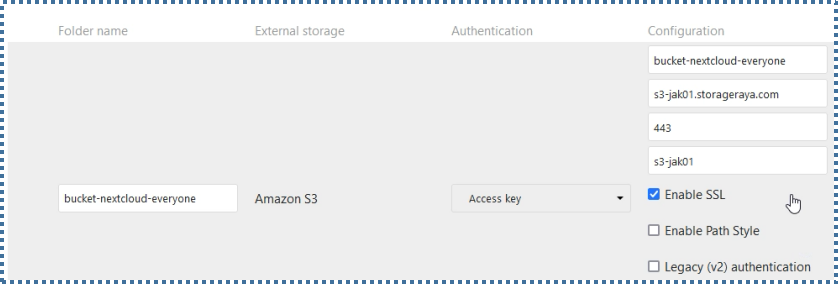
↳ Finally, in the “Configuration” field, enter the following fields:
- Under “Bucket”, enter the name of the bucket from ServerStadium you created.
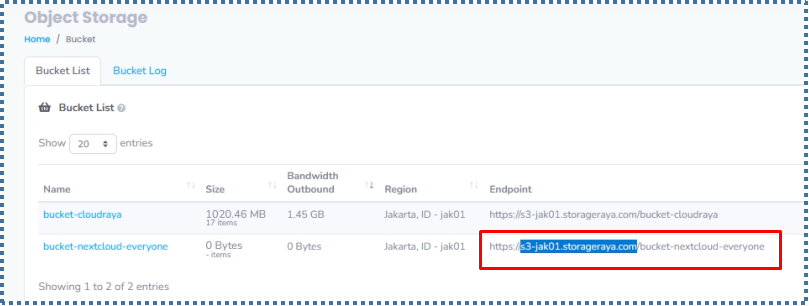
- Under “Hostname”, enter the hostname of ServerStadium. To see it, you can check the link in the “Endpoint” section on your ServerStadium page.
- Under “Port”, enter 443.
- In “Region”, enter the region of your ServerStadium storage, to find out you can enter the subdomain of this hostname, which is s3-jak01 in this example.
- Under “Enable SSL”, check this option.
- For other checks, leave the defaults.
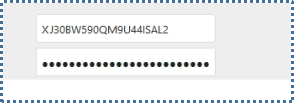
↳ In “Access Key” and “Secret Key”, enter according to the one in your ServerStadium storage panel.
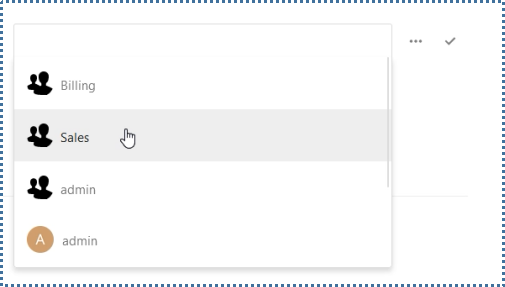
↳ There is also a field to determine whether this bucket will be shared with certain NextCloud users or available for all users. If you have your own preferences, you can enter the user or group here.
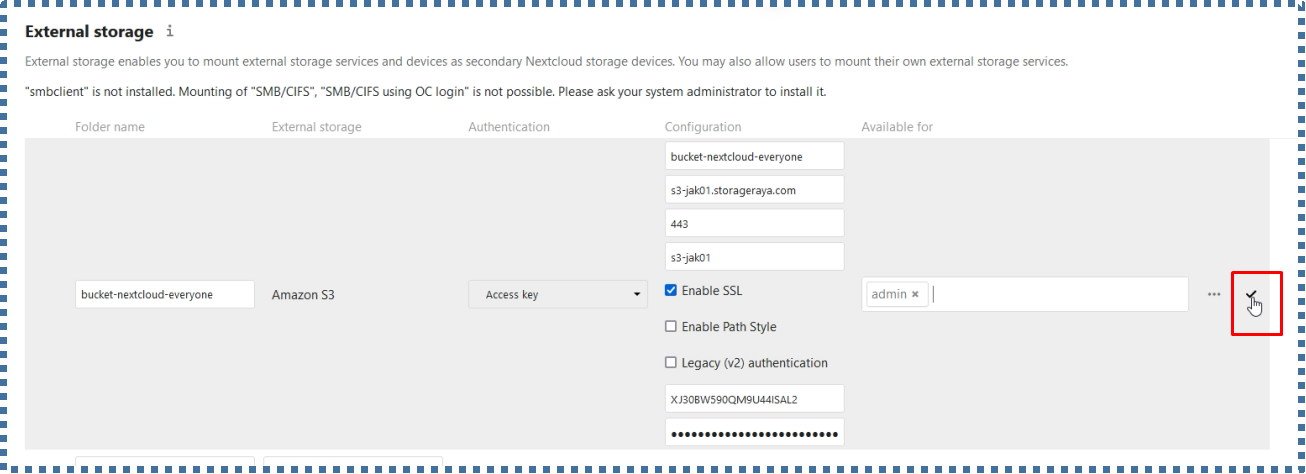
↳ If so, click on the Check icon on the right to save the configuration.
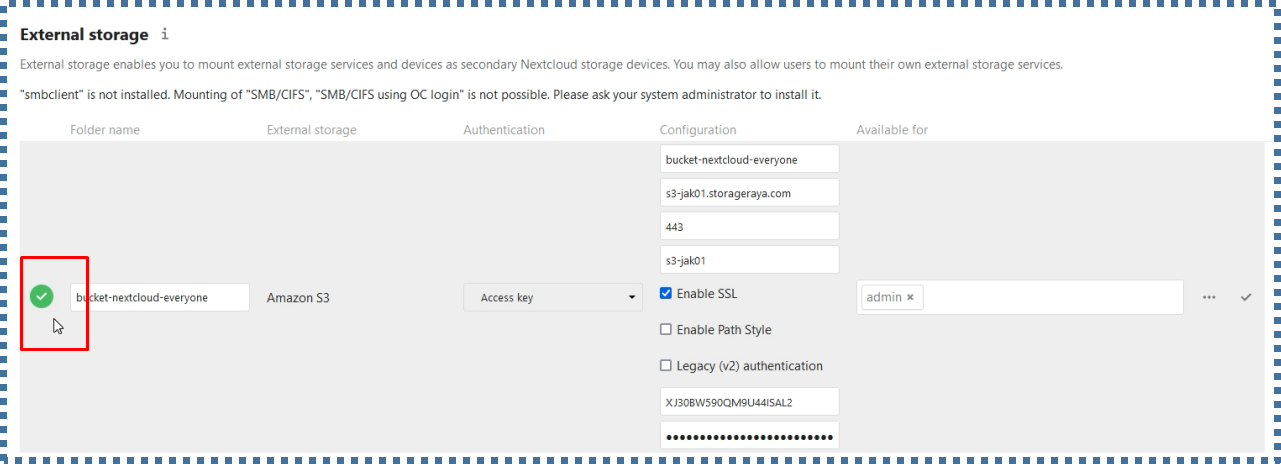
↳ If all the configurations you entered are valid, then you will see a green checkbox appear next to the entry.
OK, the configuration is complete; now let’s check the results.
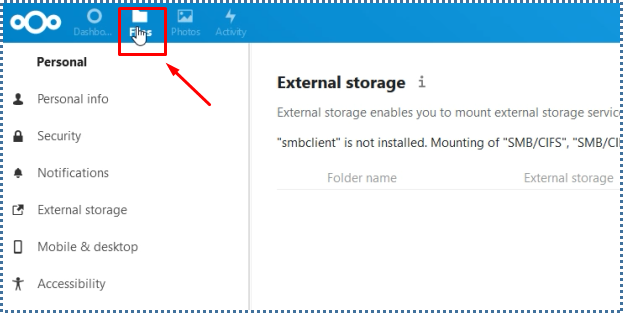
↳ On the top menu, click on the Files menu item.
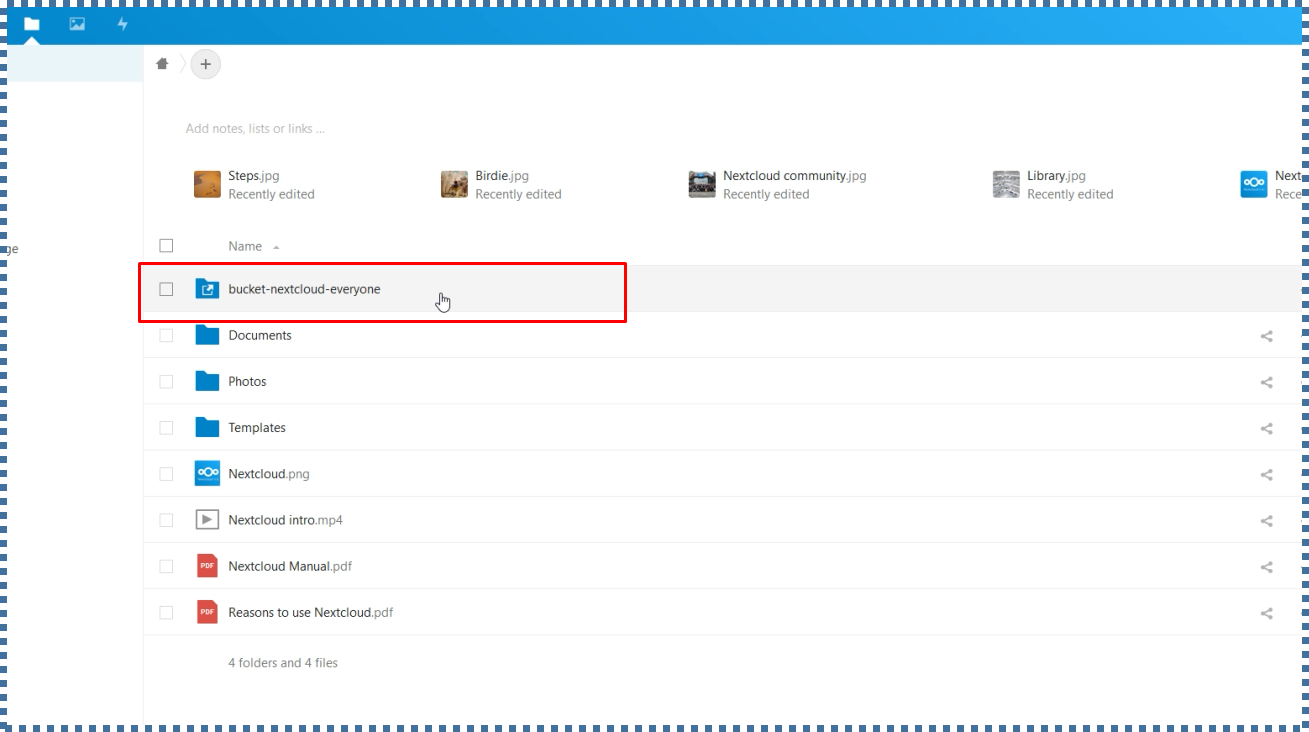
↳ The external storage folder that we created earlier will appear in our account’s NextCloud folder list.
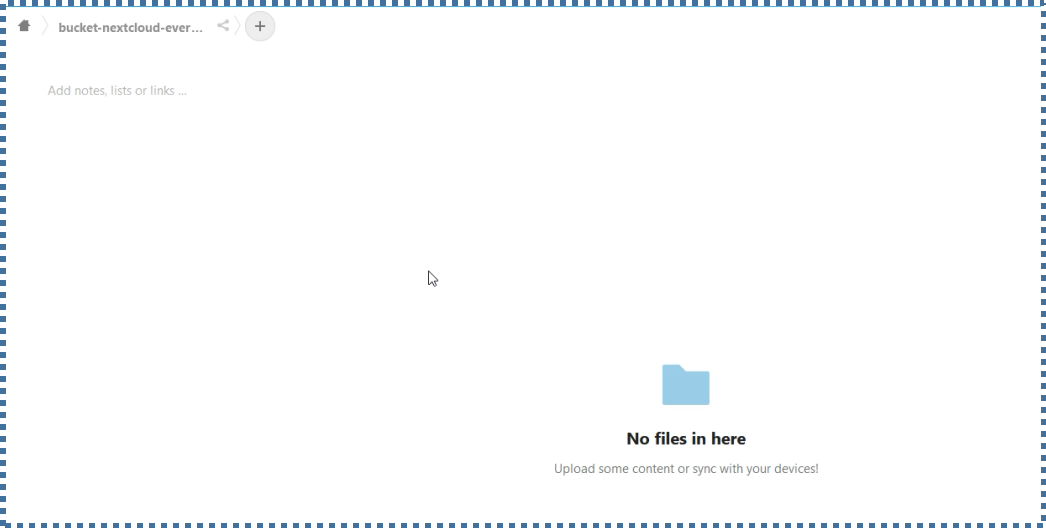
↳ Let’s try clicking on the folder to see its contents. But there shouldn’t be any contents because our bucket is still empty. Unless you have uploaded certain files in this bucket in the ServerStadium panel before.
Now let’s test whether this external storage is really synchronized with our bucket.
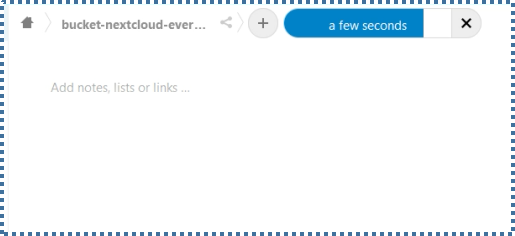
↳ Let’s try uploading the file.
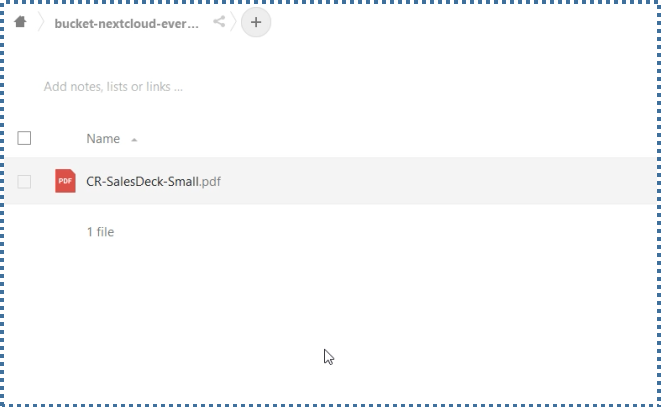
↳ Okay, it’s been uploaded; now let’s check the bucket on the ServerStadium dashboard.
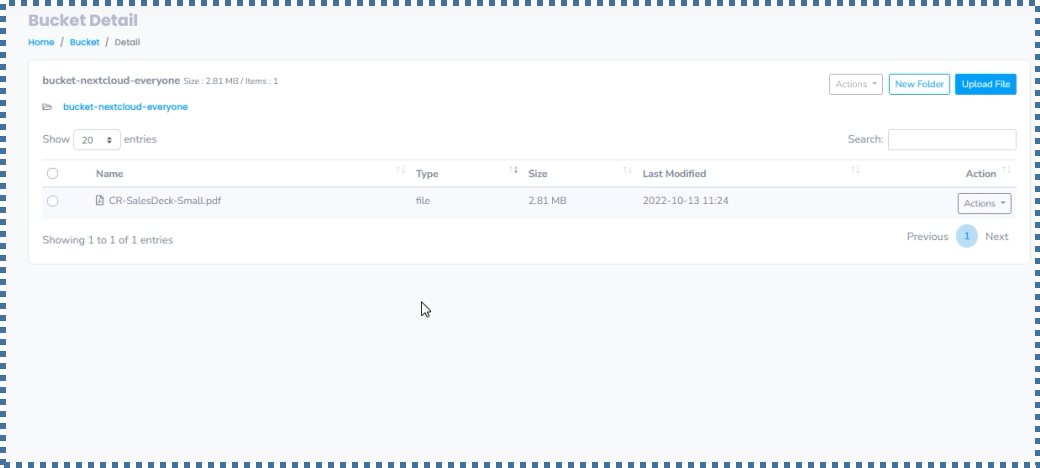
↳ And it is synchronized.
Conclusion
Okay, that’s it, everyone, in this tutorial, we’ve both learned about the use of nextcloud extension because the nextcloud provides a lot of additional integrations that we can do in it.
Now by combining S3 with nextcloud, you no longer need to worry about storage space that is limited by the storage size of the NextCloud VM, and you are free to upload and delete files according to your needs because ServerStadium already carries a pay-per-use method as well. So you pay per hour according to the size of the files you have.
Find more insight on our knowledge base page for tutorials and technology updates!